[ad_1]
A picture might be worth a thousand words, but a video demonstration can save a lot of talking. I’m a visual learner, so seeing how to do something has been very helpful in my education. I’ve found that students benefit from seeing exactly how an application is configured or how a code snippet is written. Desktop screen recorders are great tools for creating instructional videos. In this article, I’ll look at two free, open source desktop screen recorders: SimpleScreenRecorder and Kazam.
SimpleScreenRecorder
SimpleScreenRecorder lets you easily record desktop action. It has an untuitive interface and the ability to record in MP4, OGG, Matroska, or WebM format. SimpleScreenRecorder is released under the Gnu Public License and runs on Linux.
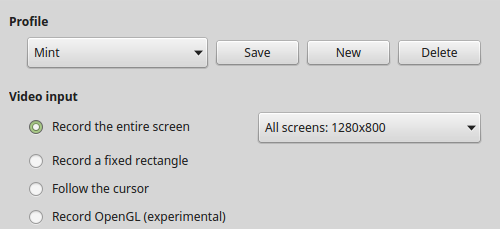
After installing and launching the program, you can easily configure it to capture the whole desktop, a specific window, or a select area. The latter is my personal favorite because it focuses the learner’s attention on exactly where I want them to look. You can record the cursor or not, adjust the frame rate, scale the video, and adjust the audio backend, which includes three options: ALSA, JACK, and PulseAudio. Video frame rate defaults to 30fps.
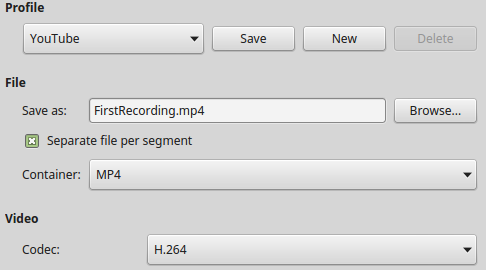
Because SimpleScreenRecorder uses libav/ffmpeg libraries for encoding, it supports a variety of file formats and video codecs. Different profiles can be used (faster profiles mean bigger file sizes), including YouTube, LiveStream (1000kbps), LiveStream (2000kbps), LiveStream (3000 kbps), and high-quality intermediate.


After you’ve configured your system, recording is easy. You can either click on the Start recording button or use a selection hot key.

Sound notification can also be enabled, which is a nice feature that lets you know when the recording begins and ends. Once the recording is completed, the file can edited or uploaded to YouTube, Vimeo, or an educational learning management system.
SimpleScreenRecorder has great documentation on its website, which includes tips for configuration, recording, and uploading, as well as installation instructions for various Linux distributions.
Kazam
The Kazam desktop screen recorder is also released under the Gnu Public License and, like SimpleScreenRecorder, it is easy to use and offers an intuitive interface. After you install and launch the program, you can configure it to capture the whole desktop, a specific window, or a select area. Recording a select area of a screen can come in handy because it focuses the learner’s attention on exactly where you want them to look. You can capture the mouse pointer movement, too. I like that Kazam also has the ability to delay the capture, which can come in useful when recording tutorials.
Configuring preferences is easy under the File | Preferences menu, and audio capture sources can be selected to include speakers and microphone. Countdown splash can be turned off, too.

The second tab of preferences is for selecting video preferences. Frame rate defaults to 15fps. The default recording is set to H264(MP4), but there are other formats available, such as VP8(WEBM), HUFFYUV, LosslessJPEG, and RAW AVI. Automatic file saving is enabled by default, along with the self-selected directory where videos are saved and a default file-name prefix, which is user-configurable.

Configuring the screenshot is easy. The shutter sound is on by default, and the shutter type can be self-selected and includes the default Nikon D80 or Canon 7D. File saving is automatic unless otherwise selected.

Screencasts are easily saved to a directory of your choice, and the file is ready to upload to your favorite sharing site or your learning management system.
Here’s to flipping your classroom and instruction using a Linux computer and either of these great desktop screen recorders! What other screen recording tools and tricks are useful in your classroom? Let me know about them in the comments.
[ad_2]
Source link