https://i.ytimg.com/vi/GiV-0FPj8GQ/hqdefault.jpg
Hello all!
The much requested beginner rigging tutorial is finally here! This is one of the videos requested beyond all others, and I’ve finally gotten around to creating something I hope will be accessible to most, if not all, blender users out there. I did my best to address hotkeys and interface issues, but please let me know if you had an issue following this tutorial!
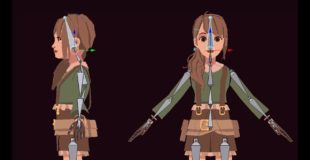
This rig is bipedal/human rig with IK, meaning that the rig has more naturalistic leg movement. I prefer this rig when animating, but I also set up a basic rig, just ignore the part with IK.
I am by no means an expert on rigging, this is just what I’ve picked up along the way and what has worked for the games and animations I’ve been involved with.
Thanks for watching, and stay tuned for part 2– weight painting!
——
The model used for this video was created for a client’s unannounced project, and much thanks to them for allowing me to use this for a tutorial!
My Site: https://www.cherylynnlima.com
My tumblr: http://rose-moth.tumblr.com/
My twitter: https://twitter.com/rose_moth
source

35 responses to “[BEGINNER FRIENDLY] 1/2 -Intro to Rigging in Blender!”
What a nightmare! The fact that the paint doesn't even follow the surface on which it's supposed to be, you know, "PAINTED," is ridiculous. With the time and seven levels of hell that it takes to do this, one could just actually ANIMATE a character, rather than going through this to make it, uh, "convenient" for animating. lol animation existed long before this "boning" bs. New animators always want shortcuts, but in the end, shortcuts just create more problems, and nothing beats being able to actually animate based on your honed skill.
thank you so much! this helped me a lot!!
A question that has to place exactly the names of each bone?
data: excellent tutorial I'm glad to be learning
Aaa the IK part isn't working for me for some odd reason. I did exactly what you did, but when I tried doing the IK, the bone extruded from the foot in pose mode didn't control any of the bones other than itself. Is there a certain setting I may have turned off or something?
Amazing !!
Is this rig set up to work well with Unity? I'm having issues importing mine as a humanoid animation type :/
lol with the advent of blender 2.8 i think its time to remake this video
Do you need to put 3 edgeloops for each joint?
The IK is so fun to play with!
very nice tutorial. wish i'd discovered it earlier. thank you for sharing your knowledge. subbed.
great job I learned a lot from your video here thanks so much for making it so simple! you should really sell courses online! just noticed this was made on my birthday, best birthday gift i never got in 2018! thanks 2019!
Bone Heat Weighting: failed to find solution for one or more bones
not sure what's up. when i was trying to move one foot the whole ring moves. When i tested the squat the knee area of the bones want to move together.
Hi, Cherylynn Thanks for tutorial about rigging. I want to ask you about parenting to Ik handle to fix the ground sinking problem.
I try this but then foot bone and the thigh or shin bone are seperating from foot bones.
What is the problem there?
i love you, u have saved me now<3
This was really helpful x3
I wasn't even making a bipedal creature xD
Thanks so much, it's really cool to see the bones come together, I'll do the weight painting day after tomorrow!
LOVELY! colud you update it to blender 2.8
😀
18:41 (teabagging)
19:03 (teabagging)
You are amazing
Newbie here! Appreciate this video! Video felt authentically helpful! 🙂
when i do the ik rig part, it breaks the entire rig, and makes another foot.
Before I go through all the trouble, I upload my model to mixamo, and bring it back into blender to fine tune the weight painting. That being said your tutorial was pretty awesome.
Thanks so much love ur style please post more!
Great Tutorial! The naming convention you used was awesome. I love how it renamed everything after you symmetrized it! I got a little confused towards the end when you said "at IK" but I'll rewatch it when I go to rig and hopefully it'll make sense. Once again, thanks!
The subdividing on the hand blew my mind. That's so much faster and easier!
Thanks. One of the best tutorials. All the best. Keep it up.
0:54 can't help but have a dirty thought there.
Tfw you get the 999th Like
18:05 Was a little confused there
but I think you meant to say Shift+I
14:17
For the Hand Part I found an easier way to do it regarding names
Just like you I Shift+D and lay out a bone for each finger.
I name all of the bones depending on the type of finger
Thumb_L.001, Index_L001, Middle_L.001, Ring, Pinky Fingers etc and then
I use Sub Divide and it just names every bone that is created after the subdivide
in proper order for me so I dont have to do what you did here.
Thought I'd share, I learned the hand thing from you but I put
a spin of my own on it.
Edit: After Looking at the names again for some reason I noticed
when I do this in 2 cuts to get 3 bones, the middle one is always named
the Third Bone for some reason Like Thumb_L.003 then the last part is 2
I dont get why that happens but if it would name them in proper order this
would be much better. At any rate, I guess it still adds the name of the bone
to all of them so you dont have to type Pinky, Ring, Middle every time.
11:05 , am I crazy or is someone snoring in the background Lol
or maybe its just breathing who knows.
Just a heads-up for noobs following this tutorial: It seems that in Blender v2.79, symmeterize might have a double-bone glitch, though I don't know the source. For me, symmeterize placed the mirrored bones AS WELL AS the original bones, resulting in overlapping bones on the original side. I spent a good 20 minutes undoing parts of this tutorial before figuring it out. So just in case, check your bone count. At the point in the video where Cherylynn applies symmeterize, the resulting bone count SHOULD be 47. If it's higher, go into pose mode, select one upper leg bone and one upper arm bone of the offending side (drag them to make sure), go into Edit Mode (the bones will move back, but this is normal; they should still be selected), and delete the duplicate bones. It shouldn't matter which set of duplicated bones you delete, just remember to fix the naming afterward. Yes, it's a pain. Here's hoping that major overhaul labeled '2.8' fixed this.
If you're reading this from the future because no other rigging tutorial made as much sense to you, this still applies to some degree. Make sure the number of bones is correct.
When adding the IK handle, the display keys feature was turned off. After selecting the two bones, it is "Shift + I" to get the dialog to add the IK handle.
You're so amazing. Please keep helping us!
thanks!