https://i.ytimg.com/vi/uBS2s6SzAN4/hqdefault.jpg
In this tutorial I will be taking you through curve modeling and a few useful techniques used in curve modeling. I’ll admit this is a video I was not completely prepared for so I apologize for any confusion/ inconveniences in advance, I will be more prepared next time. Thanks for watching
source
31 responses to “Blender 2.69 tutorial – Curve modeling for beginners.”
Just a tip I use, Empty Object can contain pictures. I am using two images to build an engine. I actually have four of them but you can use six that way you can see all sides. Just set the opacity to 0.10.
I think you should change the title to "Curve modeling by beginner" – Just joking, good work!
One thing that might make it easier to use the curves is to remove all the little 'hairs'. These are normals, and in the properties tab under Curve Display, you can turn these off. Makes it A LOT easier to focus on what you care about.
I also found that as I was modelling from the front, a quick rotation of the scene revealed that some of my bezier points were actually at varying Y coordinates. Easily fixed of course by selecting all and hitting S->Y->0.
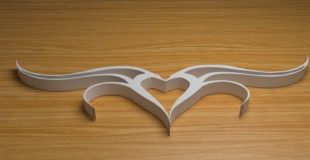
There was a lot of this tutorial that I ended up skipping, but some of the things that you pointed out early on made me download a simple tribal tat of my own to get better acquainted with the tool. Your tips really made me enjoy using these curves, where before I considered them a pain in the neck. Thank you!
Mais atrapalhado que eu que nao sei mexer no Blender direito. Poderia ter treinado antes de fazer o tutorial. Vale a intenção, mas poderia ser melhor.
Very good tutorial. THank you!
Parabéns! Bem interessante!
In response to your question at 13mins in: While I'm not sure if anyone mentioned within your comments already but
in the properties window (N) under the Heading Curve Display
you can toggle the checkbox for displaying the normal direction(arrows)
as well as alter their size in the field (Normal Size).
Thanks for the tutorial on curves.
For those complaining about the video, you don't have to listen to every word he says or watch every second of it. Try skipping or speeding up the video and get the gist of it
to get rid of arrows ; press N , scroll down to Curve Display , untick Display Normals
Kaela, I am now off youtube until further notice(in terms of tutorials at least), my sound got worse with some pc issues and fixes. Thanks for the feedback . Used internal mic for this video and all my other videos, planning on getting an external one. So anyway, might remake it, but then again I'll check if there's no tutorials on it already online.
Ye Gods, this is hard to watch and harder to listen too, please take it down and re-make it, please. Practice, create a simple script, easy to follow steps and with good sound and make it 1080P, then dear sir, you will have a half way decent video.
thanks
How do you break (bend) the control points like that? When I try it it just rotates the entire handle and bends the curve.
hmpf….
very cool. Thanks for sharing
Nice tutorial What are the names of the songs?
i done seperaty the holes and than Ctrl + J joined it and now when i click 2D to fill it and extrude it fills only the holes totaluy oposite on what i want. I tried to part them and join with different active selected still dont have it :/ Please help i bet that theres a easy way to do it
Let's say that 90% of time I was using for watching this video was waste of time. Make a new video and practice with a simple figure. A Merry Christmas to you! Jesus loves you.
Convert a .png or .jpg (image) to .svg and import the .svg on Blender and go to Panel BezierCurve and in Geometry set Extrude: 0 to Extrude: 0.1, in Object Mode press ALT + C and select Mesh from Curve/Meta/Surf/Text and ready, your model is ready.
This mode works good with image with a single color.
Good tutorial, and thanks for doing it. I haven't used curves much, so it was very helpful to see someone use them.
Good Tutorial…. thanks!!!
bad sound
I think its called tangent curving,
.' remake vid?Nice tutorial.
A tangent is specifically the derivative of the curve at a given point. Think of it as a secant line between two points on the curve, getting closer and closer to each other but never touching. Just touching the curve and isn't sufficient to be tangent. Instead it must relate to the slope at that particular point to be considered a tangent (a byproduct of the previous definition). Hope that clarifies.
unfortunately not a tutorial
guidance to those who know
Woow! Very useful tutorial. I love this! GOD Bless you
Good tutorial friend, you make me subscribed looking forwards for more tutorials and learn more from you.
If you shorten the handles you can hug that line much easier.
you, my friend, are really clear yet to-the point in your blender tutorials. i subscribed
there is quick way: open it in Illustrator, then save it as .SVG, then import it in blender (:
FIY you can trace the picture automaticallly with Inkscape and then import the curves into Blender.