https://i.ytimg.com/vi/posY9gHiQV0/hqdefault.jpg
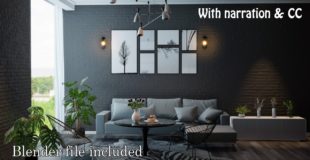
Blender 2.80 is upgraded with a lot of improvements and new features since last time I created Eevee Interior Setup in May 2018.
One of that feature is Indirect Lighting parameters, now are fully controllable. Shadows also support soft shadows that make windows lighting more natural looking.
Eevee is not created to replace Cycles, it’s a complement to use along with Cycles.
The main advantage of Eevee is real time feedback and super fast render result that acceptable for animation purpose.
Here is the link of this tutorial file :
http://www.mediafire.com/file/xv2ki018s22ou3z/Black_Living_Room.zip/file
or
https://drive.google.com/open?id=1lnKT2vJxT5CRsls9hFoVsadolPCVVVop
It’s a Blender 2.80 file format. You can’t open it in previous version.
Make sure you get latest Blender 2.80 version at this page :
https://builder.blender.org/
Link for plants and accesories :
https://3dwarehouse.sketchup.com/
Floor and wall textures from : https://www.poliigon.com/
Hit Film Express to edit this video :
https://fxhome.com/express
Thank you for watching this video till the end.
Please subscribes this channel to support me making another videos.
source
29 responses to “Blender 2.80 Tutorial : Eevee Interior #2 Black Living Room”
Most honest Eevee tutorial
Great scene and interesting tips, thanks for sharing!
Great job! Including the .blend is very generous, and makes the tutorial very powerful.
Amazing tutorial!!!!!
Thank you
I've had a lot of amazing 3D moments in my life, but trying Eevee for the first time with this scene… i'm shocked. If you spent hundred hours tweaking lights and GI params with previous renderers, and thousand waiting for some bucket to render, you know what i mean ; ) Also, tbh the quality result of your scene is wayyyy enough for a customer, we've seen worse lol. I'm not sure about the actual limitations of Eevee compared to Cycles though. Thank you for this superb interior archviz tutorial/scene in Eevee, this is gold.
Can I use this model to make some fun videos and put it on the internet???I will mention the orginal maker.
whts fuck…awesome video bro
I’m a beginner and want to know do you use Hdri? I have problem about the lighting in EEVEE.
your tutorial is very useful, not so much to know the tools …
but to help you "calibrate" between the various tools for better results …
and then it's funny, it's a bit like when the children color the drawings following the instructions … it's relaxing and satisfying to replicate the results..
hehe
Awesome
Best archiviz in Eevee for this time. Can I translate it to Russian in sub or voiceover?
mantul omm
Very well done my friend! Thanks for sharing!
thank you for this tutorial. External arch vis tutorial would be much appreciated.
thank you very much! Just what i needed to make the full shift to 2.8
Thank you!!great tutoriaL!!!
Hi Kristian, thanks for the tutorial and for sharing the scene. I noticed the walls have bricks and I was curious to see whether that was the result of micro-displacement or the effect of normal maps. It turns out you had both applied though perhaps this was for the 2.79 Cycles version, as in Eevee there is currently no micro-displacement available. Am I right?
Sy subscribe, ini yang selama ini sy cari. Loncengnya aktivin. Mantap.
Get a real voice or is your mum siri
Great Tutorial…
keren.. Mas coba juga di terangkan alasan setiap parameter yang di ganti/gunakan. sebagai contoh: kenapa kita aktifkan CONTACT SHADOW. nilai2nya kenapa di tambah/di kurangi. aku lihat di sini blm di terangkan. jadi kita gak tau kenapa kok harus begini/begitu. keren deh tutorialnya
nice tutor
Whats going on with the womans they make better totus than men….because they are more smart then us???????
I think if you could easily open an Online course on Blender for Archviz for those who want more info. But you would need to have decent spoken English.
Maybe find someone to practice English with. Or trade knowledge with a fellow Blender user in exchange for English lessons.
Thank you for the video, and wish you all the best!
This is the best Eevee Arch-Viz i have seen in the internet
Trying Eevee with your tuto for the first time. I'm speechless.
keren voice talent nya hehe
thanks