https://i.ytimg.com/vi/EusYVH5RRss/hqdefault.jpg
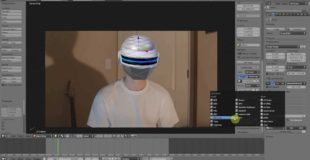
This is my tutorial on how to track your face and apply a 3d model on you your head using Blender.
My first blender face track: http://www.youtube.com/watch?v=1QqIJbtE45A&feature=relmfu
source
https://i.ytimg.com/vi/EusYVH5RRss/hqdefault.jpg
This is my tutorial on how to track your face and apply a 3d model on you your head using Blender.
My first blender face track: http://www.youtube.com/watch?v=1QqIJbtE45A&feature=relmfu
source
48 responses to “Blender 3D Mask Tutorial”
i can't see my tracking points once i set as background and as tracking scene in blender
What about your shadow?? haha
aaaaaaawesome that really helps man
Thanks a lot
better use Blender compositor lol
Nice video tutorial..
Who clicked because daft punk
it seems you play guitar also, i also, anyway nice tutorial
bad time to have acne….
will u pls tel me how to add colors in the mask…. as soon as possible am waiting
Hey really awesome man… Will You please tell me how to get the realistic mask as you rendered in the beginning of this video
Realy? Why do you use aftereffeckts if you can do it all in Blender?
Yes I know about this thing!
My helmet is rotating in the inverse direction as my head in my video. How do I fix this?
Oh man I didn't know we can do this in blender itself!
I got here from Shutter Authority's Playlist.
Awesome Videos Bro!
It wont let me setup tracking scene
and how did you make your own 3d mask?
When you actually put in the daft punk mask, what did you mean with material, you needed to high light it and compend it.
Is blender free??????
Good tutorial I learned a few things I didn't know. The only two comments lll make to optimize this would be to use the 'b' key or 'a' key on selecting your trackers at beginning since you need them all and then when you append your model make sure the model components are proper grouped and then append the group as one operation instead of having to append 3 or 4 seperate things.
Im black. shrapies wont work on me -.-
thanks man thanks !!!!!!!!!!!!!!!!!!!!!!!!!!
Any way you could do this with making something look like part of your face? Like, say half your face was torn off and was revealing the Terminator skull underneath?
thanks
Does this work on a character?
I made a 3d character that has facial shapes already
Will this work?
I don't want to put markers on my face for it not to work
Do you still answer questions?
When I render it it shows the helmet transparent over the footage. How do I fix this?
very good
Can you give a download for the raw footage please. Thank you.
help my object/iron man helmet is shaking on my video can u help me?
Question connais-tu la fonction "set origin" qui permet en selectionant un marqueur et en cliquant sur "set origin" de deplacer en quelques sortes TOUS les marqeurs
thankyou for the great vid- well explained and well edited. but you can get the same effects with the blender compositor- Tom Walks has done many videos on this- colour correction, touch up, adding masks, misty lens rain effected lens etc are all doable from blender.
very cool mate
Where you take models?
When I photograph it, it does not shoot the film only the object
you look like wayne rooney's younger brother
sorry for my bad englis i are duth
how to render without a background? like transparent background
Canyou dou dis to with a object or animationfromblender?
thank you
what about marker on skin colored tape?
I have a problem with lighting. When i delete the ground plane my whole image get washed out colors and lights just wont lit up the scene. And in some cases the objects I place look like masking, like the light only appear where there are objects, and the objects are transparent. I know there is something very simple I'm missing.
you can render the image as a video instead
The K1 and K2 is for the lens distorion. Every lens has a concave or convex distorion (bending at the sides) which is corrected by these values. And you don't have to use AfterEffects, you also can use the blender sequence editor and the node editor to join the pics and apply effects and filter to them.
Good tutorial! I make blender videos as well.
Haha i have enough birth marks, don't have to use a marker!
hey could you help me ?
I'm really doing good so far, but when it comes to select the helmet and I try to deselect an object (after selecting all with "A") by right ckilcking (also twice didn't work) onto it, it only gets selected an the rest gets deselected. What have I done wrong?
how did you do the thing where you imported a other blender file?
Hey man thanks! Im just getting into camera Tracking, and this was a good tut to find. Thanks again, ill send links to what I create once done.
U saved my life. =D Tx