https://i.ytimg.com/vi/VswCmVMLiEE/hqdefault.jpg
Learn Blender at https://Blender101.com
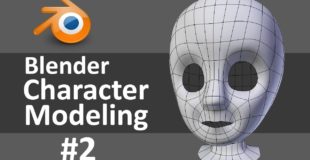
In this video I extrude edges up and back to create the forehead and back of the head. And we work on connecting up and tweaking the sides of the head. If you’d like to follow along, you can download the reference images at http://www.darrinlile.com/tutorial-files
Next Video: https://youtu.be/6Klw-vdrAVU
Previous Video: https://youtu.be/0QT1GNMevfc
Subscribe for weekly updates! http://bit.ly/DarrinLileYoutube
Get your FREE “Blender Quick Start Guide” eBook: https://blender101.com
Social Media Links:
Website: https://blender101.com
Google+: http://bit.ly/DarrinLileGooglePlus
Facebook Group: http://bit.ly/DarrinLileFacebook
Twitter: http://bit.ly/DarrinLileTwitter
Pinterest: http://bit.ly/DarrinLilePinterest
Tumblr: http://bit.ly/DarrinLileTumblr
Other Links:
Blender Character Creation Series: http://bit.ly/BlenderCharacterCreation
Blender Game Character Creation Series: http://bit.ly/GameCharacterCreation
Subscribe: http://bit.ly/DarrinLileYoutube
source

39 responses to “Blender Character Modeling 2 of 10”
Great videos! Although I like to put the speed of your vids on 1.25, you sound more natural then :p .. 0.5 is just hilarious
hey Darrin line that vertice that is under the eye doesn't really fit well
Thank you.
Where do u find these drawings
Ok so the first video was alright even though theres a few things you fast forward with out explaining, then in this one you literally skip over prob 40mins of explanation and content. It didnt bug me until you got to pulling the edges over and to the back of the edge as there were several minor adjustments you dont go over until the end at 6:44.
This number 2 / 10 of the series sucks as a tutorial because of this. I'm just saying this so you can improve and I hop your future videos are better. I know what i'm about to say is a lot of work but I would remake this series as it is an amazing resource and make it a proper tutorial. As others say you have the talent, the voice and clear words/communication, and the knowledge to make series.
Tell me PLS how I import any sketch to blender
Im only 12, and thanks to your amazing skills with blender and calm teaching voice, so far from part 1, I have created a dog face!
three years after this is made, and it's still a great tutorial. Ive always been thinking of starting blender, but was kinda put off by how difficult it looked. This tutorial makes things much more simple to understand. Thanks for this!!
My god here is a real pro
thank you so much for these videos 🙂
That's what I sound like on a Monday.
You're awesome dude your tutorials have helped me a lot thanks 😍
My friend said to me blender is the easiest way to make an animation but…..daammnn that not easy as I thought……
: (
Darren my point pulling isn't working! I'm trying to do the little adjustments but the dang thing isn't letting me!
2:26 is that Thomas the tank engine?
Set view to 5 and it looks like a plastic mask ..h ha ha
2:05 how did u make the black lines vanish?
easy to follow
this is amazing!
For those who looking for 3ds Max "Target Weld" tool in blender i leave this instruction:
1. Enable AutoMerge Editing (Mesh -> AutoMerge Editing, there's also a button for it in 3D view header),
2. Enable snapping and set snap type to Vertex,
3. Tweak a vertex (select-drag it),
4. Put it on a target vertex (it'll snap once mouse pointer is close) and left click,
5. Repeat 3-4 to satisfaction.
Snapping can be disabled/enabled by Shift+Tab quickly when you need.
2:38 it's Thomas the train!!!
J U D I C I O U S P O I N T P U L L I N G
I love how he said, "I'm going to begin pulling some points" I don't know why that sentence sounded funny to me… :/
never mind ctrl drag haha you explaned in video I feel dumb now thanks for awesome tutorial
The marquee tool youre using at 5:20 what key for that I usually use the b select box tool but that looks much easier
The Bob Ross of Blender … I half expected you to make a little tree. Thanks for your hard work, I'm following along just fine.
how did you get the nose so round? It won't work for me!!
is this blender on mac?
2:57 I want to add that mask into Payday 2
love your tutorials 😀
great turorial
You have a rather relaxing and soothing voice.
Thank you so much darrin, I'm a beginner in 3d modeling and I have been thinking about making a character model and this video series helps me so much. 🙂
You make this look way easier…
I want to model a robot in blender, can i get help?
the fine tweaking of the face is killing me haha, poor kid looks like a horneytoad
Dude, I have this problem….when I try to move a vertice with mouse it goes too much for the side I'm trying to move (there is no half step, or too much for right side or too much for left side). Until now I was editing the position of the vertices directly in the menu bar, but now with this brush (key G), it's impossible to work! Can you help me?
+darrin Your view shows a super smooth surface with no visible faceting to the face. What setting did you tweak to do that? My system shows heavy faceting. I have to up View: to 6 in the subdivision surface modifier to get it to look smooth.
Is it just me or is he kind of like the "Markcrilly" of Modeling/Blender?