https://i.ytimg.com/vi/Ryi_pYqcavs/hqdefault.jpg
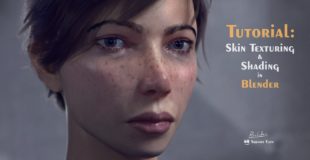
In this tutorial I go over my workflow for texturing a typical realistic skin texture for a 3D character in Blender. I also use Photoshop to correct some stuff, but you can use Gimp or Krita etc. as well.
See below for all the resources I used during this tutorial. I hope you learn something, enjoy! 🙂
===================================================
– Blend file: https://www.dropbox.com/s/wjlwo1fye2zvlpk/SkinTut_Example_Rico.zip?dl=0
– Raw skin textures and Brush-Alphas: https://www.dropbox.com/s/6p6dx1996akqth7/Rico-SkinResources_CC0.zip?dl=0
– More advanced Cycles skin shader (free): http://www.blendswap.com/blends/view/85303
– Digital Emily textures: http://gl.ict.usc.edu/Research/DigitalEmily2/ (Downloads are at the bottom of the page)
=======================================================
Other useful texturing resources:
– Photoshop Nvidia Normal-Map (free PS plugin): https://developer.nvidia.com/nvidia-texture-tools-adobe-photoshop
– xNormal (free): http://www.xnormal.net/Downloads.aspx
source

39 responses to “Blender Skin Texturing and Shading tutorial”
Good tutorial. I'm using Gimp in place of Photoshop.
awesome 🙂
Hi, i'm Black. Do I need to go to a Black artist to show me how to do African skin?
Rico Cilliers Thank you for the Tut but its kinda slow with all the additional information
@Ricco Cilliers do you bake it as diffuse or combined? Pls help me with bake settings. Thanks!
Rico, you're the man, man.
If I have normal map and diffuse map, is there a way to paint them both so paint multiple textures at the same time on the face ?
17:46 Man that is creepy xD.
Great Tutorial!
Thank you for this! SO good 😀 Combined this with Mari for better control when projecting and got really nice results
Was quite a job. Thanks man
Among your 49 dislikes consists of folks who never got it, this right here is golden.
Master!!!!!
Lets say I do this in blender. Can i export it easily to Unreal Engine, and the materials/texture will still look the same as it did? Basically do I need to set up the nodes again in Unreal Engine?
Hi. I'm a newb to Blender. Trying to walk through the entire process. I've downloaded all the materials and project file. I'm having trouble at the 18:44 mark. I click the left mouse button to begin painting and it's not painting. Actually at 4:52 when painting with a red paint color, it also does not paint. What am I doing wrong?
This is what i was looking for….Thanks Man…you are awesome…..please make more videos. Just for a part of face…like only chin texture only ear texture….
Thanks
I could not find the Hi res model in the files I have downloaded.
unforgetable tutorial!
Excuse me…did you say use BLENDER RENDER??? Lmao, it's so long since I've seen anyone use it, it's quite a shock to see it again lol. My old pal blender internal
that's the most disgusting skin texture
Dear Rico, since the revelation of principled BDSF 0n 2017, do you have by any chance created this similar tutorial with that setups? (Asking too much lol) I'm not quite sure where to connect the OCC and the Specular image texture of mine.
Some may not know this so here is an added thing. To get better detail on a model break model apart into head and body. Unwrap each individually and paint as you want. When done, join the two parts together, then select all the vertices for the area you separated the head from, go into transparent so you see only wire frame and select all those vertices so both the top and bottom ones are highlighted. Then hit W and select Remove doubles. This restores mesh to a single one. You can then switch between the two textures of head and body and paint some more so as to smooth out any unwanted lines. Also make sure specular intensity for both head and body materials are all turned down to 0.000 so you don't screw up texturing color.
To switch easily between the two textures simply select a square on the heads or the body and go into texture paint then "save as" any changes made. You can do this even with a rigged model in 2.79.
Those skin textures look creepy af xD
wow really nice. love it. keep it up sir
monyong
Lil Miquela???
wouldnt you paint the pores on a bump? why are you painting them on diffuse i dont get it :/
Perhaps its better when working on the spec and roughness maps, is to use dodge and burn. You keep more of the details. You can also work with masked levels adjustment layer, this is better because its a non-destructive method. Which is always the best workflow.
Would be nice if the texture could scale along when you zoom in on the model. Its a lot of extra work now resizing to the correct ratio, very easy to make mistake. PS is there a hotkey to hide the texture really quick? I like to use the option to turn of while doing strokes, its quiet hard to see what you doing otherwise i find.
mental break down~~~~~~~~~~ cant get nothing to work~~~~~~~~ hanging my self now~~~~~~~~
I have never understand because it is 1 hour
That looks 👀 insane awesome
Hey 👋 why is the skin texture different from what u posted on YouTube thumbnail?
this motherfucker exist, his name is Gabriel Moreno Bernat
Rico you sexy beast, thanks for the awesome tutorial dude!
You explain everything so well and you are very thorough. You also take your time and I love that as someone who is brand new to Blender. Thanks for the tut! ^edit: Liked and subbed!
Thank you so much! This tutorial is amazing!
So if I did it right I could paint from a photograph?
thanks a bunch really nice tips… I like the fact that you use blender internal for baking 😀 i do that as well
Let me explain:
"Clone sorta clones stuff, Fill is like filling, Mask masks stuff, smear sorta smears stuff…."