https://i.ytimg.com/vi/9tKHZFLbtUI/hqdefault.jpg
http://www.creativeshrimp.com/exoplanet-blender-tutorial.html
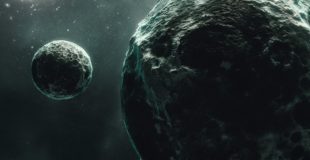
Create a stunning zoom-in animation to the surface of a moon-like exoplanet. Master the micropolygon displacement in Blender and supercharge your scenes with the micro details like craters.
Continue learning the Micropolygon Displacement:
Watch part 1/2:
Micropolygon Displacement Basics Part 1/2 – Blender Tutorial
Watch part 2/2:
Micropolygon Displacement Basics Part 2/2 – Blender Tutorial
Create stunning landscapes, planets, sci-fi patterns, asteroids and much more!
What’s in this Space VFX update 1.1?
1.5 hours of bonus video tutorials:
Micropolygon Displacement Basics Part 1
Micropolygon Displacement Basics Part 2
Exoplanet: Zoom to the Surface
Update teaser: https://www.youtube.com/watch?v=0IgmCuIpAd4
If you have Space VFX you’ll get all the project files, textures and animations.
About Space VFX video course:
Creating a 3D universe is hard… no longer! After watching this 16+ hours video course you’ll be ready to create any space object in Blender. Quasars, gas giants, planets, black holes, asteroids and more.
Aidy Burrows and Gleb Alexandrov, two Blender geeks joined forces to create this cosmic tutorial series.
Get Space VFX now: http://www.creativeshrimp.com/spacevfx.html
Video Info: 16+ hours, 1920 x 1080 (download+streaming), MP4 format
26 Space VFX Tutorials
2 Workflows: Procedural and Image-based
Skill Level: Beginner-Intermediate
Bonuses: Project Files and Extra Assets
source

33 responses to “Blender Tutorial – Create a Planet Using Micropolygon Displacement”
21:32 it will not be an automated process, most of the time you need reflections and light from the whole scene.
Do big guys have a map web site?
The sci – fi model you must watch if beginner most amazing and easy👇
https://youtu.be/finUlgpomnQ
Does the full course show how the completed space background is created? The star field, nebula etc… This is extremely awesome material! Incredible this is all free software and pro quality results!
idubbbz, is that you?! https://www.youtube.com/watch?v=ysFzSmDRs2U good tutorials as always 🙂
Gleb, Thanks for this video, really helps. Question for you, I've got a scene where I'm switching cameras by binding cameras to markers. I need for both of them to cull the object, but where the array masks intersect it leaves just a small section. I hope that makes sense… What I've done, was to duplicate the vertex weight proximity modifier and key frame the render state of the 2nd one, seems to work. Would you have a different solution? ~Thanks.
I tried your video. I can't post the link to it but its the latest on my channel. I'm curious to any ideas that might help it render better.
i don't see the lunar_bump texture in the project files?
wow this gave my computer a blue screen xddd
why are you not using maya
Tip for improvement of tutorial
Hi Gleb! Helpful tip about vertex group, thanks! After watching, I have some idea how to little bit simplify the process.
1) Add a Curve with 2 point.
2) One point Hooked to Camera & another to Empty target. Also parented Curve to the Camera.
3. On Planet object, in Array modifier, "Fit Type" switch to "Fit Curve" & select our Curve object..
Now using Empty target we can controll of cut background without addition objects, modifiers & vertex groups!
Great, if I ever need to make a moon, I'll come back. 🙂
OMG THANK YOU SO MUCH ! it helped me a lot !
yes this is good
What are your specs? I need me a computer like this.
My mask back doesn’t work, I don’t know what is happening.
It dont work in 4:15 for me :'( I press tab twice and the texture don't appear
Where did you get the texturez
you are talking like doctore
Is GTX 1060 6G enough vram for this project.
You could at least give us the moon displacement texture…. always the same story.
Why does your displacement map look completely different to you bump map? I mean the files and their surface doesn't match at all. The craters don't match at all. I understand it's a displacement map but surely it should still look a little like the bump map. Please, I'm not hating. I just want to understand how they work.
Where can I get those textures?
Manual culling in Blender?!?!?! Awesome! 😀
Very helpful. Lots of very great information.
Wat
where did you get or make the texture
When I use a shortcut in blender is like: https://www.youtube.com/watch?v=6cVNM53oOhI
Kim Jong-un only needs one key (red button) to delete your planet. Hahaha. Nice tutorial.
this is great stuff, tyvm i might finaly start using node editor after years
Hey Alexandrov. Big fun of yours, can you make a video to explain how to generate normal textures from bump maps created within cycle render?
Why the menu different
who would thumbs down this?