https://i.ytimg.com/vi/TdNrLTglxUk/hqdefault.jpg
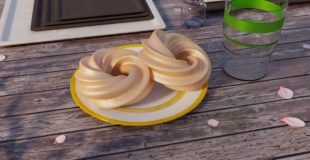
In this tutorial, you’ll learn how to model and create a glazed cruller doughnut (donut) in Blender. We’ll first go over how to use curves to create the shape of the doughnut, then we’ll go over how to use modifiers to create the model of the doughnut, finally, we’ll go over a hack on how I created the perfect material for the doughnut.
This tutorial was made due to the amount of support on the doughnut render in the beginner of the video. The render can be found in my portfolio via the website, and my Instagram page.
Texture: https://www.poliigon.com/search/recent/narrow/list/lava
────────────────────────────────
Where can you find me?
● Website – http://tooeazycg.weebly.com ✰
● Twitter – http://twitter.com/tooeazycg
● Instagram – http://instagram.com/joshuaautumn
● Patreon – https://www.patreon.com/JoshuaAutumn
────────────────────────────────
About me:
I am a 17-year-old Graphic Designer and 3D art intermediate named Joshua Autumn. I like Blender 😀
Personal Channel – https://www.youtube.com/channel/UC3tBuIitgO4IRs9f-kV4oXw
────────────────────────────────
Secret Message: This video was 2.2 GB, took 8 total hours to edit, and created multiple headaches
────────────────────────────────
*No Copyright Infringement intended*
I DO NOT OWN ANY SOUND OR MUSIC IN THIS VIDEO, ALL RIGHTS GO TO THE SONG OWNERS
────────────────────────────────
Thanks For Watching!
source

14 responses to “Blender Tutorial: How to model a Glazed Cruller Doughnut”
Great tutorial, thanks!
looks like some dog shit
i don't have a subsurface scattering node
what can i do? :((
The shape can also be done with just a curve-circle and curve bevel object, by using the twist value settings on the points on a bezier-curve based circle. Slightly different workflow, but you can have it line up every time without worrying about the screw modifier value.
Replace image texture node, use noise texture node (scale = 15, detail = 2) with black to white color ramp, then connect color from ramp to gloss shader normal. Use geometry node pointiness, connect to new color ramp with 2 color (1.000; 0.500; 0.010 @ 0.434 and 1.000; 1.000; 1.000 @ 0.639), connect color ramp color to subsurface color node. Use 0.5 for mix shader.
Bruh you sound older like 19
Would you want to do a collaboration on a video? Im a fellow 3D Blender Artist in High School, if you want to learn more about the collaboration, or have questions about it, then, please contact me by using my email on the "about page" of my youtube channel! https://www.youtube.com/channel/UCpPLOcq4EiLqS4VQqDaXGkQ
Good tutorial, thanks! May I add a suggestion / hint for new users? When you rotate the handles around 1:21 you can rotate them all at once: select all of them first, change the pivot center for rotation / scaling to "Individual Origins" (it's a dropdown button on the 3d view header), then rotate. Just remember to change the pivot center back to "Median Point" or whatever you need after that. Also, the blueish shade of the donut generated by the screw modifier indicates its normals are inverted (pointing inward in this case). You can fix that toggling the "Flip" button on in the screw modifier. Here: 3:35 you can see both the blueish color and the Flip button (right column of the screw modifier).
Early gratz on 2k subs 🙂
lol read the description, it took you 8 HOURS to edit this? What did you do? Geez
Nice tutorial! One thing I'd recommend for the material is first mixing a glossy shader with a diffuse shader with a fresnel node as the factor (diffuse on top), before mixing it with the SSS shader. Makes things a bit more… PBR-ey. Cheers!
Wow nice tutorial, loved how you made that material for the doughnut
DOUGHNUT!!!!
Definitely an interesting tutorial. Just wondering though, if we sign up for polligon, would we have to pay by the end of the trial period to continue using it for free?