[ad_1]
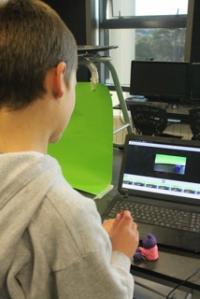
Last month we looked at digital cell animation with Krita. Cell animation is just one kind of animation, though, so this month we’ll take a look at stop motion animation. As an added feature, since DIY projects have been highlighted in the past weeks, the resulting animations from the application have all been done by year 5 and 6 students at local schools, and the application itself was developed by me and the students’ teacher, Jess Weichler of Makerbox.

The application is called StopGo. It came about as a direct response to the lack of a reliable and simple stop motion software for Linux. From its inception, it’s been designed by its primary user and intended audience: a teacher and her students. As part of the classroom activities, the students are encouraged to file feature requests.
We’ve all seen stop motion animation before: there’s Gumby, Terry Gilliam’s famous cut-out interludes for Monty Python, and recent movies like The Box Trolls. The principle is the exact same as hand-drawn animation, except instead of drawing a character, you photograph an object, moving the object little by little between each snapshot. The object can be anything from paper cutouts to elaborately sculpted models.
It’s not hard to set up a basic stop motion rig, and the truth is that absolutely no computer is required. Grab a camera and a few objects from your junk drawer, and you’re ready to go; take lots of photos of the objects moving little by little, string the photos together, and you’re animating.
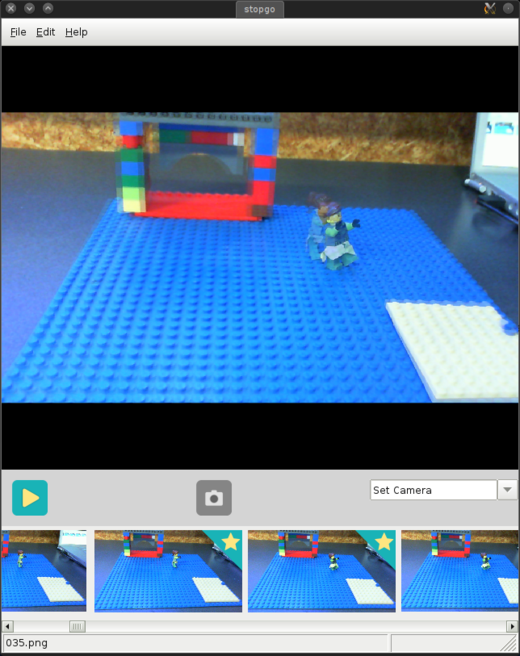
What StopGo brings to this tradition, primarily, is a visual interface in which to manage each still frame and, most importantly, the “onion skin” effect that makes it easy to gauge whether you’ve moved a character enough or too much or not at all since the previous frame. You saw this in the Krita demo, and it’s considered one of the most important features of a proper animation workflow.
Installing StopGo
StopGo is easy to install. In fact, there is no install: you just download the AppImage, plug in your camera, and launch StopGo. It’s a zero-install, portable app that should work on any recent Linux distribution. It’s not a true portable app since it does require both FFmpeg and vlc, each available from your distribution’s repository (or third party repositories like RPMFusion), but that’s largely a design choice, as we prefer to keep important libraries and executables configurable by the user.

Support outside of Linux is forthcoming, but still in development (merge requests welcome!).
Using Stopgo
Once you’ve got StopGo on your system, plug in your camera and then launch StopGo either by clicking the StopGo icon, or from a shell. You do have to plug in your camera first; there’s no refresh on the camera selection menu yet, so once it’s launched it won’t detect a new device unless you close it and re-launch.
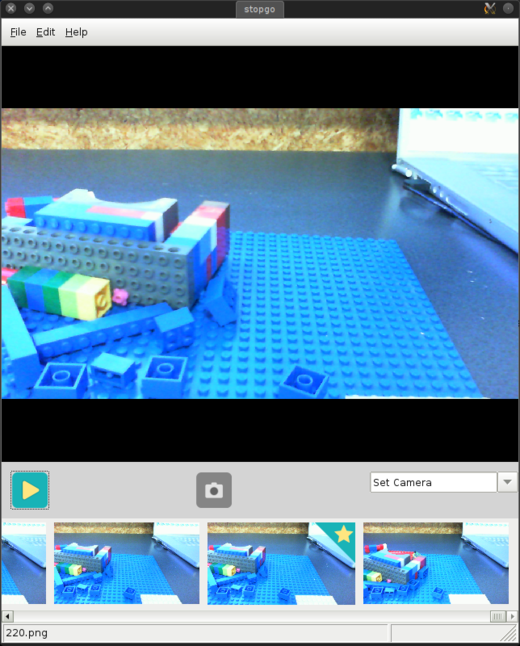
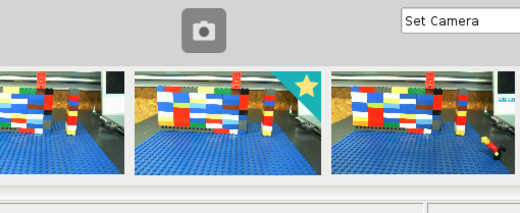
The interface is intuitive enough for an eight-year old child (we know; we’ve tested), but here’s a quick overview: the bottom panel houses thumbnails of each frame, and the top panel displays either your camera’s image or the current frame you have selected. You’ll know when a frame is selected by the star banner in the corner of the thumbnail.

Along the middle bar are the controls, such as they are: there’s a play button (does what it sounds like it does), the snapshot button (again, it does what you think it does), and the camera selection dropdown menu.
Animation walkthrough
The first step is to create a project. You can’t start animating without one, so create an empty project immediately after launching, or open an existing project if you’ve already started one.
Once you’ve created a project you’re ready to start. Take a snapshot, and then move your model a little. The StopGo screen will show you two images, overlaid on top of one another. The previous frame is half opacity, the full opacity is your live camera view.

To maintain the illusion of smooth motion, each movement should be small and progressive.
Each frame you take appears in the lower thumbnail panel, but the snapshot button remains highlighted to indicate that a new snapshot may be taken at any time.
If you make a mistake, delete a frame by clicking on the frame and pressing the Delete key on your keyboard. The most common mistake is taking a snapshot of your own hand as you retreat from the stage, so just look for your hand in the thumbnails, delete, and continue.
Importing frames
StopGo doesn’t care whether you’ve taken photos with its interface or not; you can also use StopGo to import an image sequence, play through it, and then export as a movie. Do this with the Import function in the File menu. Currently, only sequential JPEGs are supported, but support for more formats are forthcoming.
In this way, I have had users draw digital cells in Inkscape, import those cells into StopGo, and export the frames as a movie file. It’s the long way around, but if StopGo can help people get over the learning curve of FFmpeg and successfully produce an animation all their own, then StopGo has accomplished its mission.
Playback
Click the Play button to start playback of your animation.
Rendering
Once your animation is finished, export your work with the Render selection from the File menu. By default, the frame rate of StopGo animation is 8 frames per second. That’s a mere third of the industry standard of 24 fps, but it brings with it the distinct advantage of only having to produce, for example, 8 snapshots for one second of animation intead of 24 snapshots, or 480 for a minute instead of 1,440, a huge difference.
The more frames the smoother the action, though, so if you’re working on something that you want to be as fluid as possible, use a higher frame rate.
The default resolution is HD 1080, with an option to use HD 720 for a smaller file size.
These export options can be set in the Preferences selection in the Edit menu, but if you’re doing very advanced work then you might prefer to use StopGo only as the front end for your photos, doing a manual export of the frames. StopGo saves all images as image files in its project folder, so you’re free to use ffmpeg from a shell to process your images outside of the StopGo interface.
Unless your project is very long, the render should happen quickly. Once finished, you’ll have a .webm file on your desktop, suitable for posting to a video sharing site, your own website, or your mobile.
StopGo
StopGo is in use for animation every term at a number of local schools in Wellington, New Zealand. It’s constantly improving and it’s a project quite happy to receive contribution and improvement. It’s written in Python, using mostly the wxWidgets framework and the VLC Python API. Its source code is hosted on notklaatu/stopgo .
Take some time out to watch some of the Lego, Clay, and cut-out student projects that have been created with StopGo, and then go make your own!
[ad_2]
Source link