[ad_1]
Last month, D Ruth Bavousett wrote about creating sheet music with the Lilypond “music engraving program,” and it got me thinking about MuseScore—which she also mentioned in the article, but in passing—and what a powerful tool it is for musical notation. Therefore, in an a continuation of an unofficial musical notation series, I present to you MuseScore, the open source WYSIWYG sheet music creation suite.
MuseScore is to music notation what a word processor is to, say, articles about open source; it’s the tool that you want to take for granted. MuseScore is a tool you hope will become so familiar to you that it fades into the background, stays well out of your way, and possibly, on occasion, makes your life easier. As with everything else, this boils down to practice, but even to the uninitiated, MuseScore is intuitive, while also maintaining the complexity required for a professional, readable, musical score.
Installing MuseScore
MuseScore is a cross-platform application, so you can download and install it on any computer. On Linux, it’s available from your repository (or Slackbuilds.org for us Slackware users).
After installation, MuseScore may be listed as mscore, depending on how you have your desktop configured (mscore is the name of the executable, but many desktops list it by its description text, MuseScore, in application menus). If you can’t find one, look for the other.
When you launch MuseScore, it loads an example piece by default. If you want to open to an empty project, change that behavior in Edit | Preferences.
New project
The demo piece is a good example of what’s possible with MuseScore, but the best way to learn it is to use it, so let’s start a fresh project. To begin an empty project, select File | New.
The new project wizard steps you through creation of a new project; you can start from scratch or you can use a template. All settings you choose here can be changed later, so no pressure to commit to anything.
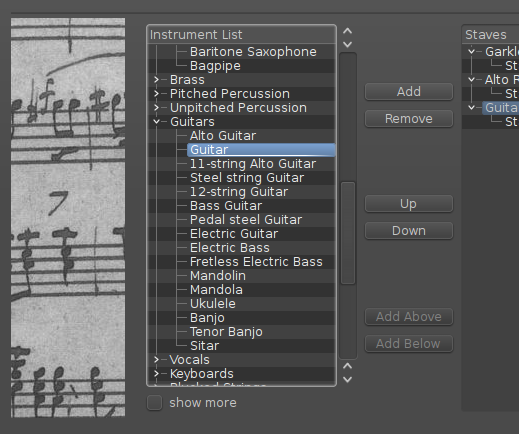
New project wizard.
Once you’ve stepped through the setup screens, you’re left facing blank staves. That must mean it’s time to start inputting music.
Interface
MuseScore’s workspace is pretty intuitive, regardless of your musical knowledge. The main work area is the sheet music itself, where you draw the notes (which are listed as clickable icons across the top toolbar). On the left are palettes providing access to special musical elements such as glissando notation, fermatas, dynamics, repeats and codas, and so on.
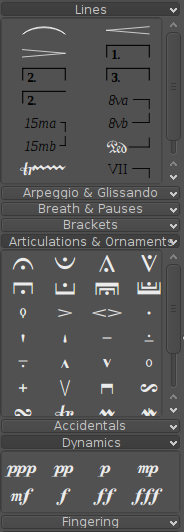
MuseScore palettes.
If you’re just starting out, you can use the mouse to input notes. It works exactly as you’d expect; select a note, point to the place on the staff that you want it to go, and click. Rinse and repeat. There are toolbars and palettes and menus to give you access to every minor detail you could ever possibly want to enter into sheet music.
But that’s not usually how it’s done in the real world. Pro users use the keyboard.
Keyboard entry
As any composer knows, the barrier to actually setting music down to paper is efficiency. It’s work enough to compose a coherent piece of music, and more work still to arrange it for different instruments, so if you have to add the overhead of data entry into that mix, it changes from being a labor of love to just being, well, labor.
For that reason, the most common method of editing musical scores is keyboard entry; it’s the most flexible and efficient way to get data into the computer. Like playing the other kind of keyboard (the musical one), it takes practice to get all of the keyboard shortcuts down. As with Emacs or Blender, much of the entry consists of a sequence of key presses rather than single keys. I make it sound a lot scarier than it really is; the good news is that the most commonly used entries are intuitive and easy to remember. Entry mostly centers around the number pad, arrow keys, and the letters A through G.
To get started, you need to be in notation entry mode (not just mentally, but in the software). This is the default mode, so you’re probably already there; to verify, look to see if the N button in the upper left corner of the MuseScore window is highlighted.
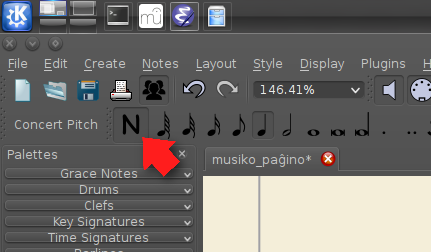
Notation.
You can enter or leave note entry mode by pressing the n key on your keyboard at any time.
The first value you enter is the duration. Durations values start with the 1 key (a 64th note) and continue up to 7 (a whole note), with 8 being the less common double whole note, and 9 being the rare longa.
The duration entry of a note gets treated as a “dead” key, like the Compose key when entering Unicode characters, or c-x and m-x in Emacs. If you’re not a Linux user, that might not make much sense, but you can also think of it as one of those self-tripping Caps Lock keys on a mobile touchscreen; you press it once to enter CAPS mode, and then hit a key to get a capital letter, after which CAPS mode gets turned off.
In other words, when you enter the duration, nothing appears on screen; it just gets held in memory until you then enter a note. Entering a note, as you can probably guess, is done with the A through G keys.
For example, pressing 5 (for a quarter note) and then a chromatic letter (that is, a through g) results in a quarter note entered onto the first staff on your page. Try it!
To keep both hands busy and thereby increase efficiency, the duration is usually entered on the number pad. (Real-life composers carry around a dedicated USB number pad, just in case emergency note duration entry arises on the go.)
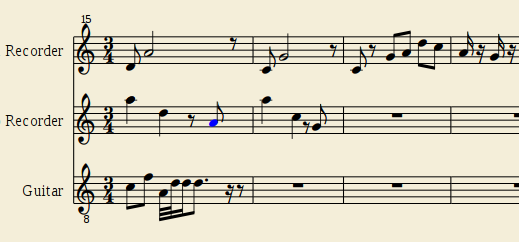
Notes.
Once a note has been entered, MuseScore adjusts the rest of the measure according to your time signature.
You can also fine-tune the note you’ve just entered:
- Up and down arrows move the note up or down the scale by half-steps (control arrows raise and lower the pitch by a full octave)
- Left arrow selects the note in case you need to replace (overwrite) it with a different duration or note value
- Right arrow moves your entry bar right along the staff
Similarly, you can modify notes with a dot, select several notes with shift-arrows, tie two selected notes together (with the + key), and so on. Rolling your mouse over the toolbar reveals the keyboard shortcuts associated with whatever you might want to enter, and once you get used to the way MuseScore selects notes and either adds or replaces values, it feels like second nature.
If you accidentally replace a note when you meant to add new ones or just modify an existing one, you can always undo with Ctrl+z, just like in any other application. That seems obvious, but in new environments we sometimes forget that the same basics apply.
A full list of note entry keyboard shortcuts can be found in the excellent MuseScore Handbook for version 1.x and in MuseScore v2.x Handbook for newer releases. If you’re familiar with non-open music scoring applications, you’ll probably find it easy to get into the rhythm of note entry with MuseScore; many of the shortcuts are exactly the same, others make as much sense as anything else, and you can always customize keys from Edit | Preferences.
Playback
MuseScore is mostly a notation editor, which is to say that it’s not a DAW (digital audio workstation) like LMMS. Wanting to hear what you are composing as you go is natural, so MuseScore does feature several options to listen to your progress.
MuseScore playback is, naturally, MIDI-based. The default playback mechanism is general MIDI through PortAudio or ALSA (depending on how MuseScore was installed). You can set the output in Edit | Preferences | IO tab.
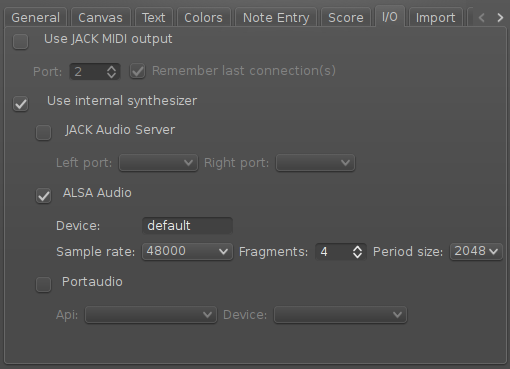
IO tab.
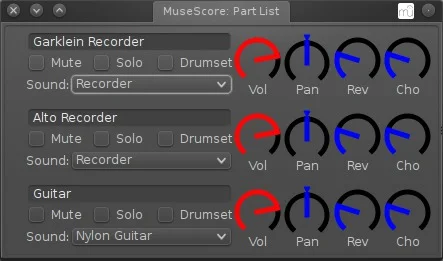
The General MIDI (GM) voices used are determined by the Part List. To access the Part List, select Mixer from the Display menu. In the Part List (mixer) window, you can set the baseline volume for each part in your score, as well as the stereo position, reverb level, and chorus effect. You can also rename the parts, and set what GM voice is used.
This is probably enough to give you an idea of what your composition sounds like, at least in terms of listening for dissonance, harmony, timing, and other technical aspects of what you’re writing.
If you want MuseScore to sound a little more realistic, you’re free to pipe it through JACK. With JACK, of course, you gain the ability to assign any MIDI instrument to each MIDI channel, meaning you can use something like Linux Sampler to trigger soundfonts or full-on samples and gigasample libraries.
MuseScore and JACK arguably forms a kind of modular DAW; you can use MuseScore to play your composition through soft synths and samplers, and record a high-quality rendition through JACK-enabled tools like JACK Record, Calf, and Jamin.
Export formats
MuseScore’s native format is the Compressed MuseScore Format (.mscz). This is a suitable and open format for musical scores, but MuseScore can save out to a lot more than that, including MusicXML, MIDI (.mid), Lilypond, SVG, PDF, and more.
Community
As is often the case with open source applications, the community around MuseScore is vibrant, creative, and eager to share. MuseScore links to its online community from the MuseScore Connect panel. Here, you’ll find sheet music—mostly creative commons—by MuseScore users from around the world. Download them as examples of what MuseScore is capable of, for practice arranging music, as source material for your work (license permitting), or just because you want to hear some great new music.
MuseScore is a powerful, professional-grade composition tool. It’s made to compete with the best of them, and it does. So take your hands off the keyboard and put them on the keyboard, and start making music.
[ad_2]
Source link