[ad_1]
Animation is a robust field with a large number of specialties and an even larger number of tools for creating a particular look or style. In the past two months, I’ve covered Krita Animation for hand-drawn digital cel animation and StopGo for stop motion animation. There are many more animation applications out there, not the least of which is Blender for 3D animation and all manner of hybrids (check out how some users are abusing the Grease Pencil tool for animation or the excellent Freestyle effect), GIMP Animation Plugin GAP, Tupi, the recently open-sourced OpenToonz, and many more.
I can’t review every animation application (at least, not all at once), so the last animation suite I’ll look at this year is Synfig Studio. Synfig Studio is a “tweenless” animation system designed to speed up the animation process by using sprites and digital tweening rather than adding to the illustration workload. For this reason, it’s ideal for a solo artist or a small animation team.
Synfig is production-ready. The Morevna Project, a small anime studio, is producing not only content but several tutorials about their tools, with everything being produced on an open source stack, released as Creative Commons. Better still, as they work, they are developing and improving the tools they use and committing their code for everyone to use. If you’d like to fund their excellent work, visit patreon.com/morevna and subscribe to their content!
Installing
Your distribution might package Synfig in its repository, but be sure to download the most up-to-date version directly from upstream. The Synfig site offers .rpm, .deb, and generic .tar packages. If you download an .rpm or .deb, then use your system’s package manager to install them as usual. If you download the .tar file, just untar, place into a sensible directory such as “~/bin,” and run synfigstudio.
Interface
The layout of Synfig is probably familiar to anyone who’s used an animation application before or even a graphics application in general.
The upper left panel holds your tools, the central panel your canvas, and the bottom panel the timeline and keyframes. Property panels appear along the right.
Before starting, go to the Canvas menu in the menu bar and select Properties (or press F8 on your keyboard). In the properties window, enter your desired canvas size. You might want to start with 1920×1080 (1080 HD) if you’ve got a moderately powerful computer, or lower if you’re on a less powerful computer. Generally, I feel safer working at one resolution greater than my target if my computer lets me, on the theory that it will future-proof my work, but obviously your target determines how necessary that is.
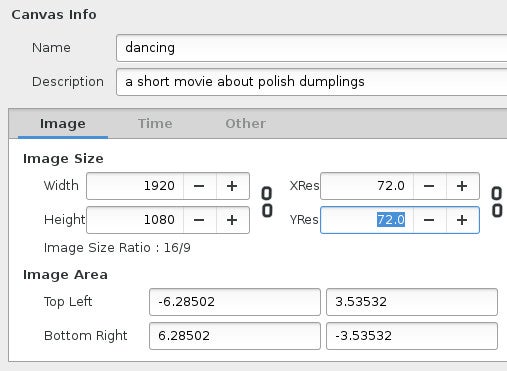
Also in the Properties window is the amount of time you want your timeline to contain. Time units for animation are frames, and what that translates to in human time depends on how many frames per second your animation plays. The more frames per second you use, the smoother the animation looks, but you’re also managing and rendering many more frames. For this demo, I’ll use the slower frame rate of 16fps and a total timeline length of 128 frames just to keep numbers low.
Once you’ve set your project properties, save your file.
Drawing and Importing
In order to animate, you need assets. Synfig has several drawing tools included, but most users I’ve ever seen use Synfig seem to prefer to draw elsewhere and then import their assets. Synfig doesn’t require it, but the idea behind its animation technique is the old “paper cutout” principle, as you may have seen in Terry Gilliam’s famous “Monty Python” interludes or in the “South Park” television series — each element that you want animated is an object that gets “pinned” to a rig, allowing you to record each movement you make on the rig. Playback the recording, and you’ve created an animation.
If you want to use Synfig’s drawing toolkit, you’ll find all the usual suspects in the toolbox, located in the upper left corner. There are shape tools to generate rectangles and ellipses, a bezier pen, paint bucket, and so on. To see the properties of each shape you draw, click on the object either in the canvas or in the Layers panel (located in the bottom right by default). The item’s properties appear in the Properties panel in the lower left corner.
Working with any object, whether drawn from scratch or imported from an external application, is best done in using the Canvas and Layers in conjunction. Even a simple shot can become very complex, so use both views — the “on set” view of the Canvas and the “dope sheet” that the Layers provide.
To import items into your shot, use the File menu and select Import.
When you create or import an object, it gets an entry into the Layers panel. If you add several objects, Synfig adds each as a Layer, with the layers nearest the top of the list being “in front of” the layers lower down — this will be important later.
Whether you’ve drawn or imported an asset, any object in your shot gets controls, or handles. There are several, so working with them can get confusing.
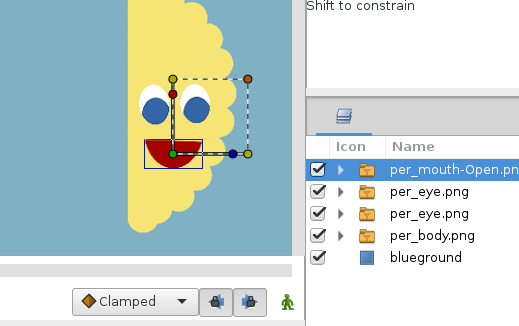
To break it down:
- The green center handle is “origin,” or the X and Y coordinates of the object. Drag it to move your object.
- The brown corner handle (top right) “scales” an object, respecting the aspect ratio. Drag it to re-size your object.
- The yellow handles “distort” an object; it’s a scale effect with no regard for aspect ratio.
- The blue handle “rotates” (pivoting around the green handle; Ctrl-drag the green handle to re-position the pivot point).
- The red handle provides a “skew” effect.
Try importing or drawing an object, and then manipulate it using its handles. Once you get used to this basic interaction method, you’ll be able to do everything else in Synfig much easier. Trust me, trying to animate, but stumbling every time you need to interact with your subject is extremely frustrating.
Animate
Good news. If you’ve just been experimenting with the controls of an object, then you’re about half way to animating already. The only step left to do for a basic animation is to press “record” and start moving things.
To start recording movements, click the person-shaped icon near the bottom right of the Canvas.
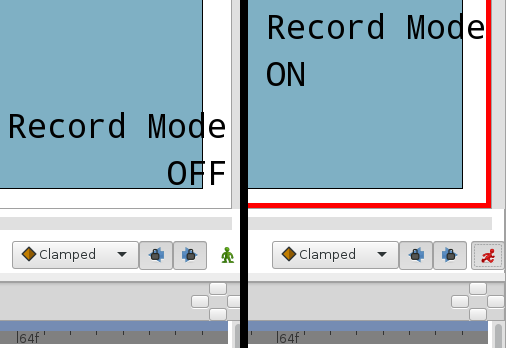
You’ll know when you’re recording because the icon turns red when active and a bright red border surrounds your canvas.
While you’re in record mode, everything you do with an object is recorded as a keyframe in your timeline.
Of course, animation isn’t just about movement, but movement over time, so to make something be animated, you must also progress through your timeline.
Keyframes and Tweens
In traditional animation, you would draw your character in each of its major poses at specific points in time (say, the 0th frame, 16th frame, and the 33rd frame), and then you would go back and draw the frames in-between. This process is called “tweening.”
In Synfig Studio, the idea is to automate the tweening process: you get your character into position at the 0th frame and the 16th frame, and Synfig figures out how to get it from one position to the next. No more tweening.
Try it yourself:
1. Draw or import an object. As an example, I’ve drawn a anthropomorphic pierogi in Inkscape, and imported individual parts into Synfig as PNG images.
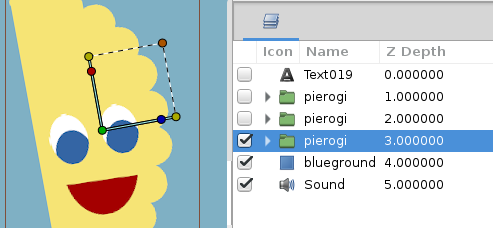
With each layer selected, right-click in the Layer panel, and select Group Layer to place all selected layers into a folder. Now the pierogi can be moved as one object, but I still have access to each component should I need to animate individual body parts.
2. Once grouped, an object’s control handles encompass the entire group; if I rotate my pierogi character, then its body, mouth, and eyes will all move together, relative to their common origin.
To start animating, click the Key icon in the lower left panel of the Synfig window. This switches you to a timeline view.
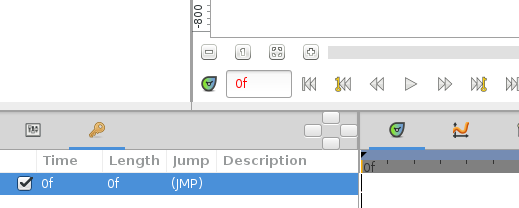
3. To enter live recording mode, click the Animate button (the green icon) in the lower right corner of your canvas panel. The icon turns red, and a big red border surrounds your canvas. At this point, everything you do in your canvas will be recorded, so don’t make any unintended movements!
4. Use the control handles to move your object to its initial position. I’ll have my pierogi dance, in my example, so as the first (0th) frame, I’ll make him tilt to one side.
5. Move the playhead (the vertical dotted line) in your timeline to the fourth frame, and move your character to some new position. Since I’m just having my pierogi do a jig in place, I’ll tilt him in the other direction.
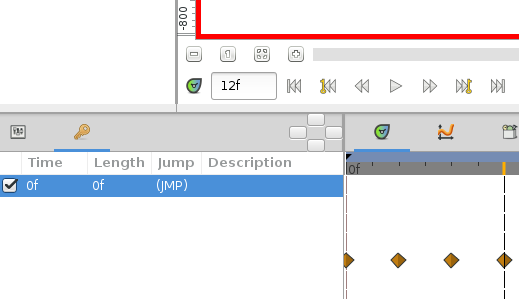
Repeat this process until your character is in its final position.
6. Click the Animate button to leave recording mode, just to be safe. At this point, you can either scrub through your animation to get a preview, or just press the Play button to see a real-time render of what you’ve done.
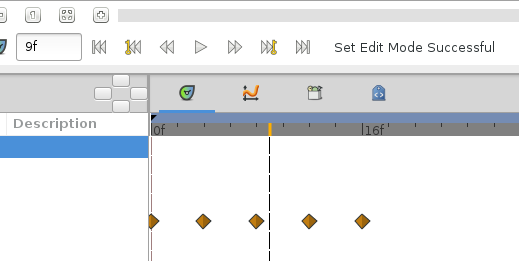
If the object you’re animating is a group of individual parts, you can also animate those by revealing them in your Layers panel and making changes to them with the record mode active.
Layer Types and Effects
Not all animation is possible with just transform handles. For additional effects and animation tricks, there are different layer types.
For instance, a common way of animating mouths for speech and vocables is to swap out mouth shapes. There’s rarely a need to animate the way the lips get into the position they need to be for each phoneme, so an animator will just swap out the shape. Since Synfig is built more for sprite animation than hand-drawn, to get that same effect I would replace one sprite for another; in other words, I’d hide the smiling-mouth sprite with a mouth shaped for a different phoneme.
To try out this technique, go to the Layers panel and right-click. From the contextual menu, go into the New Layer option and select Switch from the Other category. This places a Switch layer in your Layer panel. Drag and drop it into your target group; in my example, I drag and drop it under the Pierogi folder to add it to the Pierogi group. Defining which layer is a parent and which is the child can be tricky; look at the black line indicating how deep into a layer you’re descending.
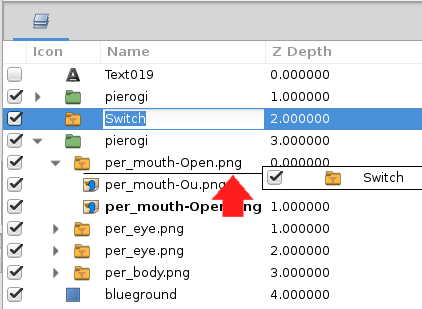
The Switch layer is an “effect;” all of its children are subject to it. All effects in Synfig work this way; the Layers panel is a “tree,” not just a stacked list as it would be in GIMP or Inkscape.
Because the point of a switch layer is to switch between different sprites, I’ll add a second mouth position under the switch. The order of these sprites don’t matter; they’re all equal children of the same switch parent.
Now that the switch layer effect is in place, there’s a switch function in the layer group’s properties. Click the parent group to view its properties. In my example, if I highlight the layer containing the switch and different mouth positions, then the properties appear in the Properties panel in the lower left corner of the Synfig window.
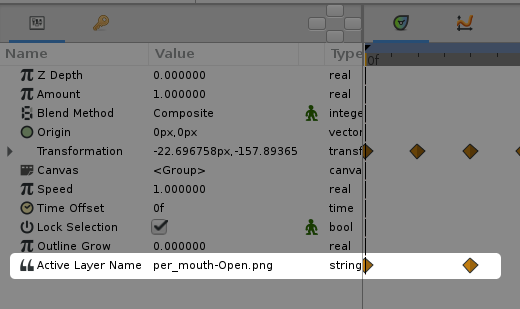
To animate an effect, you must be in record mode, the same as when you animate anything else. Enter recording mode, and then place your playhead at the 0th frame. Set the Active Layer Name even if it’s already on the Layer you want to begin with; this is unofficially but commonly called “jiggling,” meaning that you move or adjust a setting resulting in no change, but forcing the computer to notice and record the movement. So jiggle the setting to the active layer you want to start with, and then move your playhead farther along the timeline and set the Active Layer Name property to an alternate layer. A new keyframe appears, and in my example the mouth position changes from a smile to a surprise.
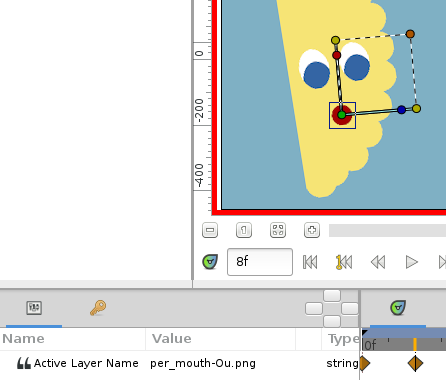
Synfig doesn’t create tweens from one mouth position to the next because nothing’s being transformed. We’re just doing a quick-change of sprites, so the moral of the story is that if you want to disable auto-tweening for something, then you’re probably looking for the Switch effect.
Synfig has are many other effects, and not all of them are technical effects like a switch. It has blurs, color effects, generators, time loops, and much more. Just keep in mind that the Layers panel is a tree, not a list, so make sure practice moving layers along the tree, and you’ll discover all kinds of cool effects.
Sound
Unlike the previous animation applications I wrote about, Synfig has integrated sound playback. It’s not (and shouldn’t be) a robust audio-editing interface by any means, so you’d only want to use a final or near-final soundtrack, but to sync up mouths and sound effect cues, it’s all you need. To add a soundtrack:
- Add a “Sound” layer from the Other category to your Layer panel.
- Click the sound layer to bring up its properties in the lower left corner of the Synfig window.
- Click the ellipsis […] next to the “Filename” property and select the sound file you want to use.
- Click off of the “Filename” property; if you don’t, Synfig thinks you’re still setting the sound file, and won’t play it back. This catches me off guard every time.
Once your soundtrack is in place, click the Play button under the canvas to watch and “hear” your animation.
Rendering
How you render an animation is more choice than technique. Traditionally, you’d export your project in a series of frames and they’d be turned into a movie file later in your pipeline. You can do it that way, but if there is not “later” in your pipeline, then you can also leverage the bundled version of ffmpeg to go straight out to a movie file (although your sound does not, at least in the current version of Synfig Studio, get included, so you’d have to attach that manually, later).
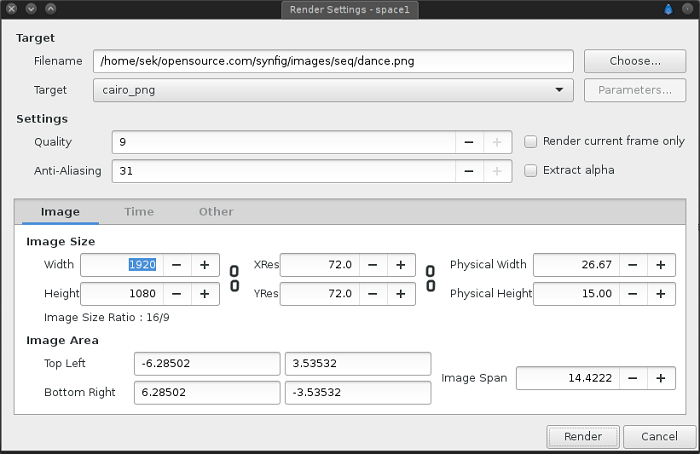
I find it easier to render to an image sequence, because then I have a “master” copy of the animation, from which I can encode many different versions. To do that, go to the File menu and select Render. In the Filename field, give it the path to an empty directory where you’d like the files to be saved and the filename each image should use as its base. Synfig automatically splits whatever filename you provide just before the .png extension and inserts a frame number.
-
From the Target pop-up menu, select “cairo_png” for an image sequence.
-
Set Quality to 9 and Anti-Aliasing to 31.
-
You may also adjust the image size here, in the event that you want to scale down your animation, as well as the number of frames you want rendered, and so on.
Once finished, click the Render button.
It might take some time for your render to complete; a message just under your Canvas provides a status report while you wait and an alert once it’s finished.
To turn your rendered image sequence into a movie file with sound, use ffmpeg from a terminal. For example:
$ ffmpeg -r 16 -f image2 -s hd480 -i dance.%04d.png -vcodec vp8 -an dance-video.webmWhether you output as a movie file or as image sequences, combining an audio stream to video after the fact is pretty simple. For example:
$ ffmpeg -i bounce.webm -i music.flac -acodec libopus dance.webm
Synfig is a professional-grade animation application with all the must-have features, and plenty of additional ones as a bonus. If you’re after fast and efficient animation, Synfig Studio is the one to use. It’s got a learning curve when compared to cell animation, but the elimination of tweening pays off in the end.
[ad_2]
Source link