[ad_1]
Using a phone to shoot professional work isn’t new, but most instances involve situations where the photographer has almost full control. But how would a phone stand up to the same test if the photographer had little to no control over the lighting and environment?
For some odd reason, I have always wanted to challenge myself by shooting an entire wedding on a cell phone. I have come close a handful of times, but plans always seemed to fall through. So, when I got my hands on the new Sony Xperia Pro-I, I knew I had to make it happen. Not only is this phone equipped with one of the best cell phone cameras on the market, but it also has some standout features I felt would make shooting a wedding much more possible than past camera phones.
To start, this phone has the same 1-inch sensor that the high-end Sony point-and-shoot cameras have. This 1-inch sensor is paired to a 24mm lens. The cool thing about this lens is that it is the one and only cell phone lens that is made of actual glass. So, between the larger sensor and glass lens, you have a very capable setup.

The phone also has two additional cameras that use the more traditional sensor and lens combos on the back. So, what you get is a normal cell phone-style camera in the 16mm and 50mm focal range and then a better lens and sensor combo for the 24mm range.

While the 1-inch sensor is kind of the main draw when it comes to this phone, there are a handful more features that make this phone different. The phone has a dedicated Bionz-X image processor, real-time focus tracking, eye-AF for both humans and animals, and it can even shoot at 20 frames per second. Though, when you shoot at 20 fps, you can only get a JPEG for the file output. If you want to shoot raw, you can only do that in single-shot mode, which is a little disappointing.

The phone also has a physical shutter button with the familiar half-press to focus ability similar to what you would expect in any type of dedicated camera. And if you already shoot Sony, then the camera app will feel like home, with a very similar layout and menu setup. You can shoot in auto, program, shutter priority, manual, and even a memory recall mode. And although these modes are all nice to have, one feature I missed having is the ability to set a minimum shutter speed when shooting in auto ISO. it’s one of the main ways I shoot with my professional camera, so it would have been an easier transition to the phone had this feature been included.
So, with some of the technical aspects out of the way, how did using it at a wedding actually go?
One thing I didn’t want is for this brief experiment to turn into me grabbing ideal moments in ideal lighting conditions throughout a wedding. So, instead of simply adding the phone to my camera bag, I wanted the phone to be the one and only camera I used for the entire day, from wedding prep, all the way through to the end of the night. As I was presented with tricky situations, I wouldn’t have my better camera to fall back on. I obviously couldn’t expect a paying client to let me perform this experiment at their wedding. I reached out to some friends, and Zee Anna Photography was gracious enough to let me second shoot with them for a full day, and I made sure they and the couple had a complete understanding of exactly what I was doing.
The first thing I want to bring up is that it fully surprised me that I got no strange looks from guests and no questions on why I was shooting on my phone. And I will say that it was very clear I was a working photographer and not just a guest shooting on my phone. I had my camera bag and GoPro mounted to my shoulder, and I was pretty much always shooting. So, this just goes to show you don’t need the big lens and updated camera body simply for how a client will perceive you, at least in the world of weddings.
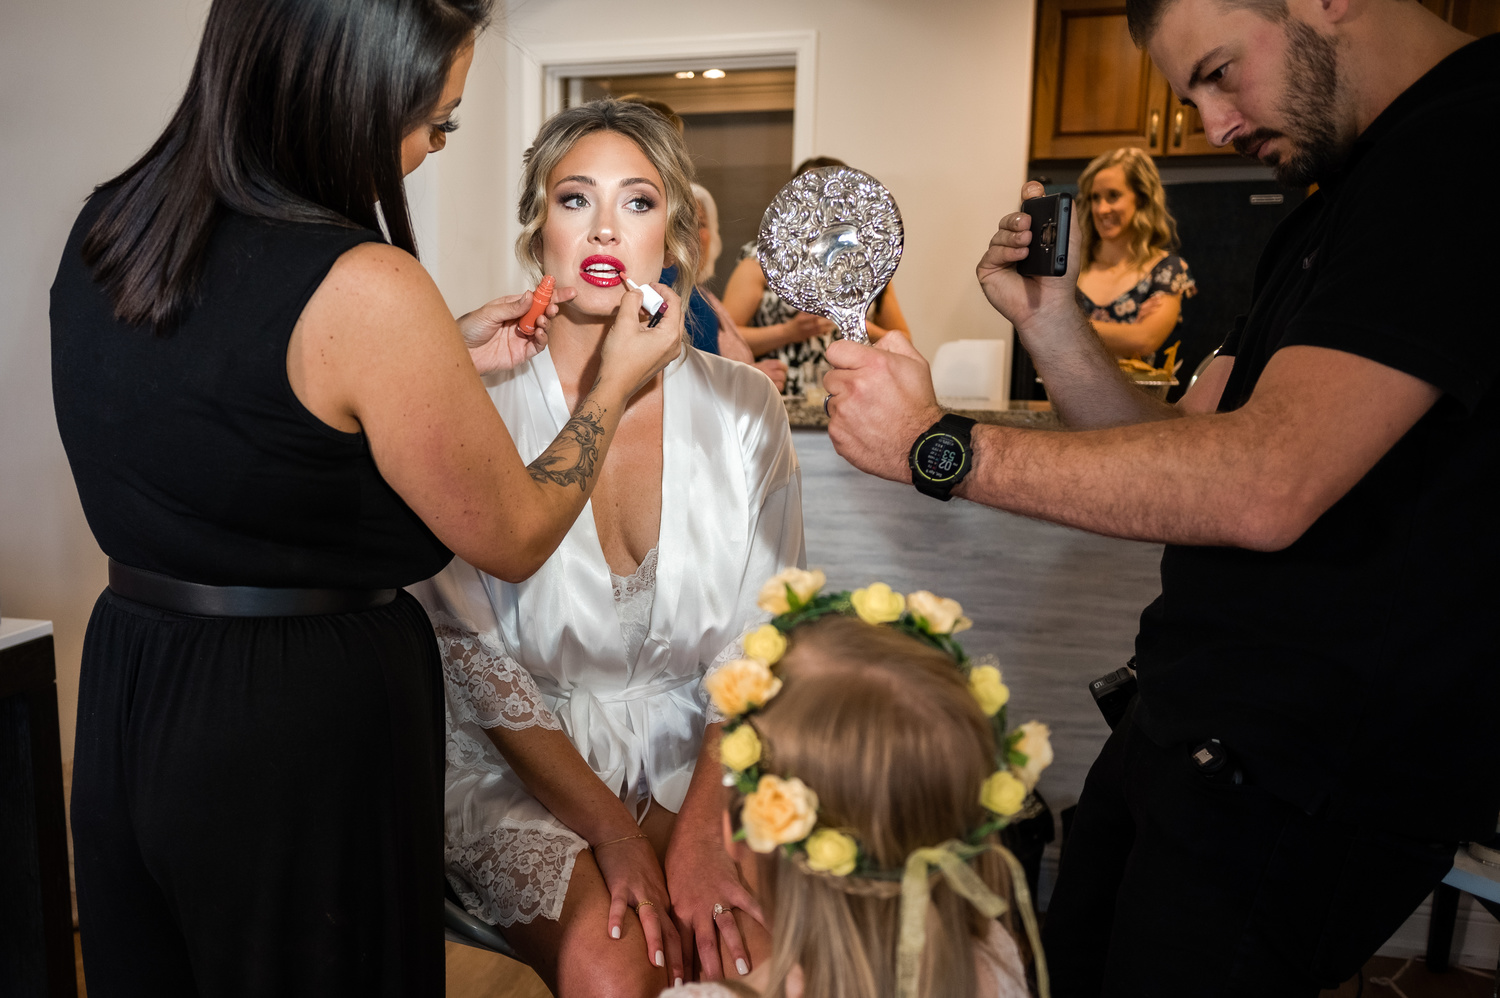
As for the actual shooting aspect, we started the day off with wedding prep, and this is a part of the day when I usually experiment with adding light. I ended up using my Stella Pro Reflex S in constant mode and experimented with this off and on during makeup, but I ended up putting the light away after a bit. As the second shooter working with a lead photographer and a video team, I didn’t want to subject everyone else working to my lighting choices. So, once things started moving around the room, I went with natural light for the rest of the day, except for the reception, which we will get into in a little bit.

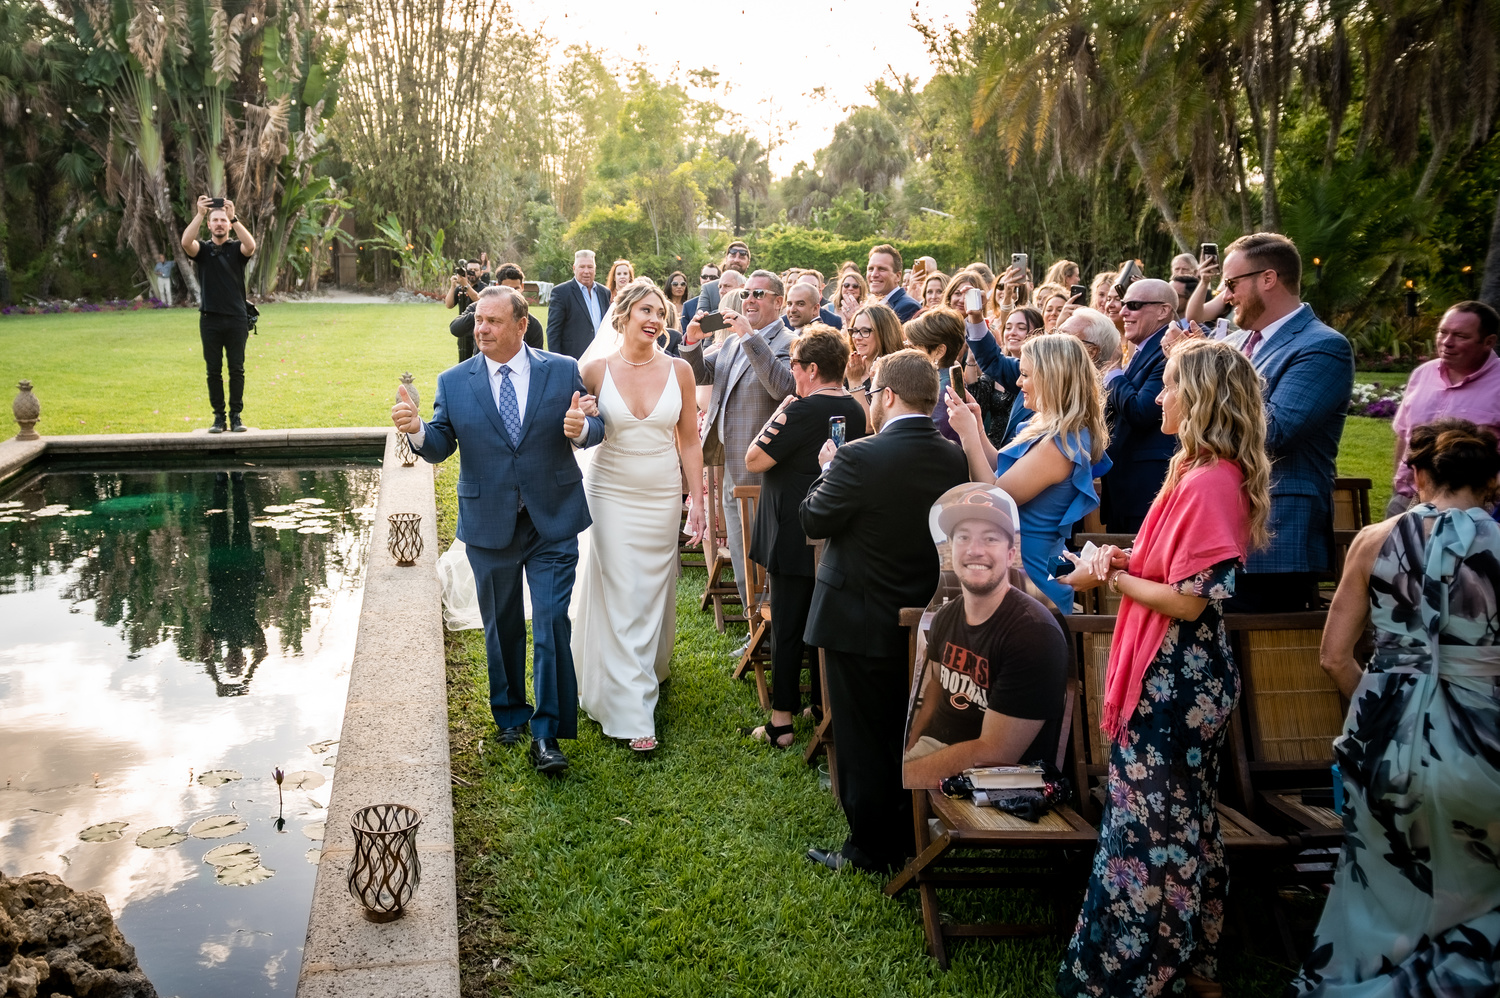
From here, the ceremony went pretty normally. I did what most second shooters do and wandered around the ceremony trying to find interesting light or compositions while also trying to stay out of the way, although this ended up being one of the more difficult times to shoot. The screen on this phone is really bright and usable in full sunlight, but when you try to tilt the phone or shoot at an awkward angle, the reflection off the glossy screen can be hard to see. But really, this is like when using the flip-out screen on my a9, though the screen on my a9 is less glossy, so it shows fewer reflections.

For portrait time, I would normally use some type of flash. I really love adding my light to accentuate a scene, add drama, or even completely transform a scene. But as I was prepping for this wedding, I found out I couldn’t use flash like I thought I could. I had planned on linking up to the Flashpoint M1 mobile flash unit., which would then allow me to pair up with some of my bigger lights. Unfortunately, while I could connect to the trigger and fire the lights with the test button inside the app, the app didn’t actually support the phone yet, so I couldn’t open the camera from the app. Because of this, I got the idea to bring a strong ND filter, hoping to get a low enough shutter speed I could manually trigger a flash, but like most wedding day timelines, things ran a bit late, so I didn’t have time to experiment with this. So, I simply shot where I could and directed when given the chance.
 From here, as portraits were ending, the sun went down further and things got a bit more difficult. While I would normally rely on the higher ISO capabilities of my Sony a9 or do some type of off-camera lighting, instead, I just had to make do with what I had. Though, because I was shooting on a phone, I tried my best to stick to the lowest ISO as much as possible. This was fairly easy to do throughout the day, though as soon as the reception started, I had to raise my ISO. The highest I ended up needing to go was ISO 640. But there were times I would have normally chosen to go with a higher ISO, but I just chose a slower shutter speed than I’d normally choose and simply overshot a bit to make sure I got a sharp image.

For the first dance, here I wanted to make sure I had some type of light I could use. So, I checked with the lead photographer and video team to see if I could place a single light on the dance floor, but neither of them cared, so I could use the same setup I use for all my first dances, and that’s a single light placed behind the couple. This gives me a nice rim light for the couple and some good bounced light to fill in faces. And again, for this situation, I used the StellaPro Reflex S. For this setup, I had the light set to 2,000 lumens, which is 1/3rd power when working on the light’s battery.

Now, when the lights went even lower for the party dancing, things got even more difficult. For a little while, I could use the video team’s lighting setup, but when that got turned off, I had to resort to waiting for the DJ lights to line up with something. But since these DJ lights were constantly moving, it was hard to get things to really fall into place. Mostly, when the lighting was good, there just wouldn’t be much happening, or there would be a lot happening and the light would be pointing up at the ceiling or something.

But, at the end of the day, I could make a similar style slideshow that I make for all of our couples. It shows key moments of the entire day, and I’m quite proud of the images I was able to include. I don’t feel like I had to search for filler images or leave out certain things because I wasn’t able to capture them well, aside from the fact that I would have normally included some groom prep, but he was in a different location, and I never got access. I also would have normally included a few more reception images, but I was still happy with what I got given the circumstances. So for me, I think this little experiment was a success.
Now, I would never suggest any of you all trade in your professional camera and start shooting full time on your phone. Although in a pinch, I do think someone could get by with this. But mostly, this is just a testament that this makes for a great everyday carry-in-your-pocket camera. This camera has features like full manual control, AF tracking, a better sensor, and better glass. And these are things you’d normally only be able to find in a dedicated camera, so add in the fact it has a phone included, and that’s a big win in my book. Because if I can take professional and deliverable wedding images on this phone, then surely, it’s enough to document everyday life.
[ad_2]
Original Source Link