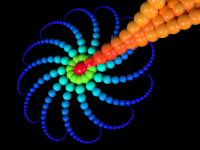
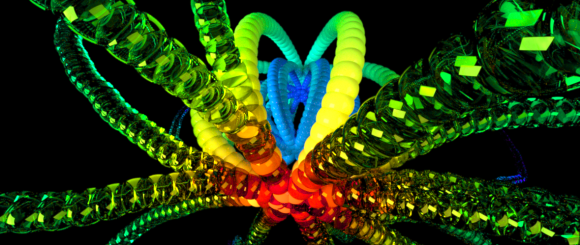
In this tutorial we are going to see how to use the Structure Synth to Luxrender exporter to render your SS creations in Luxrender.
After following along, you will have the resources to fully integrate your SS creations in Luxrender and take advantage of its power to render your scene. Not only that but you will learn how to customize the exporter to fit your particular scene and create the beatiful renders you’ve always dreamed of. However, this won’t be a lesson on Luxrender and it’s intricacies, I’ll save that for another lesson.
What will be covered:
Downloading the exporter
Installation of the exporter in SS
Conventions used for the SS to Lux exporter
How to prepare your scene for export to Luxrender
How to export from SS
How to prepare the Luxrender exporter for your scene
Depth of Field
Lighting
We have a lot to cover, so please follow along and let’s get started!
Downloading the exporter
First things first. Let’s get the exporter if haven’t already. Follow the link below and dowload the latest exporter:
Installation of the exporter in Structure Synth
To install the exporter, we are going to need to navigate to our Structure Synth installation folder. I am on OSX but the folder structure will be the same for other os’ so what you see here will be very much the same. Inside our SS folder/directory we are looking for the “Misc” folder.
Now if you don’t know where your installation is located all you have to do is open SS and press the F6 key and you will find the following window:
By default, SS will give you the location of your installation in the highlighted area. Make note and navigate to that folder/directory and in there you will find the “Misc” folder we are looking for.
Once there, go ahead and place exporter in there and we are done!
Conventions used for the SS to Lux exporter
Now let’s take a look at the conventions used by the exporter to harness the power of Luxrender.
Before we can just jump in and start exporting, we need to adhere to some conventions in our scene to be able to get the geometry out of SS.
The exporter supports 5 different materials for Lux:
Matte
Glossy
Glass
Metal
Car Paint
In order to select which material Lux will use to render we need to tell SS to tell Lux which one to use. We do this by using special primitives inside SS when programming our scene that use a syntax as follows:
Primitive::Material
Again, this isn’t a SS tutorial so it is up to you to learn how to program in Eisenscript. As you can see from the image below, one line has the correct syntax and the other doesn’t.
We always have to follow this convention as otherwise SS will not export the primitives and you will end up with a blank render. Not what we want at all!
Here is a list of SS primitives and their Lux materials:
box::matte
box::glossy
box::glass
box::metal
box::car
sphere::matte
sphere::glossy
sphere::glass
sphere::metal
sphere::car
The grid primitive has two different versions: thick and thin. Thin is the default and thick must be declared
grid::matte
grid::glossy
grid::glass
grid::metal
grid::car
grid::mattethick
grid::glossythick
grid::glassthick
grid::metalthick
grid::carthick
Again, we must declare every primitive in this way for the exporter to work. Learn it! Loveit! Live it!
How to prepare your scene for export to Luxrender
In order to get great renders out of Lux, we need to prepare the scene for that. In Lux, we need to make sure that we don’t use any RGB value higher than 0.7 – 0.8 and definitely never 1 otherwise we run the risk of getting fireflies. This is also true fo other renderers such as Cycles, etc.
So how do we make sure that SS doesn’t export any RGB value above those numbers? Easy…
Whenever we set a color value in our Eisenscript we also need to set the brightness. ALWAYS! We so this by adding ” b 0.7″ after the color setting. This needs to done for EVERY color setting in the script.
When you run the script you might think that the color isn’t going to be as “rich” as you see without this setting but in the final render it will be, trust me.
Lighting the scene
The exporter takes care of creating the lighting for your scene for you and gives you two options: a studio type lighting scheme and an HDRI setup. The HDRI, however, is turned off by default although we are going to see how we can turn it on and off in the next step.
How to export from SS
Now that we have our scene ready for export, let’s take a look at how to actually get the scene out of SS in a format that Lux can understand. In the first step we saw how to open the export window using the F6 key. Well, now we need to repeat that step and bring up that window again. Oonce here, we are going to select the Luxrender 1.0 option from the template drop down at the top (1). Next, rename the output file (2) to whatever you need and or change the output folder as well. Then we need to click on “modify” (3) at the top to be able to change one more setting before we export.
How to export from SS 2
Once at this screen we need to check the box shown with the red arrow. This is going to open a window with the exported .lxs file and allow us to edit it before saving. We need to do this for two reasons that I will show you in the next step. Click “OK”
Lux output file name
This brings you to the edit window which is where we are going to take care of the lighting and the name of the output file that LUX outputs when rendering.
As you can see in the highlighted line the default output file name from Lux is Structure_Synth_LDR. You cna leave this as is and Lux will save everything as that. But keep in mind that every subsequent render with this file name will be overwritten with the next render. That’s why I would recommend changing this to the same name that you named the file in the previous step. Just remember to put the name inside the double quotes. Also from here you can change the focal distance to get depth of field in your render and will see that in the next step.
Depth of Field
Next step is optional but can add a great depth of field effect to your render. To get this effect we first need to un comment the line by removing the # at the beginning. Then we need to change the 0 to the value we get from SS. Take a look at the following image to see where to find this info.
Depth of Field from SS
To get the DOF info out of SS we first need to be in our main SS window. In the image, right click and select “Show 3D Object Info”. Then we are going to look for the “Camera Plane Depth:” at the bottom of the window as shown by the arrow above. Write this nimber down so we can input it in the focal distance field as shown in the previous step.
Lighting
Now that all that is setup we move on to taking care of the lighting.
Go ahead and scroll down until you get to the section shown above. Like I said before, the HDRI section will be commented out by default so if we want to use and HDRI file we first need to uncomment (delete the # from all the lines begininng with “AttributeBegin” and ending with “AttributeEnd”) so that it ends up as shown above.
Now, you can use both the studio set up and the HDRI at the same time, however if you use both light groups you will have a speed hit. HDRI provides much better results at the cost of speed. If you do do this then you can turn either setup on or off in the Lux GUI but it will still be rendering both with the consequent reduction in speed.
A second option is to comment out the studio setup and just use the HDRI by adding a # to each line begininng with “AttributeBegin” and ending with the SECOND “AttributeEnd # “” ” just above the HDRI section. This is going to only render the HDRI. Again this is going to save render time.
So you really have three lighting options:
Studio setup – default
HDRI – need to uncomment this section and comment out the studio setup
Both – just uncomment the HDRI section. This is slower
That’s about it for editing .lxs file and the export preparation. All you need to do now is click OK and your scene will be exported and saved to the folder you chose earlier.
The final step is opening (you should be able to just double click the .lxs file) in Lux and watching the magic happen!


