https://i.ytimg.com/vi/Ttc_GVI291A/hqdefault.jpg
In this tutorial you will learn how to box model a cartoon face in Blender starting with nothing but a cube.
1. As we know from the previous tutorial, to enter edit mode, you press the tab key.
2. In order to do box modeling, you must be in Edit mode, where you can edit corners, lines and sides of your objects, or using the terms that Blender uses, vertices, edges and faces.
3. As we saw before, you can scale, rotate and move any of these, except the vertices.
4. With box modeling, you begin with a 6 sided cube. Choose ‘Face Selection’ from the properties panel at the bottom of the viewing pane and press ‘a’ to select all of the faces.
5. Pressing ‘a’ again deselects everything, but for now we want everything selected.
6. Press the ‘w’ key to open the specials menu and select ‘subdivide’ from the dropdown list
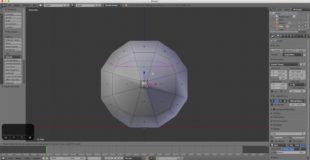
7. This divides each face of the object into further segments and increases the number of polygons. You can increase or decrease the number of cuts in the Mesh tools panel. Select ‘2’ for the number of cuts to create a Rubiks cube type shape.
8. Select the centre face on each side of the cube by right clicking and holding down shift
9. Switch to front view by pressing ‘1’ and then press ‘5’ to enter Ortho view and press ‘s’ to scale from the centre of each face. Try to make your shape as round as possible.
10. It’s looking a lot more round, but we still have some pointy corners. Select the 8 corners that are sticking out by choosing ‘Vertex Selection’ from the properties and then right clicking on each one, while holding down the shift key. Press ‘s’ to scale the corners inwards. This doesn’t actually scale the vertices, but moves them towards the centre of the object.
11. Press ‘1’ for front view if you’re not already in it. Go back to ‘Face Selection’ mode and select the face in the centre of the object. We are going to create a nose for our cartoon head.
12. Press ‘s’ to scale it down. Press ‘e’ to extrude and then ‘s’ again to create a nose. Repeat this process 2 more times, extruding then scaling up or down to create a cartoon nose.
13. Press ‘tab’ to go back to Object mode and select ‘Smooth’ from the Object Tools panel.
14. Go back to edit mode by pressing tab and use the Loop Cut tool by pressing ‘Ctrl+R’ to make a cut around the eyes and cheekbone area.
15. Switch to ‘Edge Selection’ mode and select the 2 edges where the eyes would be then move them in to create a kind of brow shape to the head, a groove or indent for the eye sockets.
16. Do another Loop Cut by pressing Ctrl+R, this time going down the middle of the face. You can right click to centre the loop cut perfectly in the middle.
17. Loop Cut one more time right across the middle of the head to add more faces.
18. Adjust the nose edges to make it seem ‘rounder’ by selecting individual vertices in ‘Vertex Selection’ mode and using ‘s’ to scale and ‘g’ to move the vertices until the nose looks round
19. You can use the Gizmo, the coloured arrows to push the vertices in different directions
20. Select the front faces of the nose and extrude them out. Move the edges of the cheek bones out.
21. Create an ear by selecting the faces where the ears would be and pressing ‘e’ to extrude .
22. When extruding the ears, look at the face from about a 45 degree angle.
23. Loop cut the ears and work on the individual vertices and edges to sculpt a better shape
24. Create holes for the eyes and mouth by pushing the faces in towards to the head’s centre.
25. Tweak these holes edges and vertices by adding more Loop Cuts and sculpting the shape.
26. Open the ‘Object Modifiers’ tab in the properties window. Press ‘A’ to select all.
27. Select ‘Subdivision Surface’ to smooth out the cartoon face much better. This is known as a ‘sub-surface modifier’ and Blender works out the equations to make the object smoother.
28. You can increase the number of subdivisions, but generally it is not advisable to go above 2.
29. Go to Object mode to see the finished face.Compare the old head with the new one by switching on and off the modifier. As we can see, the new one is much smoother and more detailed.
This has been a simple introduction to using box modeling to create objects in Blender.
source

2 responses to “Beginners Blender 3D: Tutorial 6 – Modeling a Cartoon Face (2.78 HD Update)”
You're awesome thanks for tutorial
Thanx, it's great for me as a beginner