https://i.ytimg.com/vi/Ca3qRDfsf5g/hqdefault.jpg
Join our community Discord!
https://discord.gg/EuDSCsc
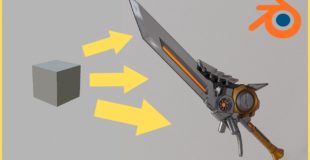
In this video, I’ll show you the basic steps in how to model a basic stylized sword using concept art in Blender 2.8. I’ll go over my workflow, tips and tricks, common issues and much more!
This first section will cover creating the low poly and high poly models.
Right off the bat, I’ll demonstrate my methods of creating the first basic starting shapes and how to break down complex shapes into more manageable pieces.
As I work through all the various pieces of the sword, I’ll be showing my though process and fixing my mistakes to demonstrate how to solve common problems you will face as you’re creating your models.
After the low poly is complete, we move onto the high poly. I’ll show you how to properly prepare the model for high-poly, how to use subdivision and bevels to refine and give your model that extra ‘pop’ needed to take your modeling to the next level.
Grab the Concept art here on my site:
Concept Art by Max Davenport.
——————————————————
Like the work I do? Feel free to join the community:
https://www.patreon.com/StylizedStation
Submit your speedpaints, models, sculpts & tutorials to the worlds best network of artists:
Find more tutorials at:
Top 5 Blender 2.8 tutorials for absolute beginners: https://stylizedstation.com/article/free-blender-tutorials-complete-beginners/
Looking to learn stylized assets in Maya?:

19 responses to “Modeling a Sword from Concept Art in Blender 2.8 [MEGA TUTORIAL]”
Thanks to my new patrons for joiing the team this week!
Daniel Andrade(dca3d)
David Glissmann
David Nortes Martínez
Eric Henriquez
Giorgio Romero
GodofFruit
https://www.patreon.com/stylizedstation
Man… some tips
Enable Native Addon named F2. Provided you have 4 vertices to fill in a row you just need to select the first edge and keep pressing F to close the loop..
Numpad Divide key "/" will make it go to something called Local View, which isolates the selected objects. It works as a toggle so you don't need to Select, Ctrl+I and H. Also it just unhides what was visible before and not everything which is pretty convinient.
Bevel modifier set to Weight it's an interesting way of sharpenning edges, select the edge, set the Edge Bevel Weight to 1. Use it before the Subsurf (actually sometimes you don't even need to subsurf specially with models with a lot of flat surfaces), this way you don't need to manually add the holding edge loops.
After bevel and subsurf(or not) think you should not use Edge Split modifier as it may bring you some unwanted sharp edges(actually split), that's why the bevel wasn't working good I believe.
Alternativelly to the Edge Split you can use Auto-Smooth which does pretty much the same but not spliting the edges…. but still don't think it's very useful for the HP model.
There is a way to select most of the sharp edges of a model while in Edge select in Edit mode, go Select> Select Sharp Edges, there is an angle slider. Then you can set the bevel weight, sharp or seam.
I'm just trying to help 😉
in my simple opinion the thing that makes this modeling tricky is because you use a lot of object for each pieces when you can use a single object for these pieces , then you can add more object in EDIT mode but when you go back to OBJECT MODE they still one piece I think you know what I mean , at least that's the best tuto I've ever seen before I learn more things that makes me improve my skills in modeling THANK YOU SIR
11:05 it get an error saying could not create merged face. Can anyone help please?
reference image sir
Random question that I always want to know, how do you get the thing that says what you're doing on the bottom left? an add-on?
second part pls
How do you do the loop cut?
How would you add textures to this?
OH
MY
GOD!
I can't wait to start with this tutorial. Thanks a lot man!!
I have a problem on making a face on 4 vertices. It is not working. The first time I tried only 3 vertices become a face. The next time I tried, it had error on it. Today nothing is happening. crazzy. btw I'm new in blender. thanks for your response.
https://imgur.com/a/b3SZfAq
I did it
Why didn't you use the mirror modifier? it would have been way faster than using symmetrize!
fyi, if you spam the F key with two vertices selected, Blender will automatically create the quad for you.
There were a lot of bad practices in this video… The first 10 minutes were me cringing every time he moved anything or extruded…. so much work for such a simple task — really no reason to work that hard.
Hopefully you’ve learned more about good practice since this video!
When I did that symmetry tool, both mesh were too far apart know a way where I could get them closer
"break it down into small manageable chunks"
3 hour video
Nice video. Would just make the video a bit shorter so i dont have to watch through 3-4 hours other than that it was a good video
Thanks for video will be very helpful keep up a good work, do you have some tips for begginers