[ad_1]
We’ve all seen behind-the-scenes footage, so it’s no surprise to find out that a great many breathtaking shots never actually existed in reality. You know the kind of shot I mean; maybe a group of heroic dwarves are walking along a precarious ledge, mere inches away from falling to their certain doom into an impossibly dangerous chasm. Then the VFX supervisor reveals how it was done, and it turns out that the actors were on a soundstage not even an inch off the ground, with nothing but a styrofoam cavern wall behind them. The rest is, of course, a matte painting.
The matte technique was pioneered a hundred years ago, taking advantage of the fact that preventing light from hitting film would render dead space on the film into which any picture (such as a painting of a fantastic set far too difficult to build) could be inserted in post production. The concept is similar to using painter’s tape when renovating your apartment or house; you line the alphaxor you do not want painted with masking tape, thereby leaving empty space that you can later paint a different color or leave unpainted.
With camera tracking technology, mattes can get very complex. But for this month’s article we will use a static plate to mask out a portion of our motion picture and swap new footage into the empty space.
Get some footage
For this example, you need a static shot; that is, motion picture in which the camera itself does not move. That means your camera needs to be on a tripod with no pans, tilts, or shakes from wind.
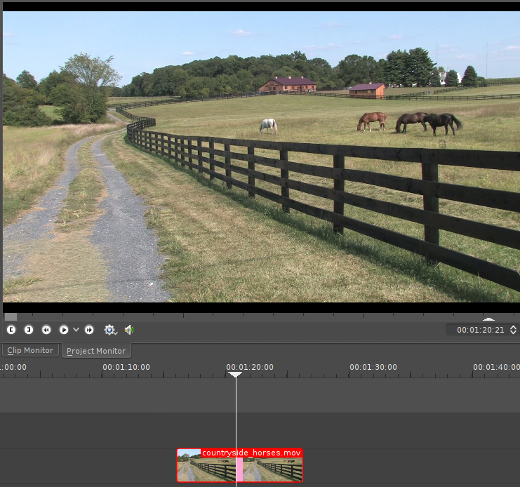
Import the footage into Kdenlive and drag it into your timeline.
Create a mask layer
Since it’s a static shot, place your playhead anywhere over the clip so that you see a frame of it in your project monitor. Right-click on the project monitor and choose Extract Frame.
Save the extracted frame to your hard drive in a location that makes sense to you (preferably in your project directory, but you know your own organizational scheme best).
We need to create a mask layer with fully “opaque” represented by white, and fully “transparent” represented by black. This is easiest to do in GIMP, so open up the extracted frame in GIMP.
There are several different ways to achieve a mask, and how you manage it will depend on the footage you’re using and what you have in mind. For this example, the mask is achieved by using the Colors > Threshold filter to reduce all hues to either black or white. This creates a noticeable horizon line. Since I want to mask out the sky, this is perfect for me.
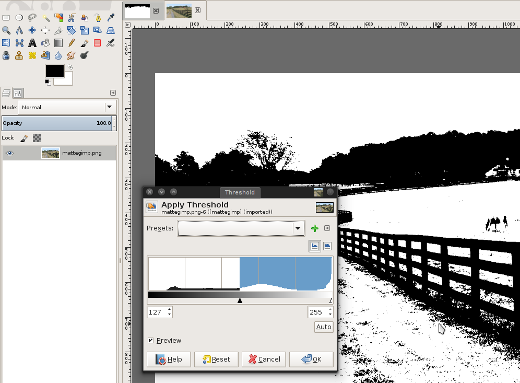
Once the threshold filter has been applied, I use Select > By Color to grab just the sky, then Select > Invert to select everything but the sky.
Right-click on the layer in the Layer Palette and choose Add Alpha Channel (if it’s not available, then your layer already has an active alpha channel). Then choose Edit > Clear to erase everything currently selected (replacing it with alpha).
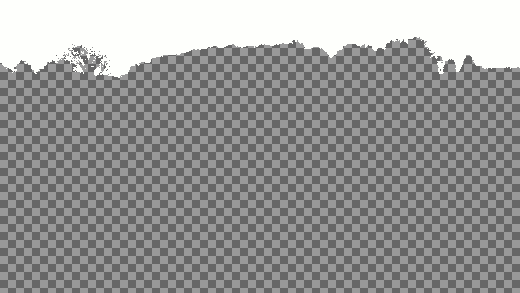
It’s not much to look at, but we’ll use it to govern what we can and cannot see through the project monitor in Kdenlive, so export the frame as a PNG and import it into your Kdenlive project.
Matte painting
For this process, I use three video tracks. Add extra tracks as needed until you have five in your Kdenlive project. To add video tracks, right-click on any video track label on the left of the timeline and choose Insert Track.
If we’re going to mask something out, we need something to fill in the gap we create. In this example, I’m using footage of some horses on a lonely Pennsylvanian farm, so I’ll mask out the sky and put in a more exciting time lapse sequence of clouds against a darker blue sky. Whatever you choose to use, import your matte footage or painting into Kdenlive and place it on the bottom video layer of your timeline (Video 3).
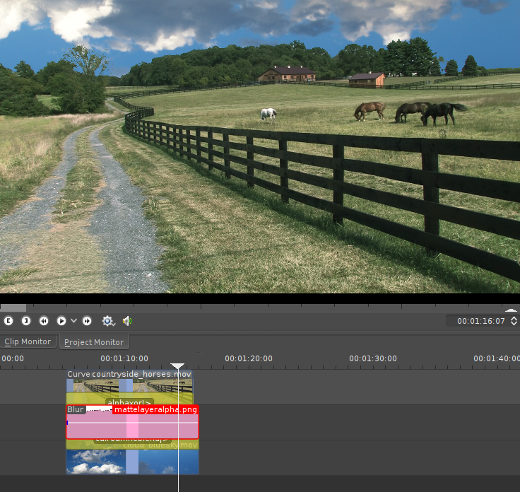
Just above your matte footage, place the mask layer that you just created in GIMP.
Right-click on the mask layer and choose Add Transition (recall that Kdenlive uses “transition” for what you might think of as a “composite effect” or “composite mode”) > Cairo Affine Blend. Set the transition effect to composite with Video 3 (which should be the default value).
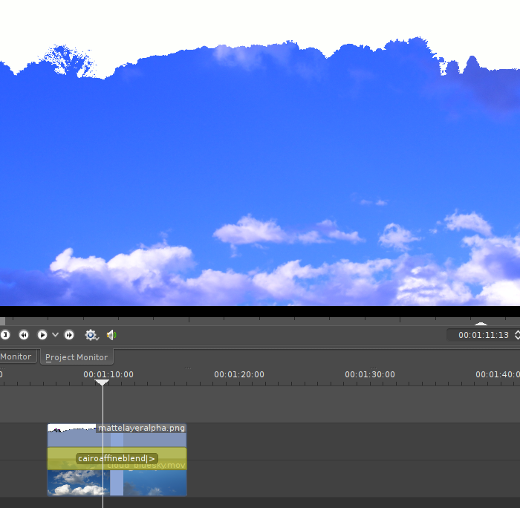
The result should be immediate—the mask layer’s white region is solid and the alpha channel is transparent to reveal the video underneath.
Don’t worry that this appears to be the exact opposite of the effect we are looking for; we’ll use another transition in a moment to reverse the effect.
Alpha XOR
To reverse the alpha channel effect and to introduce the plate, drag your plate footage to the Video 1 track. Right-click on it and choose Add Transition > alphaxor. The XOR (“exclusive or”) logic function results in output if one condition or another is true, but no output if both conditions are the same. In this filter’s case, the conditions are channel types; no output is produced if two opaque regions or two alpha regions meet. Output is produced where alpha and opaque combine.
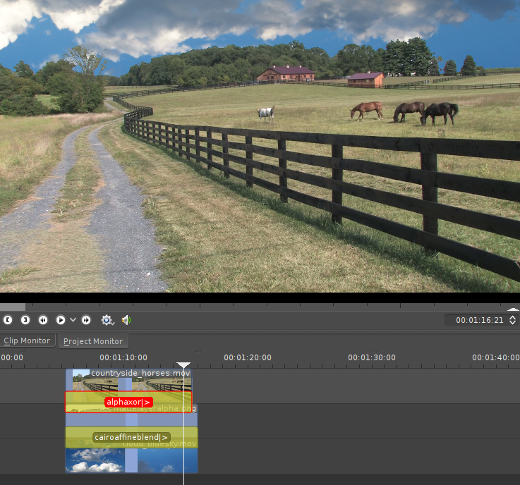
The result is that opaque regions fail over to the lower video track, and mixed regions fail over to the upper video track.
There are other composite methods to achieve the same effect, you just have to think about how black or white values interact with different composite modes. I chose this method because of the quick and direct results, but some very nice effects can be achieved by using other modes.
Finishing touches
The current composite is a little more saturated in the sky than on the ground, so use Add Effect > Color Correction > Curves to balance Luma and colors as needed.
Granted, serious matte work in Kdenlive is not something you will do all that often; Blender and Natron are better suited for extensive compositing. Still, it’s a useful trick to know for quick mattes and something you can use easily with a little practice.
[ad_2]
Source link