https://i.ytimg.com/vi/obB9T3jXlak/hqdefault.jpg
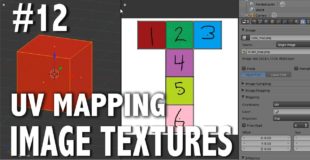
In this video I demonstrate and explain how to ‘unwrap’ a model by creating seams, how to export tat mesh’s UV map into a graphics editor like Photoshop, paint a texture, then bring the image back into Blender to apply to the object.
source

34 responses to “Blender 2.6 Tutorial 12 – UV Mapping (Image Textures)”
How the fuck can I do it in cycles render??
thanks dude
Thanks. And your mic is fycked up….
What if my object is a circle without really any edges. I already applied the subdivision to it so it has like a million vertices.
thanks, really helped
Fantastic… thanks! I just successfully did this in Blender 2.78.
Danks.
Thanks you saved my day. 😀
OMG THANK U SO MUCH THIS REALLY HELPED ME THANK U!
What am I doing wrong. Here is the snapshot.
https://drive.google.com/file/d/0B_DeaU8usEjAeDVzZDZhbUlOQkE/view?usp=sharing
I love you, like a fat man loves heart disease. You made it possible for me to fucking port models from gmod to table top sim
Useful tutorial… Thank you sir.
It's great up until the point I don't have a "Mapping" section of the properties tab, then the whole thing takes a dump.
smacks lips xD
Thank You Much! Liked!
People! BornCG made the 'same' video for blender 2.7.
It's here: https://www.youtube.com/watch?v=Tovu1A0LxeQ&index=14&list=PLda3VoSoc_TR7X7wfblBGiRz-bvhKpGkS
It wont show the texture when i export
I'm using 2.76 and a lot of the UI panels for textures and materials are no longer the same. I've gone though this step by step and matched it as closely as possible (given that some of the tools are no longer there) and I can't get this working.
When I press unwarp, it put all my face in a corner. In big it doesn't make a T like you at 3:44.
quite ok..
GameYan Studio
This does justice to the Blender render, but how would I do this in Cycles render? I have been creating all of my projects in cycles and I don't know how to add texture maps to them.
7:12 Apply image to cube
I like the way you explained this! Nice video, but sound wasn't that good..
How would I do this with a non-cube shaped model? I'm making a sword and when I try to UV unwrap, it says it's a nonuniform mesh and that unwrapping will operate on a wrong size scale or something like that.
Thanks This was so helpful. Straight to the point
When I try to UV only selected faces, it applies the texture to those faces properly, but then applies them elsewhere as well…
Thank you for this video. Was wondering how I could export the UV unwrap as a separate PNG file. Works like a charm!
awesome video! I'd been looking for a tutorial which explained how to draw textures on 3d objects but didn't realize it was called "UV mapping".
A shortcut to mark and clear seams is ctrl + e. Mark and Clear them from here.
This does not work! I'm trying to get textures to work for a model of mine. I do everything that they do, i've tried about 20 or so videos, and nothing works!
Hi I really like this tutorial? Would it be okay if I downloaded your vid and add it to my site?
are you speaking from the outer space?
query: how do i exit the render
nice video!! clear and short!! excelent!!