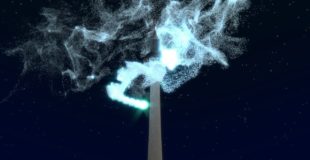
https://i.ytimg.com/vi/9-_vQb7Rycc/hqdefault.jpg
Blendfiles: http://www.blenderdiplom.com/tutorials/416-tutorial-advanced-particle-trail-in-blender-264.html
German Version / Deutsche Version: http://www.blenderdiplom.com/de/tutorials/508-tutorial-advanced-particle-trail-in-blender-264.html
source

41 responses to “Blender 2 64 Tutorial I Advanced Particle Trail in Cycles”
Nice! great explanation!
Wonderful Stuff. I just wish you had offered us a short animation at the end showing how it appears as a 1 example of a finished version.
Excellent
Super Cool!!!
this looks so very cool! thank you very much! OT: would it be possible to freeze the particles at a certain frame and then export/import that as a static object into a different scene for decoration? (i mean as a movable 3d object, not as a rendering overlay)
32:58 . how can the images showing up? mine didn't show.
+Adventures In Blender FYI
Are you german? 😀 sounds like you are
Can you make that particles look like ashes so they get more random movements?
I think my pig whistles!
As a newbie to Blender, all of the videos you present are clear and concise. Thanks for the AMAZING works.
Here is what I made using elements of this tutorial
Blender Animation: Particle Flurry
Opinions?
im amazed and congrat ….
A perfect tutorial! Not to much theory but very enough to understand everything bit by bit. Congratulations and my thanks! 🙂
I would like to say thank you for creating such an easy to follow tutorial.
Amazing!
I don't know where to start… Awesome maybe… Yes, awesome does it. Great tutorial. Your videos have pushed me deeper into blender than I ever expected. Thank you!
thanks! This tutorial helped me and was fun to do.
OK … übersehen. Verstanden hab ich's trotzdem. Danke nochmal für das tutorial.
I am rendering this szene, now … my computer is dying!
Grüße aus Erlangen 🙂 Btw: Kuck mal in die Beschreibung für die deutsche Version des Tutorials…
Also, als ich den Fernsehturm gesehen habe, hatte ich ja schon einen gewissen Verdacht, aber mit deinem akzent … du solltest noch an deinem englisch arbeiten, das klingt sehr deutsch… ich bin übrigens aus dresden.
…
(If you can't read this … i was wrong with this comment, ignore it.)
Yes, go to the right position in the timeline, then go with your mouse to the time-valve, press i and the keyframe is added.
Are you using Cycles?
hey there, parent path does not come up when I try to add the object to the path? any help?
I am unable to find any of the new nodes in blender 2.68 under composite, shader, or texture nodes. Any idea where they are or how I can add them?
Check the particle settings – in the "render" tab there is a checkbox "emitter" – uncheck it. You can also find that somwhere in the video…
yep. Would it make a difference because I'm using a Mac?
Hmm, did you try to unpack the textures? That might help…
I don't know why, but I am up to 9:04 of your video, and when I render the image my objects are pink. Do you think this is because I am using Blender 2.67 as it is a later version of Blender?
I'm not subbed to you… Fixing that now!
brilliant! Thank you
This is awesome, just what I needed, great tutorial
Amazing
Thank you so much!!!
Thank you for the nice tutorial, I like how you really have a great eye for detail, which makes the result a lot more realistic 🙂
Wow I learnt so much here! thanks Godfred..
I'm having a problem at 23:30, my proxy object doesn't disappear
yep, just move your mouse over the field you want to keyframe and hit 'i' 🙂
😀
Is it possible to view your PC spec's somewhere?