https://i.ytimg.com/vi/scPSP_U858k/hqdefault.jpg
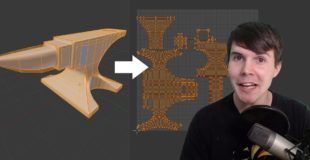
Blender tutorial about how to UV unwrap in Blender, so that you can texture your model.
Download the model: https://drive.google.com/open?id=0B8PFSrI9B3iwanNtYWp3eFU4V28
Texture: https://www.poliigon.com/texture/2425/metalness
———————————————–
Follow me:
Twitter: https://twitter.com/andrewpprice
Instagram: http://instagram.com/andrewpprice
Facebook: http://facebook.com/blenderguru
ArtStation: http://artstation.com/artist/andrewprice
Blender Guru: http://www.blenderguru.com
Poliigon: http://www.poliigon.com
source
39 responses to “Blender Beginners UV Unwrapping Tutorial”
can someone help me, im unwrapping the seams the exact same as him but for some reason the end of my mesh goes off in a bend?
The worst part of blender that i hate
Who else agrees?
I cheated! I could not select that inner box correctly so instead I click on the dots in the UV Editor that matched the ones The Guru had in his. I am so ashamed. (not haha)
Can someone tell me what wrong with my mesh because in the material menu, my anvil refered as plane and not as cube. Give me enlightment plz
Hey Andrew, did you apply the mirror modifier on your face came? hit like if you understand that,
Big thanks for the tutorials
Jesus Christ, Finally – I found what I REALLY Need: useful & simple! GURU, THANK YOU!
o.0 AAARGH 0.o
if you need some information about anvils and forging: watch 'daily steele'
The link for the texture is broken, here is the link for the same texture: https://www.poliigon.com/texture/metal-spotty-discoloration-001
This video was exactly what I've been looking for for the last 4 hours haha.
Thanks Andrew
Once again, epic tutorial you've done here Andrew.
Hello Blender Guru community!!
I am new to this but I am trying to make a HUGE building. I have some questions that I would be really in debt if you guys could help me.
So, I have already modeled everything (It was an eternity) and now I want to go for the photorealism! Here goes the list of my issues:
1- Separate the Inside Walls from the Outside Walls to create different texture for each. (in order to make the outside rough stone walls and inside a nice smooth white painted walls)
2- Avoid the Repetitive Texture Patterns. ( I cannot run away from this issue working with "normal textures" as with the PBR textures. It always goes like an ugly repetitive pattern.
3- Be able to create a Blend (stack organically) 2 or More textures (if possible, PBR textures) to the same wall to create a more realistic result. This comes because the Large Crude Cement modern buildings feel really fake because of the repetitive patterns.
4- Be able to have good resolution in the textures! This is an issue because not putting the UV meshes overlaid, the mesh occupies little space, so, huge pixels and really ugly and disappointing result… Should I make an UV mesh and Texture to Every different face of the building? If so, how would be the management of the different textures and materials and so on?
I've looked for this answers online, but I could not get them in any forum. The question might be the wrong ones, but please, help me find the right path!
Clicking the texture link and "page not found" error.
it only took me 2 seconds to find a top view https://www.stockhoffsonline.com/acatalog/Delta%20Future%202%20top.jpg
Holy shit this is easy.. Why I am too lazy huh? Well thank you sir!
Maya is better in that you don't have to slice everything. you relax UVs with relax tool, and another tool. It moves the UVs around like you move pie dough on a pastry board around, you want pie dough uniform thickness, so you move it around, you want UVs evenly distributed and not stretched areas of mesh, so you relax the map by redistributing the UVs around. Too many seams are bad for render speed, especially in a game it gets glitchy.
Annotations
PROBLEM: The texture is not visible in the 3D viewport @4:50 like his is. how do i fix this? I am using Cycles.
traceback most recent call last blender
You can erase seams by using the texture paint method using the "smear brush" or "soften brush". Click on the brush picture in the texture paint tools tab (t). Seams to work for me
I placed a light close to the seam, rendered it from up close and couldn't see the seam.
You can even clone bits of the texture with the clone brush; right click to clone, left click to plonk the cloned area on the seam to break it up.
Nice. Everything is blue in my project and still my texture goes in random directions, cuts at certain places etc. What. The. FUCK.
puto jahahjjajaja
Wait, isn't it better to use the stretch and the sync to select the seams that we want to mark from the UV editor?
thanks !
Is there any way to move this UV map to the center without losing texture position ?
i tried to move manually but not help (can't match exactly position of texture image .
https://drive.google.com/open?id=1woyKdPw8uSAAedgcqgpAPV7IHGIufsdG
happy good times !
I know this is older, but does anyone know the Maya equivilant to the, "Unwrap" button?
do you make animations?
and if you do please make a tutorial
i had no streches i just watched you i dont know why maybe they fixed the auto unrap
I love your box unwrapping animation!
hi there, I have a question if you're still answering them. I have a very high polly mesh that I've tried to seam (I'm very new to normals and texturing so bare with me here.) I've tried to place seams on it but I've ran into an issue every time I try to unrap it. it'll come out into a massive amount of parts regardless if I've only seamed a few. None of the seams were connected to make multiple parts but regardless it does this anyway. any tips or ways I can solve this problem? Thanks for your time mate.
(also amazing video, you do a fantastic job in explanation.)
okay mr smart, how will you UNWRAP model if he have 10000000000000000 FACES HM ?, its imposible! so blender is stupid, cuz you cant even make subdivison surfece to get textures later, cuz EVEN if i DO "MARK SEEMS" if model has 100000000000000 faces, you will got UVMAP with bilion, tons of just black "."."." (DOTS) and 3 years later pulling just that DOTS you didnt finish nothing with textures, so shit !
quick tip that i found a couple of days ago that i find quiet useful. hit SHIFT+F in the object mode lets you free roam with W,A,S,D
I'm trying this, but everything is coming out black
I have this issue with my mesh and I have no idea what's causing it: https://vgy.me/fNvERT.png
Only cycles render
Holy crap dude, you just gave me the solution to a problem I was having in three.js with .obj not having UVs. Thank you!
The alt-click doesn't work.
Can you actually paint over a texture file? For instance if some parts of the anvil should be rusty?
5:55!
SEVERATION