https://i.ytimg.com/vi/Z6vuhnyHk9g/hqdefault.jpg
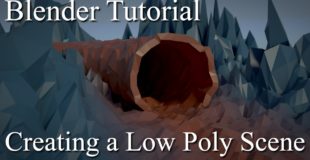
In this Blender tutorial we create a low poly scene! We first start out with the modeling, next the materials and sky. Finally after some camera settings and rendering, we do some post processing. This is a pretty fun and easy tutorial to follow along! If you have any questions make sure to leave them in the comments below.
Come follow me on social media!
Instagram – https://youtu.be/2qebTSTjdg4
Twitter – https://twitter.com/BlenderMadeEasy
Facebook -https://www.facebook.com/pages/Blender-Made-Easy/654488747984849
Website – www.blendermadeeasy.com
Gaming Channel – www.youtube.com/therealsyberius
Make sure you leave a like and subscribe! 🙂
Replay the Video!
Blender Tutorial
Low Poly Tutorial
Blender 3D
Creating a Low Poly Scene
Cycles Render
B3D
3D Models
Sky
Materials
source

39 responses to “Blender Tutorial – Creating a Low Poly Scene”
thanks): I really enjoyed watch this video.
cool
Lift, gamma and gain are the correct terms for a colorist because that's what you're doing with the colors. Nothing wrong here, all the good compositing packages will call them like that.
awesome tutorial..thanks a lot.
Amazing . Honestly he should make more such videos ! keep it up
I wouldve done the ground first then mountains because you can hit "randomize" on the toolbar and it will randomize the ground for you and you can set the value
Nice tutorial,
Please see my channel for other tutorials
I Can't make gradient texture in node at version 7.9b. Are you Know something about it?
I stuck at 1:42, how did you change the size of the brush?
that looks pretty good
nice video🏟️😘
love your videos! 🙂 i just need some help, when i tried to add the texture i cant click on gradient texture.what should i do?
dude you are going way too fast try to slow down some. Also try to explain more what everything you did does. Otherwise really good tutorial
Awesome video keep up the good work.
Pls try to make more landscape and game assets.
Thx
Help theres nothing in my node editor!!
One rule of low poly you forgot:
Good idea to triangulate your mesh.
I know this is an old tutorial but I need help, I did the Proportional editing and it broke, it is always on really large circle. What do?
Cool!!!! Nice tutorial.
when I went into my node editor there was nothing and when I tried to add the texture there was no texture….Help???
Whatup! I need help making a scene of a low-poly rigged character sitting on a log next to a campfire 🙂
Thanks….have a fantastic day!
When I apply subdivide smooth nothing happens.
can this guy go any faster
When I try to do the gradient I select material view and it doesn't show up on the plane, any ideas?
Thanks for the super helpful tutorial. Now I can make low-poly anything! 😀
Note: If you build everything in the wrong direction, making the rotation of the gradient in the wrong direction, just add a texture coordinate node feeding into a mapping node at the beginning of the nodes. Then, set the z rotation to 90 before changing the x location to 0.900.
Started playing with this last night, awesome fun.
Subbed
Awesome tut! Thanks!
when i extrudede the circle its now not an independent shape is connected to landscape, how do i fix this
Help! I want do do a blender tutorial, how do you enable the screencast keys at the bottom corner? There is a website, but nothing seems to work! plz help! thanks
I don't have a numpad..
I like it! Simplifies small scenes
great tutorial =) Really helped me a lot!
Also contrary to my current account I'm logged into, I do do animation =)
super helpful!
an enjoyable tutorial… thanks a lot 🙂
You should create an ARTSTATION profile?
Well made tutorial 🙂
Could you pleases explain me what was the empty for? I am new at 3d modeling 😀
Your videos are super helpful and awesome to watch!