https://i.ytimg.com/vi/tDO07-a2lm0/hqdefault.jpg
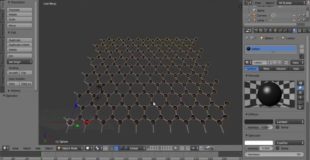
This tutorial shows how to make model of a sheet of graphene. Graphene is a form of graphite, forming a sheet one carbon atom thick. It has properties of high strength and and high electrical conductivity. Now that engineers can work on an atomic scale, materials like graphene will be used in more and more applications.
The model is made using Array modifiers and it is possible to quickly make a very large sheet of graphene. Large models with a high number of faces, can cause a computer to slow down or even crash. The model is designed to have a low polygon count which means a low number of faces.
Each carbon atom forms a bond with three others. The resultant shape is a grid of hexagons. The angles between the ‘sticks’ are 120 degrees.
If the sticks are 1 unit long the x axis distance between atoms is given by a right angled triangle with 30 and 60 degree angles and a hypotenuse of 1
The x axis distance is the sin(60) = cos(30) = sqr(¾) = 0.866025404
If the stick is two units long then 2 x 0.8660254 = 1.73205
If there are two blocks in the array then the offset needs to be doubled
2 x 1.73205 = 3.46410
The steps are –
Press X to delete the cube
Add, Mesh, Cylinder
In the Tool Shelf, set Vertices to 4 and the Cap Fill Type to Triangle Fan
Change the View from Perspective to Orthographic and to the Front view
Press S (scale) hold down shift and press Z press .1 press enter
Go into Edit Mode, with all vertices selected press G (grab), Z, -1, enter
Go into Object Mode, duplicate (shift D, enter), press R (rotate), 120, enter
Duplicate (shift D, enter), press R (rotate), 120, enter
You should now have three cylinders forming a Y shape
Hold down shift and select all three click Join
Go into Edit mode, Remove Doubles and back to Object Mode
Name the object ‘sticks’
Object menu, Apply, Scale
Click Modifiers button, click Add Modifier button, click Array
Untick Relative Offset, tick Constant Offset
Set X offset to 1.73205
Set Z offset to 3
tick Merge
Click Add Modifier button, click Array
Untick Relative Offset, tick Constant Offset
Set X offset to 3.4641
tick Merge
Click Add Modifier button, click Array
Untick Relative Offset, tick Constant Offset
Set Z offset to 6
tick Merge
Add, Mesh, Sphere
Segments 6, Rings 6, Size .5
Duplicate (shift D, enter)
Set the location of the duplicate X 1.73205 Z 3
With the duplicate selected hold down shift and select the original sphere, click Join
With the spheres selected, hold down shift and select the sticks
To copy the modifiers to the spheres, in the Object menu, Make Link…, Modifier
Select the spheres
Click the Material Button, click the New button
Call the material carbon
Set the Diffuse colour, Red, Green and Blue values to 0.02
All files can be downloaded from my website –
http://blender.freemovies.co.uk
source

10 responses to “Blender Tutorial Making a 3D Model of Graphene (With a Low Polygon Count)”
Please, put on some tutorials of how to make MoS2 sheets. I tried with modifier and array tools. But, got lost in the coordinates system and all the things are messed up.
Does anybody know how to render the full structure?
Thank you in advance…
I am trying to plot 3D Graphene lattices with blisters in some places. Can you help me with that? I have no idea about the program.
This video is really very helpful. But I could not save the whole structure as image. While converting this as render image it only shows a part of the sheet. Help me how can i adjust the camera so that i can get a nice 3D sheet as JPG image form.
This is a great tutorial. Could you please make a tutorial on modeling the atomic layers of MoS2, similar to the graphene ?
Very good Video!!!
Superb! Exactly what I wanted (I wanted TMDCs though, like MoS2 monolayer, but this is good to start)
Wow, you gave excellent instructions and got straight to the point, no intros, no outros. I like it! You my friend, earned a new sub.
Right to the point. Nice! 🙂
I watch your videos at 1.5 speed 😀