https://i.ytimg.com/vi/jNzuXO31qcg/hqdefault.jpg
Get the material node setup screenshots here: http://www.blenderguru.com/videos/create-realistic-materials-with-cycles
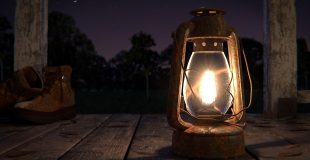
Discover how to create realistic materials using the Cycles rendering engine.
source

20 responses to “Blender Tutorial: Realistic Texturing with Cycles”
andrew~ can i use your rustic lantern shot image for my school design paper? I wanna use it as brainstorming image for my concept called lanter. It will be one of 8 images but no explanation… since im more focusing on the concept explanation than the images i used. im an architectural lighting design major! let me know if its okay! thanks
Thank you very much dear!!!!!
that was soooooo helpful thank u guru ♥
I didn't even know you didn't had to have a special texture that was exactly tuned to be a bumpmap or a normal map…
im using cinema4d i'm a bit skeptical about blender , but i saaw the capabilities of cycles and im interested , i could actually use it for rendering….
16:44
The light trick doesn't seem to work for me. Using v2.76. Any help is very appreciated!
How do I save my image after the composite?
and how long gonna this take to render i bet abt an year
By far the best tutorials for blender on youtube. Thank you!!
At 30:00, would using an array modifier be a good idea for the floorboards?
At 12:00 why couldn't you just alter the roughness for the Glossy shader?
thank you for this. Very useful.
probably shouldn't of tried to defend your comment on hunting ( probably just keep that to yourself ;), camping is enough ( research Distilled water Therapy and Orine/Shivambu kalpa xxxx , we DON'T need meat !! XX xx )……..otherwise, great work, super tutorial too, you are a great help, thank you x
i can only say THANKS!!!!:) you are the king of blender:D
I'm not able to immediately get such a clear render result simply by removing the glass mesh, nor does the Light Path node trick appear to work for me. I still get way more blown out white fireflies with the glass mesh hidden (at 10 preview samples) compared to your nice orange glow (at 10 preview samples). I figured by 2.75, the solution was simply to turn off Cycles' reflective & refractive caustics and remove the Light Path node trick, but that doesn't seem to do anything (using the Light Path trick or not). I just can't get the same nice preview render you're getting at 19:50 simply by removing the glass mesh. It must be something setting added to Blender since you did this tutorial, but what? Any ideas?
Nice video, very helpfull!
it doesnt work. the slider thingy in the coloramp has no effect and changes nothing
i cant do the same things with you 🙁
+Andrew Price I know what animals you mean… Foxes, rabbits can destroy crops and livestock.