https://i.ytimg.com/vi/06A_l95vJWw/hqdefault.jpg
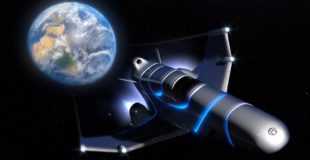
Blender tutorial showing you how to add materials, lighting and compositing for a spaceship scene.
Go to the tutorial: http://www.blenderguru.com/videos/create-a-spaceship-part-2-of-2
source
https://i.ytimg.com/vi/06A_l95vJWw/hqdefault.jpg
Blender tutorial showing you how to add materials, lighting and compositing for a spaceship scene.
Go to the tutorial: http://www.blenderguru.com/videos/create-a-spaceship-part-2-of-2
source
48 responses to “Create a Spaceship in Blender – Part 2 of 2”
i love for your work….it is realy cool.
Hi Blender Guru, thx for your great tutorial which is a very big help for a beginner like me, here what i did : http://pasteall.org/pic/index.php?id=118628
2:30 Gun Metal Blue
is there any tutorials on how to make a flying spacship animation ??
Dude you waste so much time to talk much shit…
31:47 Your resolution for the image texture is too low. If you had used Inkscape, you could have gone back there and re-exported the bitmap at a higher resolution. With Photoshop, you can’t do that.
24:08 I would have used Inkscape. It’s a better object-based drawing tool than Photoshop. Photoshop may be fine for doing paint-type stuff, but that’s not what you’re doing here.
is there a way to make the black color in the afterburner setting to be transparent so the blue flame would just fade away?
I bet using the one with JPEG artifacts would make for a nice abandoned version oftheship
Man, good tutorial. That compositing though… I went through it and now I deserve a drink.
can you redo this part plss? its way diffrent in the newer versions of blender
Hey one thing that I think helps here is to send the render engine to Cycles. It gives you the options that you can directly follow the tutorial with.
Magic! You are great…
hello, really well done tutorial is you I am and I love blender
https://itunes.apple.com/th/app/slots-in-space-game/id1021538725?mt=8
1st off, thanks a million for sharing Andrew, as usual. = The light emitting obj in the 2nd Scene is not showing in the rendering. Hence once setting up the Compositor nodes it only shows a black scene when I choose its index number in the ID Mask node
2ndly, Although I have followed and re-revised many times your steps something is not working for me
Feel free to get my .blend file:
http://blenderartists.org/forum/attachment.php?attachmentid=393128&d=1438720252
and or join my BlenderArtists thread:
http://blenderartists.org/forum/showthread.php?377937-I-can-t-see-the-2nd-layer-rendered-in-the-Compositor
Thanks a bunch in advance
Good job on making the length 1:23:45
You could use RGB Curves to take down some of that fluorescence. I find them useful. I use them as much as you use color ramps!
Hi Andrew, this is an amazing tutorial and I am loving following along however I have gotten completey lost with regard to what happened in the compositor at 1:11.36 after you paused to fix the issue. Can you post a screen or two of what the whole node screen should look like? Also did you change anything in the node groups as no matter what I do I cannot get the starfield image to show in the "add" mix node after the "afterburner" node group. Please help!
Thank you for the great tutorials, I didn't create the exact same thing but I really learned a lot from this one. You can see what I did at https://plus.google.com/115530143450904906677/posts/MptsMPnRbEs
and https://plus.google.com/115530143450904906677/posts/SSmc49WQswF
I'm having trouble with the bump map. I unwrapped everything very nicely (I think) and saved as a png, but the line still has some jaggedness to it. Brush was at size one and hardness all the way up. I think I saw in your video that you had the same jaggedness to your line. Is there any way to make this cleaner or am I doing something wrong?
+Andrew Price can you make the star trek enterprice. this is my idea of what i think u should make. i can make it and i have but it take quite a while with all the detail and that.
You barely understand this with the newer versions of blender
really bad compositing andrew;) you have 2 amazing things to look at i don't know on what i should focus.
my material dont have any "index MA" in the compositing… My material only have "image, alpha, Z" Please help me. I'm using blender 2.70
I have the material created very much like the one in the video. It previews correctly, but it's not displaying on my object in the same manner as it does at the 10:00 mark. There's no gloss to the material at all, it's like a matte finish. The shape of my ship is different, is that the reason?
Great as always!Good job man
It doesn't make sense with those "slip stream" lines at the wings since it's in space and there's no wind in space. Anyways good tutorial learned alot!
Thank you Andrew for this great tutorial! Really helps me a lot for modeling spaceships for my game. You're my favourite Blender tutor.
You are a comedian sir!
The reason if u don't know why the jpeg did that is because its a lossy file. Meaning it takes advantage of what the eye cannot see and breaks the file down giving you a smaller file with the same look as a png but a different picture. Obviously jpegs are not good for rendering unless you want that effect.
Arabians read from right to left, you need to mirror the image for Arabains! lol
Question about unwraping the image, wouldn't it be simpler to use 'project from view' from the TOP view it's perfect for a plane and wing?
Thanks Andrew , you gave me some good ideas.
when adding the panel lines how do you add colour? it wouldn't do it for me.
learned a lot.
amazing. you truly are the blender guru
so i watched this video even a long time before my previous comment. but this time id just like to say i actually made a model using this tutorial to that im making money off of. its amazing what we can learn from inspirational people like you andrew.
Okay i got it, if anyone has had the samre problem, set it to cycles render at the top
When i add the material for the plane at the start, above the uv sphere, i dont see those options that u have, i cant set it to be an emitter, there is no such thing as "surface" or anything like that, just the usual "preview", "diffuse", "specular" bookmarks. Any idea ehy?
Excellent Tutorials Andy – Thanks
It may be that you have blender render set instead of cycles render?
Great tutorial Andrew! I am using version 2.68a so some things have changed but I realize that you really know what you are doing with Blender. Great work and thank you for posting this!
Hey guys could anyone help me with the UV Unwrapping? I've followed everything so far but when I unwrap my ship, it puts the front of the ship in the image editor fine, but everything beyond the black vent is bundled into 1 point to fit it into the wrapping area. help!
i just thought of this. on the panel subject, didnt you kinda already technically panel it considering the glow cut design? why do i write these? no one ever looks at these XD
I really realize how big of a noob that I am I was lost a long time ago in part 1 but I think it's amazing what you can do in blender and its really amazing what you pulled off thanx maybe when I learn more I can understand this better but a really awesome tutorial.
Such a helpful tutorial. Thanks Andrew, I've learnt a lot.
at 1:00:21 why didnt he just copy the group and set the id mask in the new group to 2?