[ad_1]
In the world of IT, keeping a consistent experience across your machines is essential. Imaging, also called disk cloning, is a process of copying the contents of one hard drive onto another.
IT professionals create what’s often called a “golden image” with desired settings, tweaks, and software installations. This image is then uploaded to a server and distributed to other devices from there.
Commercial products like Symantec Ghost and Acronis Snap Deploy have offered means of capturing and deploying images with handy features like PXE boot deployment, driver injection for Windows, and post-image tasks. However, these programs can be costly and not well supported by their corporate owners.
Thankfully, open source imaging solutions like PartClone, Clonezilla, Redo Backup, and CrucibleWDS exist. Each has its own unique advantages, and some use parts of each other.
The FOG Project
The FOG Project came about to provide a complete, open source cloning and device inventory system. FOG takes advantage of open source tools like PartClone, TFTP, iPXE and the Apache2 HTTP Web Server to create an all-in-one imaging solution.
Installing FOG
There are a few ways to get FOG up and running: Install a stable version through a package manager, or install a development version with Git or SVN.
In this tutorial, we’ll cover installing the current stable version (1.20) and the bleeding edge version via Git.
FOG can be installed on Debian-based systems (Debian, Ubuntu, Mint) and RHEL-based System (RHEL, Fedora, CentOS). The installation steps for either are virtually identical.
Stable vs. trunk
You might be asking yourself which version you should go with: Stable or trunk? This is largely a matter of preference.
For a lot of people, stable (1.2.0) works perfectly fine. However, you may not have all of the new features and functionality offered by newer builds.
On the flip side, pulling from trunk may give you bleeding-edge features, but is updated very frequently and can have some bugs. I suggest trying both to see what works best for your environment.
Installing a stable build
1. Install the distribution you wish to install FOG on and fully update your system’s software packages. Updating packages prior to the FOG setup is important, as updating post-install can break the install. So be sure to run apt-get update or yum update, as appropriate for your distribution.
2. Log into your server and run the following commands to download FOG stable 1.2.0 and run the install script.
wget http://sourceforge.net/projects/freeghost/files/FOG/fog_1.2.0/fog_1.2.0.tar.gz
tar -xvzf fog
cd fog
cd bin
sudo ./installfog
The installfog.sh script will ask a series of questions about your environment.
Installing trunk via Git
1. Just as when installing the stable build, be sure your system is up-to-date before installing.
2. Log into your server and run the following commands to download the latest FOG build via Git and run the install script.
git clone https://github.com/FOGProject/fogproject.git /home/YOURUSER/fog
cd /home/YOURUSER/fog
git pull
cd bin
sudo ./installfog
Once you pull down the latest build via Git, the setup process is nearly identical to the stable version. Running the installfog.sh script will ask you a series of questions about your environment prior to installing. Be aware, a new build of FOG may have additional or different options in the installer.
The FOG dashboard
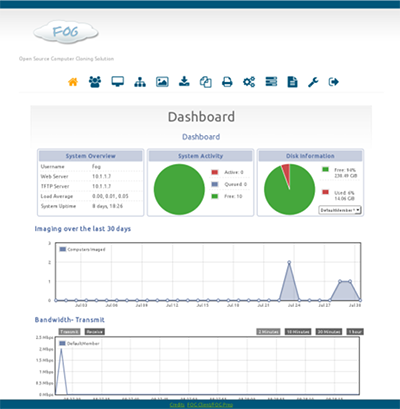
The dashboard is one of FOG’s greatest strengths. The web-based dash provides a single pane for managing devices, images, storage nodes, and deployment tasks. Near the top, you’ll notice an array of icons leading you to the different sections of the dashboard.
Capturing an image
In order to upload your first image, you have to create it within the FOG Dashboard.
Navigate to the FOG Image Management page and choose Create New Image from the menu on the left.
FOG create image
Give your image a name, choose the operating system the image will contain, and choose your disk layout and file system setup. Click Add when done.
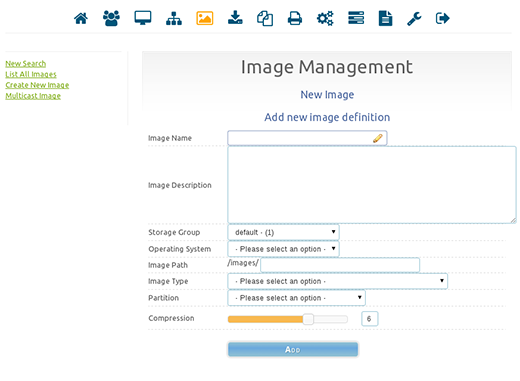
The Compression option shown in the picture is available on newer builds of FOG.
Register a host
Now that you’ve created your first image, you need to assign it to a host. Assuming you set up your DCHP options correctly, you should be able to PXE network boot you devices into FOG. You’ll be greeted by the FOG menu, where you have a few options to choose from.

If your device is not registered in the FOG database, you will be notified at the top. To perform a full registration, choose Perform Full Host Registration and Inventory.
You will be prompted to enter in some information about the device such as hostname, group membership, image ID, product keys, and asset tag numbers. At the end of the process, you will be asked if you want to image the machine now. Say no, as we don’t have an image uploaded yet.
At the end of the process, the data will be sent to the FOG server and the host will reboot.
If you mess up or want to change the info you entered, you can easily do it within the host management page in the FOG Dashboard. Just find the host you need to edit and click the pencil icon.
Upload an image
Now that you have a host with an image assigned to it, you can perform an upload task.
In the FOG Dashboard, navigate to Host Management and click List All Hosts. You should see the host you just registered in the last step along with some basic info on it.
To the right of the hostname, you should see a set of four task icons. The icons stand for upload, download, multicast, and deploy.
Click on the Upload icon.
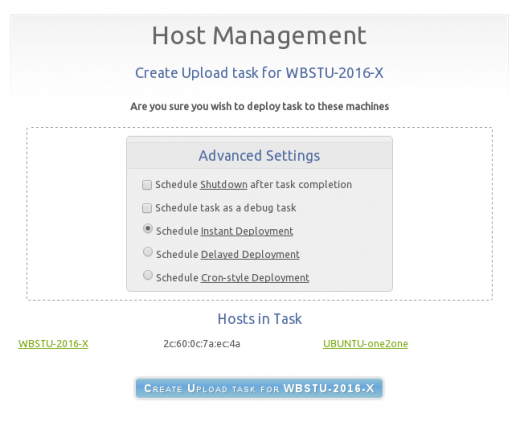
Next, you can choose from:
- Instant deployment: Create the deployment tasks immediately.
- Delayed deployment: Schedule a date and time for task creation.
- Cron style deployment: Schedule a date and time for task creation using a Cron format.
In this example, choose the Instant Deployment and click Create Upload Task.
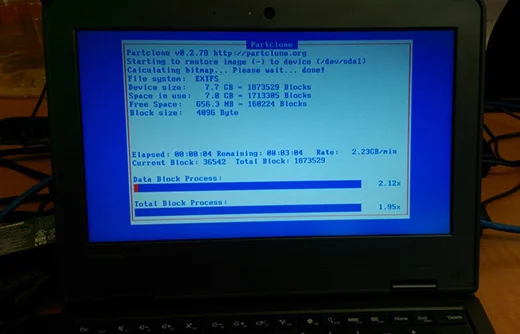
Now that an upload task has been created, boot the registered host back into FOG. This time, instead of going to the FOG menu, it will immediately begin the upload process. At the end of this process, the host will reboot. You should now have an actual disk image connected to your image ID.
Deploying an image
Now let’s say we want to push that image we just pulled to another host. Go through the same steps to register the new host and make sure to assign it the correct image ID.
In Host Management, find the host you wish to image and click the down arrow icon. Choose the deployment time and click the Create Task button. Now reboot the host and network boot into FOG. The host should automatically begin the imaging process.
Some helpful hints
While a lot of users don’t have issues with FOG, everyone’s environment is different. Below are some common issues that we’ve seen and some methods to try and resolve them.
Devices don’t get an IP address or can’t PXE boot
This can be caused by a few things. Depending on your network, you may have to set up Helper Addresses to allow your PXE broadcasts to reach your FOG Server.
On Cisco switches, this is done by
- Entering configure terminal mode
- int vlanX, where X is the vlan you want FOG Service to reach.
- Adding ip helper-address X.X.X.X, where X is the IP address of your FOG Server.
- You may have to research your switch brand to find out how to set up these helper addresses.
Device fails booting into FOG
The default setup of FOG does a good job supporting most network cards, but there are circumstances when FOG won’t boot up correctly on some hardware.
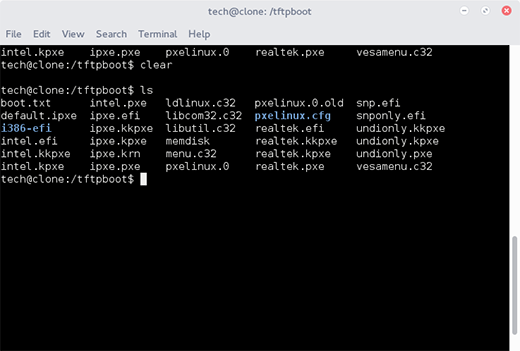
By default, FOG recommends using the bootfile undionly.kpxe for option 67 in DCHP options. However, there are other options to choose from. There are pxe boot files for specific manufacturers like Intel or Realtek that will work with some finicky cards. These boot files can be found in the /tftpboot/ directory.
To change which PXE boot file is used, simply change option 67 to that bootfile name.
PartClone fails to image device
This can happen for a variety of reasons, including:
- Wrong image partition type: This one is fairly common. When creating the image, if the wrong partition layout is chosen, the imaging will usually fail.
- Defective hard drive: If a hard drive has bad sectors, PartClone may fail during the imaging process.
- Image is too large for hard drive: If the image is larger than the destined hard drive, Partclone will fail.
For most images, the Single – Disk Resizable (1) option will work.

FOG image queue size too small
By default, FOG unicast is set to image no more than 10 machines at a time. Other devices will be placed in a queue and wait for another machine to complete. If you want to increase this queue number, you have to do it in two places.
First, under Storage Management > Select your Default Member > Change the figure in Max Clients to the desired number.
Second, under FOG Settings > Expand General Settings > Change the figure in FOG_QUEUESIZE to the desired number.
Conclusion
This article is just a small sample of all the great features that FOG boasts. Please consider donating to the FOG Project to help keep this great software alive and active.
If you run into any problems, check out the FOG Project forum. And if you enjoyed this article, please feel free to leave any comments or questions!
[ad_2]
Source link