https://i.ytimg.com/vi/XaqYyBGbx-c/hqdefault.jpg
Blender tutorial http://www.blenderguru.com/videos/rendering-an-interior-scene-with-cycles
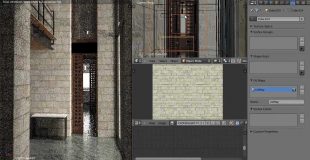
Discover how to light and texture an interior scene for rendering with Cycles.
source

https://i.ytimg.com/vi/XaqYyBGbx-c/hqdefault.jpg
Blender tutorial http://www.blenderguru.com/videos/rendering-an-interior-scene-with-cycles
Discover how to light and texture an interior scene for rendering with Cycles.
source
23 responses to “Cycles Tutorial: Interior Rendering”
good tutorial man
you are the best of the best REALLY THANK YOU FOR MADE THIS TUTORIALS
Sorry, Im going to explain this the best I can. When he scales the UV to match the texture, I noticed it is bigger than the size of the space given to us for a uv map. For instance the problem i am having is trying to bake the texture but the UV parts are to big and not fitting on that block. Is there a way to fix that? https://gyazo.com/a19275c5d2eeab59efed63e46288fefc
Andrew, please tell me what GPU are you using!! I want to be able to get these fast viewport previews you have.
Hi I have a question ~what is your recording screen software?
Houses you can fap on lol
I like your rendition better than the actual reference picture.
Thank you so much for great tutorial. it really helps.
Very useful … Thank you…
Great tutorial, you're talking, just talking a bit too fast
i have the ati v4800 firepro and cant render by gpu whats your gpu model??? D= help me please my english its no good enougth sorry for that
Thanks man. You're really helped. Amazing naration. Excellent job.
Hey, can somebody help – how can u make fur (fluffy couch in my case) with displacement maps and material and without using the particles systems? How do I make displacement stronger? I triedto use mathmultiply node between displacement map and displacement input in the final node, but all I get is grainy bumps no matter how much I put in value…
Thank You for this great tutorial..:-)
Weird they dont have the integrator in the newer versions Correction it's under light path now so it's still there just under a different name.
Парень, чисто годный урок, лойс тебе душевный, побольше бы таких. Я из слов почти ничего не понял, английский плохо знаю, но по конкретике въехал чуть больше чем полностью. Ю э гуд мэн энд бест оф зе бест, карочи
mind:blown
looks really amazing and definitely helped me!
Thx for the tutorial. I started blender a month ago and watch dozen of tutorials, but was not able to make something cool by myself. Your explanation about copying untill you can do it yourself is maybey the best tip i had so far. Now that i know the basics i guess im best of sticking with your tutorials for a while! Big thanks for your time to make these awesome tutorials
Category: Comedy haha
Andrew I am watching your video as I write this you mention noise how would get rid of noise without bringing sample high, or is it not possible to do so?
Im spanish and i dont understand so much english, but you talk so clearly that i even learn some words and, as always, your tutorials are perfect. I've always learn something new. Thanks
follow active quads uses the edges direction of the previous unwrap. with these shapes its simple to do a reset and then follow active quads… but if you for example got a bending pipe and you want a streight UV unwrap like that you can do a lightmap pack unwrap and then a follow active quads.. now you still got a problem about the scale.. so you add a colorgrid texture and scale the UV coordinates to the right proportion