https://i.ytimg.com/vi/OvuDwdF_psQ/hqdefault.jpg
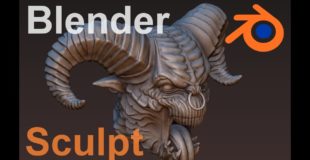
Скульптинг в Blender. Blender sculpting. Скульптинг Демона. Часть 1-1 (голова)
Demon’s sculpting in the Blender. . Part 1-1 (Head)
Часть 1-2/Part 1-2: http://www.youtube.com/watch?v=OsI4MvSRuvo
//////////////////////////////////////////////////////////
BUY MODEL/КУПИТЬ МОДЕЛЬ: https://www.cgtrader.com/3d-print-models/miniatures/figurines/demo
///////////////////////////////////////////////////////////
Music by Kevin MacLeod (incompetech.com)
Licensed under Creative Commons: By Attribution 3.0
http://creativecommons.org/licenses/by/3.0/
Tracks used:
Agnus Dei X
All This
Black vortex
Constance
Dragon and Toast
Echoes of Time v2
Egmont Overture
Final Count
Halls of the Undead
Hand Balance Redux
Heart of the Beast
Hitman
Long Note Four
Right Behind You
Stormfront
source

38 responses to “demons head sculpting blender 3d”
BUY MODEL/КУПИТЬ МОДЕЛЬ: https://www.cgtrader.com/3d-print-models/miniatures/figurines/demo
Для чего потом будет использоваться эта модель?
so, one can i make a sculpt of lets say a sci-fi helmet/alien and just separate the parts and apply materials to the different parts, end of story?? and skip the retopo, texturing etc etc nightmare? regards ( im not interested in games or animation, just modeling/sculpting)
just wanted to say this looks awesome!
Are you using any plugins to make these models? If so where can I find them?
Is it beter then zbrush?
What detail size do you start with?
how we can buy/use your models ???
я такой конкретный нубяра, хоть уже и два года в блендере и год в скульпте, так и не преблатыкался в создании ровных полос без кривой стандартной кисти
cool ~!!!
Into art and cg check this out on fb, https://www.facebook.com/Hightech-designs-222200067918519/?ref=bookmarks
For anyone that is still wondering, YES, these models can be used for games and animation. But a highpoly is too dense when you finish modelling, so what you need to do is follow the required workflow for games / animation.
Games & Animation usually follow this workflow / path:
1. polygon model the low poly
2. sculpt the high poly as much as you want, for details
3. bake the highpoly onto the lowpoly model to create a detailed normal map (which looks just like the highpoly but has few enough polys to be animated / used in games).
or this path for even better results.
1. polygon model the low poly
2. sculpt the high poly for detail
3. retopologize the mesh, this will give you more shape and definition similar to the highpoly. You control the amount of detail the mesh has and can contour it however you want. You have so much power in this step.
4. bake the highpoly onto the retopologized mesh. This will create a normal map with all the details from the highpoly. This can be used for games & animation. And will have a lot of detail.
So follow those steps and you will have successfully made a highpoly mesh into a lowpoly. After its lowpoly you can rig, animate, paint directly on the model (vertex paint / texture paint), add other maps (specular, normal, etc), and place the model within a game. At this point it if fully functional and optimized for whatever you need it for.
-This post is for beginners
That was an amazing piece of 3d sculpting, very talented. Help me understand the possibilities. Thankyou for an enjoyable experience ..
You sculpt with a mouse? That's so goood
Эпичный музон подобрал!
качественно работаешь)
music sounds pretty doomed
hey can you animate this head to use it in a game like the unreal engine 4 ?
regards
Stunning
подписывайся на мой канал !!!
Musik fits perfekt. You have some serious talent and is inspireing to get back to blender!
hi, how long were you on blender before you were able to sculpt this?
beautiful work!
ma sta usando una tavoletta grafica?
dayı sen yaptın ya 😀
Daaaamn, these are some amazing sculpting skills you have. Thanks for sharing this wonderful work of art. I only have one suggestion – too much symmetry sort of makes it look less realistic. Take the teeth for example – even as an imaginary creature the demon should have different teeth not just size-wise but also little variations in the shape and colour.
I have a quick question. What setting enables you to move large sections around without the dynamic Topography undoing all your fine detail?
o My good splendid
im freaking out right now dude. this is amazing. i cant wait tilll taxes so i can get my PC nd start bringing my ideas to life like this! 😀
Incredible. Makes me wish I could do this. I feel like its too late now though.
Im quite surprised at how far blender has come. People like you show blenders true potential. I used to use zbrush and mudbox whilst at university but I have been getting to grips with blender as it requires much less resources so I can use it whilst on the train or bus without any problems!
hi how many poligons? I really like that demon
я тоже в художке учусь но так не могу хоть и увлекаюсь моделированием. Поэтому очень круто и моя оценка 5555555555555
How long actually took?
How do you get this skin material in viewport while sculpting?
Hey, what tips do you have for people that start out sculpting in Blender.
ps: This is amazing, I'm blown away.
Круто, мне надо много тренироваться чтоб такое забабахать…
I still can't believe this very powerful program is 100% free.
That's just amazing. You're doing damage with that tablet my friend!!
ого!мастер)