https://i.ytimg.com/vi/mdTbjgCbIG0/hqdefault.jpg
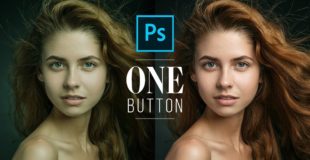
A Powerful Trick to Get the Perfect Skin Tones with Just One Button in Photoshop! Using advanced sampling, learn how to use the Curves Adjustment Layer to create custom samples, and apply them to the skin.
Hope this tutorial helps. Thank you so much for watching 🙂
► DOWNLOADS:
1. Sample Image: http://bit.ly/2WQIFwf
2. Finished PSD: http://bit.ly/2Gxd1hl (Only for our Patreon Family)
3. Skin Color Palette: http://bit.ly/pixskincolor
► HELP US CREATE MORE FREE VIDEOS:
Support us on Patreon: https://www.patreon.com/piximperfect
► SHARE: https://goo.gl/IUhnUl
►LET’S CONNECT:
Facebook: http://facebook.com/piximperfect
Twitter: https://twitter.com/piximperfect
Instagram: https://www.instagram.com/piximperfect
Google+: https://plus.google.com/+UnmeshDinda
View Original Source Here
48 responses to “Fix Skin Tones with One Button in Photoshop!”
Well done, but i still like using curves to reach this effects.
very helpful tutorial as always 🙂
Thanks i learned alot
Love how your channel has grown as well as how your production quality has increased! Remember following you when you were at 60k sub or so. Amazing work as always!
Nice work
u look so weird
You are amazing. I like your way to teach.
Mind = Blown. I'm about to try this out right now on a few images
That's amazing video that's very helpful for us,
Please upload video for mobile Adobe Photoshop
Wowww
Lovely
Sir make a tutorial on moody effect
Unmish, I met a problem when using this method. When clicking the 218/171/145 color panel, the color value in my color picker dialog was not as the same value. The value was 182/160/132. I don't understand why it happens. Is that because of different color zone used in Photoshop? I use a Photoshop CC 2019, and MacOS is 10.14.2 in my MacBook.
great💯💯
Make your videos shorter!!! Thanks
Such a blessing to us newbies! How did you learn all this?? Also you are almost 1m subs 😍
Good ❤👍
Thanks 😘
This is so perfect! I* have decided to scan all my negatives of 40 years work so that I have digital files. This allows me to recreate the past.
Could you please do some jewellery retouching tutorial???
You are so awesome.
You are awesome
Wasn't it just a tint error? I think magenta would've solved
U are the best man love u soooo much
Perfect. Keep up your great content!
So Quick So Dope 👌
Will definitely try on my infrared photographs. Thanks.
Cool!
you are the king of image editing…
you are more than awesome <3
Where have youve been all my life man
What laptop do you use, do you recommend any other under 50k
好吧,没字幕看不懂
You are god
Nice Trick
Thank you. I like your videos and I'm watching more and more. Who needs a book?
You are the best. I learnt whatever i know about photoshop from you. Thanks
Really like the shorter videos. Easier to retain. At least for me. Thank you 🙏
👌👌
Amazing as always Unmesh! Thanks!
You the best 💗
Amazing!
what is the photoshop version you are used ?
great fast tutorial ,thx dude
You are always awesome bro 💪 love ur videos 🙏🙏keep making such tricks 🔥
Hi bro can I know that video Editor software best n easy to know. N how to download from website please tell me.
just a magic!!!
Congrats on changing the entire picture.
Amazing!! Is there also any trick for lightroom? I'm processing mostly for weddings, and one of my points i need get better on are such beautiful skin colors. Do you have any advice for that in LR?
Thanks in advance! 🙂