https://i.ytimg.com/vi/3vsGxmhYZo8/hqdefault.jpg
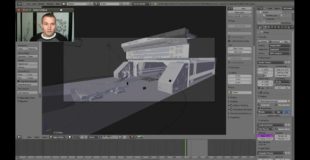
Hey all. An answer to a tutorial request. Here is how I do the bulkhead panelling in Blender 3D. Sorry for the quality of the video and sound, I’m not exactly set up very properly to handle these sorts of things.
Links: http://www.danbrowncgi.com | Hull Plate Tutorial: http://vimeo.com/34099882 | Tank Tracks Tutorial: http://www.blendernerd.com/tank-tracks/
Hope you’re all doing awesome.
source

29 responses to “How I Do Bulkhead Panels in Blender 3D”
I am aware this is an old video. But I am making something like that and tried the technique shown. But how would you combine the base mesh and newly solidified panels, to create a normal map out of that? You deleted blackface, but should it always be connected to the basement as a single object? For game assets?
Kill the keyboard … it’s too loud
Oh well, it is 2018 , but I hope this will still do. Gonna try follow it next hours. First of all – Thank You. Second – somehow can't shake feeling that you might be brother of Matt LeBlanc ….
EDIT: yeah, after some my beginner's wrong doings (eg., wrong option ticks for solidify), i got this principle working. Thanks again for "show", so to speak 🙂 !
Yeah, i want to go back to doing 3D stuff, its cool.
Thanks, this was really useful 🙂
Just go to edit mode – Mesh Display – Normals click on 1 of the 3 boxes (face) to see which way normal are. (Blue—lines) . You had both Planes faces the wrong way you then flip the 1st base plane to face into hallway. When he try to do it to the 2nd it is wrong BUT only because the Solidify MOD is set to a NEG -1.0 . Ctrl N will also recalculate normals. Should of just made the 2 meshes different colors at the start as to see better. Good info here. I just can not stand having too watch any tut that leaves themselves on screen talking and getting in the way.
I LOVE YOU SO MUCH! I've been living a lie this whole time. This would take me about 4 hrs to do otherwise
16:03 how do you rejoin things
How to do curve detail
Thank you very much for sharing this technique! The amount of time it took to "bruteforce" it is fucking crazy.
Hey Dan!!! You're saying to work on the story and don't make over-the-top visuals because everyone will enjoy the landscape instead of the Visuals? Also, you are saying you would get fired for doing this profesionally?
Thank you for the tutorial. Entertaining and educational.
Did you ever hear the one about the O.C.D. 3D-Artist… yeah I can't finish anything ;P
18:09 can you name some such movies? I’m curious what they look like. 😉
3:39 +1 for metric. 🙂
hmm I wish 3ds max had this solidify modifyer. Going to look now LOL
Thank you very much for this great tutorial and especially for the tip with "e" and "f" key while Strg. + R 🙂 Great work ! Greets
Hello, I am a Industrial designer who use nurbs alot, I am new to blender. not very new but …, just i question, how to have quick modeling with accurate dimension? using snap?
friend, what happened to the sound I want to listen to your video. Is this only me?
merci thank you, usefull tuto.
How do you do the snapping of vertices and whatnot to the grid?
Cool to see you're using Ubuntu. Linux is awesome!
8:10 A better way of doing this now is just simply creating a single loop cut and then use [Ctrl + B] to bevel it. You can select multiple edge loops and do this as well.
Great Video, many thanks Daniel.
thanks man, great stuff, super helpful
saw this video a while back, visited it now again because it's so helpful! thank you Dan! 😀
Thanks for an AWESOME tutorial on Blender! You are really fast but that's luckily not a problem when you have a pause-button and a time-slider;)
Maaan! I never would have guessed it is so simple! 😀
You Rock!!! please keep up the good work!!!