https://i.ytimg.com/vi/MYJCFP9CAMA/hqdefault.jpg
http://www.creativeshrimp.com/post-processing-tutorial-in-12-simple-steps.html
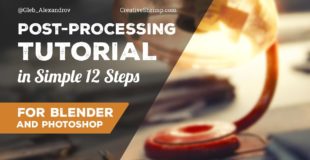
Discover how to make your images 273% better by post-processing it in Blender and Photoshop.
After following these 12 simple steps, you will be ready to add that high octane ‘varoom’ to your artworks.
Question of the Day: how do you post-process your images?
Realistic Lighting in Blender video course: http://www.creativeshrimp.com/realistic-lighting-in-blender.html
Facebook: https://www.facebook.com/CreativeShrimp
Twitter: https://twitter.com/gleb_alexandrov
Instagram: https://instagram.com/gleb.alexandrov/
Podcast: http://www.creativeshrimp.com/podcasts
————————————————————————————————————
Subscribe to Newsletter: http://www.creativeshrimp.com/subscribe
Contact: http://www.creativeshrimp.com/contact
Useful Resources: http://www.creativeshrimp.com/resources.html
Thank you guys for your support and interest! Stay tuned.
source
37 responses to “Post-processing Tutorial in Simple 12 Steps (Blender and Photoshop)”
how did you made the books and notebooks around the lamp ?
Thank you very much awesome video helped me alot but couldnt you use the jitter effect of Blender for filmgrain?
Russian ?
Awsome tutorial …………….. (is that lamp unpluged but still glowing?!!)
What node did he connect to mist at 2:38 ?
Great! again
Get the lessons of 10 years of composition experience in 10 min. 😀
2 years later.. how do you scroll between the LUTs in photoshop :O
Gleb, your amazing tutorials pushed me to do dis: https://blenderartists.org/forum/showthread.php?438036-Bot-factory-head-manufacturing
Can you give me feedback, please?
i dont like the way you speak, but damn
Great skills here
Jesus, you are a good artist but your voice is unbearable .
You amaising!
That "camera look option" is absolutely amazing! Thanks 😀
were do I get Dust textures, I cant find good ones?
so informative tutorial! thanks 😀
Where did you get those scanned books ?
Thanks A LOT! for this priceless Tutorial.
Hi!! what configuration of computer training? I want to have a landmark ge set up a computer training. Thank you
Is there a video where you show how to make this modell/ lighting?
Gleb, this was amazing tutorial, but do you have the tutorial for how to create the lamp(with the Model + Lighting) itself in Blender? If not, can you make one for it? 🙂
Is there any way you can share the project file ?
i don't believe you take a drink in video kkk
One more Awesome Tutorial. 🙂 Thanks ….. BTW where did you get such a realistic model of lamp and wires etc..? is it a scanned model ?
papu share ur textures!
Exellent tutorial kid. Thanks.
I did a quick research on google but I didn't find any of these particles images.. where can I find some?
Awesome! So much info in one tutorial, and it's knowledge I can apply to other software and mediums as well… question: at 2:39 your viewer turned to a black and white, like a depth pass. I assume you were viewing only the Mist pass, but I'm trying to do that myself on my own scene and I just keep seeing my full render with color. Any advice? Thanks in advance!
Wait wait?? The first image was modelled??? Holy crap! Take all the money sir!
Great tips thanks Gleb!
Thank's Gleb
Hey Gleb, a quick question, I liked the attic and this Tutorial ,some of the models used in this project and that one (The Attic) , where they 3d scans of photos?. Just curious to know.
Thank you so much for this video Gleb! These steps and the theory behind them has certainly changed the way I view digital processing of my artwork. I will likely use a lot of these techniques in my future work. 🙂
Hey ! Thx you very much for this tutorial ! Do you know where i can find the sand texture u use ? 🙂
would you reccomend these steps for bigger scenes like architectural visualisations?
does it work with 3dsmax renders ?
What you done to me ?! Now I have to create something;) Thank you for a brilliant tutorial!
And Step 8: Throw in some party girls!
Can't you do some animation tutorials? A simple zoom or papers flying by would make this epic scene even better