https://i.ytimg.com/vi/gm6-qmrYIFU/hqdefault.jpg
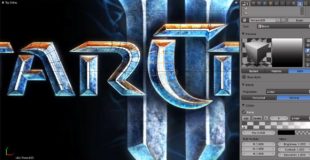
Blender Tutorial: http://www.blenderguru.com/recreate-the-starcraft-2-logo/
In this tutorial you will learn:
-How to use area lamps effectively
-How to quickly UV unwrap text
-When to use an orthographic camera
-How to imitate complex lighting using textures
source

23 responses to “Recreate the Starcraft 2 Logo in Blender”
wouldve been couple hundred times easier in illustrator
Numerals?
You are the best
Yikes Andrew! I'm sure he's gotten better now but I just watched him place the 3D cursor on a vertex and scale when he could have either set the orientation to active and had the stationary vertex active, then scaled. Or better yet, and most preferably, press G twice. lol
Is starcraft like supreme commander? If it is I will probably interested in the game.
it's funny because you remind me a bit of 'Apollo' who makes really good starcraft2 tutorials
Hey i have seen much vids of yours and im learning for several years to make characters like for a game or animation and make them move but for some reason it doesnt work.
Also IF you ever have the time i would like to learn how to make the logo intro of league of legends. ( Animation ).
Thx.
With friendly greetings nick00580.
29:03 That was skeh-weeee for a moment. It didn't work for me at first, except on the bottom, curved part of that center C. I figured it out, though, because of a mistake I made.
I actually have my letters standing up from FRONT view, while you have yours lying down from TOP view. I forgot to apply the rotation to the bottom part of that C. So I applied rotation, and the texture blend would NOT MAP right for it either. That's when I snapped.
Applying rotation puts the LOCAL (intrinsic) coordinate system of the object in sync with the GLOBAL coordinate system of the 3D View. So I figured my DEPTH from front view is the Y axis. So the "Y Mapping" of the texture blend should be left at Y axis, with all the rotations applied (ctrl + a -> rotation).
But then it was BACKWARDS. Ah, that's because the POSITIVE direction on the Z axis is UP (toward front of letters on yours), while the POSITIVE direction on the Y axis from front view is BACK (toward back of letters on mine). So I had to click the F (flip) button on the color ramp. And there it is. BIG SMILE after working ALL DAY on this thing (I also create NOTES on these wonderful Blender tutorials I complete).
So the Texture context's blend-color ramp is like a standard coordinate system. LEFT = NEGATIVE coordinate direction, and RIGHT = POSITIVE coordinate direction. So the color ramp INTUITIVELY maps from left to right which correlates with the negative to positive coordinate system respectively.
However, the fact that it WORKED on that bottom center C piece because I forgot to apply rotation, that means the texture color ramp maps to the OBJECT'S local coordinate system rather than the global coordinate system of the 3D View. So if I would NOT have applied rotation to any of the pieces, although, rotated in the 3D View, the texture mappings would have still worked with your settings. Rotating an object in the 3D View does NOT change it's LOCAL (intrinsic) coordinate system. OOO-KAY!!! That deserves a REWARD — yes, ICE CREAM. Blender requires A LOT of dedication and, therefore, a lot of ice cream. Cheers!
At 9:20 edge-slide (shortcut: g -> g) would be easier. However, that is a really nifty trick I just learned. Thanks. There is at least one ADVANTAGE to that trick over edge-slide, though, which is edge-slide does NOT extend beyond the end-point of the edge, and I have run into that problem before. He demonstrates that at 10:40
Your good but you do things on the keyboard without telling us and even though its on the side its incredibly hard to follow.
Шикарно! Просмотрел от начала, до конца. Спасибо.
i love the tutorial, but its too long, n very difficult to download
41:00 to make the letter's shadow, using the alpha channel of the renderlayer would be easier. =D
You've probably figured it out by now but if you tap g twice you dont need to do the 3d cursor business.
You go fast, but you certainly do know the software. Thanks for the offering. Take care.
Great tutorial, but not without criticism. If you make a mistake in a tutorial, at least re-explain what the process is. The part with compositing on what attaches to where has just totally confused me.
Other than that the tutorial was fantastic.
Andrew, couldn't you use slide along edge tool at 09:30 ~?
I tried to open the image file and its not showing up i am not sure what to do ..
nodes its use to make special effect for a 3d model, like blur?
can you make a tut on how to make a starcraft 2 unit?
WELL DONE ANDREW. THANKS!
watched this while blender rendered a logo for me… I love your stories, Andrew. I don't play Starcraft but it's funny to hear that you've blown up your own base and such^^
Your Channel is now my #1 Favorite!!! Thanks for all the tutorials..