[ad_1]
There are many ways to create a glow effect in Photoshop using layers and blending modes. What if you could do it in a fraction of the time and get even better results? Would you be interested?
Oniric Glow is a plugin that enables you to easily create realistic and beautiful glow effects in your images. It’s perfect for creating heavenly or otherworldly highlights, giving your photos an extra bit of magic, or even just making them look more polished and professional, and it’s just about to get another update.
Before I purchased the plugin over a year ago, I would work on the glow effects for my composites for quite a while to achieve the look I was after. I would spend maybe 15-20 minutes in Photoshop to generate a glow that looked realistic, but it was so time-consuming, and there were just too many manual steps involved. The glow generator is fast, sleek, and provides you with results quickly and effectively, better than I could ever achieve.

Non-Destructive
Oniric is a non-destructive plugin that allows you to edit repeatedly even once you have created the effect. It does this by creating a layer based on your image. Once you set your parameters for the effect, it saves it as a new layer, complete with a reveal-all mask, allowing you to select blending modes for the layer or use the mask by painting the areas you want in your image. 
Each of the glow effects is totally customizable in the panel, and there is also a masking option in the panel, enabling you to add the effects to the parts of the image that you require, instead of an overall application of your chosen effect. It does this by selecting the hottest areas of your image and highlighting them in green. The brush that you add to the mask effects comes with your download, and its size is controlled by the same parentheses keys as Photoshop brushes.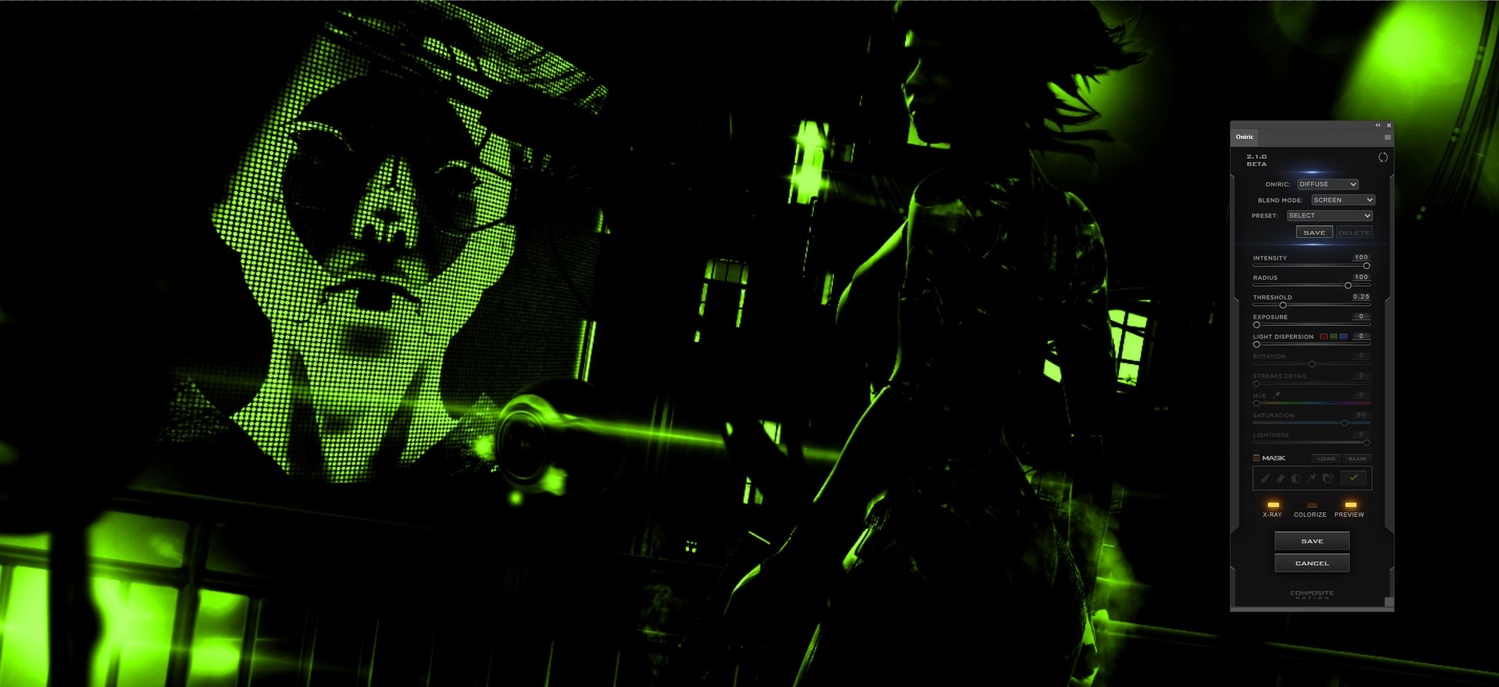
The interface of the plugin is really easy to use and simply does what it says on the tin. Experimentation is the key here, however, as it’s easy to get caught up in the one-click wonder and, boom, your image takes on another persona. Depending on what you are seeking, sometimes, a subtle approach is all that is needed.

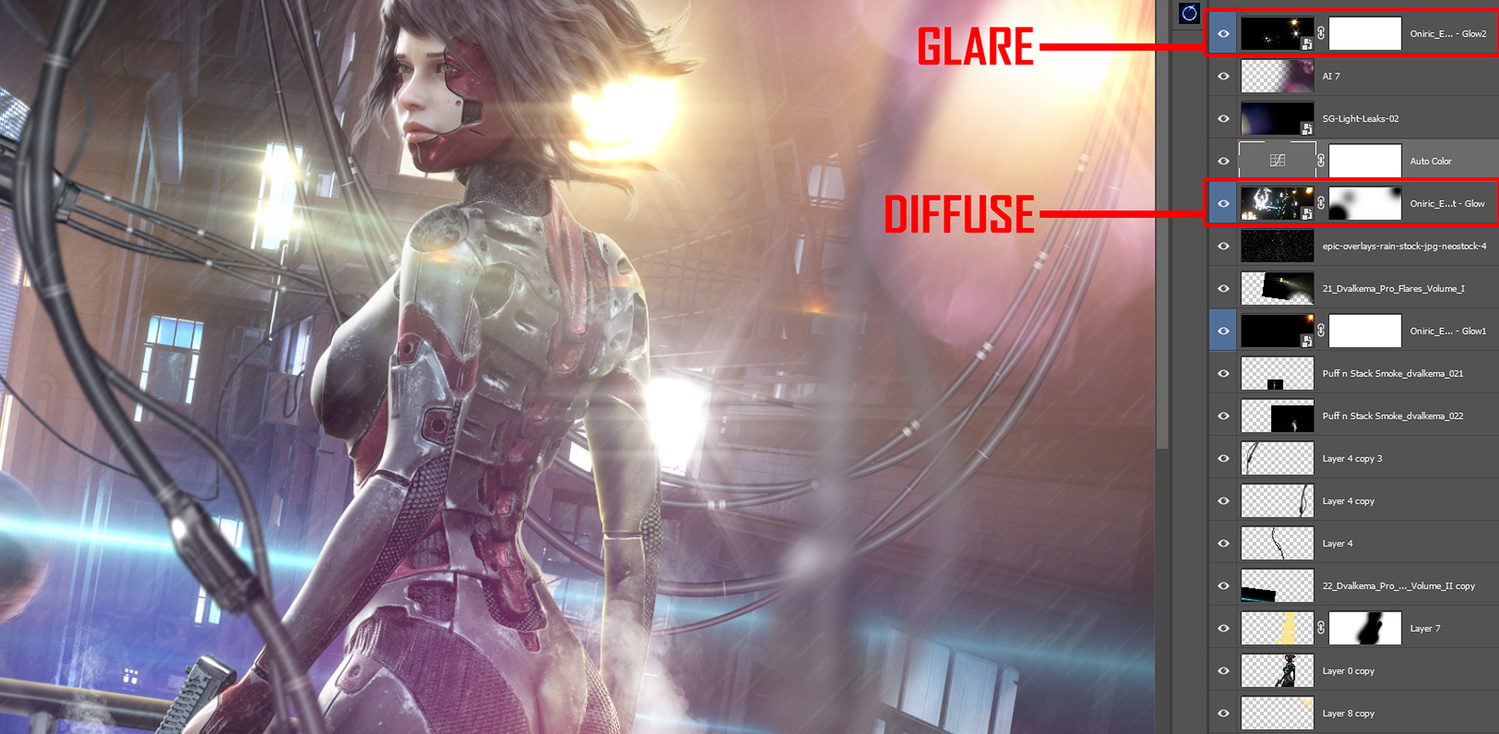
Glare is the new addition to the effects panel, and each time the plugin is developed further, you get a free upgrade.
With no limit to the amount of Oniric effects you can use to enhance your image, you can build these up subtly to get the look you are after or go full force and apply them all and then work from there; it totally depends on what you are seeking in your final render. Mix them up depending on the type of glow effect you want to achieve, and you can get some really dynamic results. There are two blending modes within the panel, screen and linear dodge, each providing different results to great effect.
Possible Uses?
Although I mainly use Oniric for composites, I have used it in the past on product photography to add subtle highlights to images and a warm subtle glow to the odd landscape photo of a sunset sky. Sure, you could do this with the Orton effect, and I suppose it’s worth comparing the two to see which one provides the best results in that scenario.
Most of the possible uses below can be done entirely in Photoshop, but this plugin provides believable non-destructive results in a fraction of the time.
- Product photography: subtle highlights, as in the watch photograph below.
- Food photography: subtle glow to certain items.
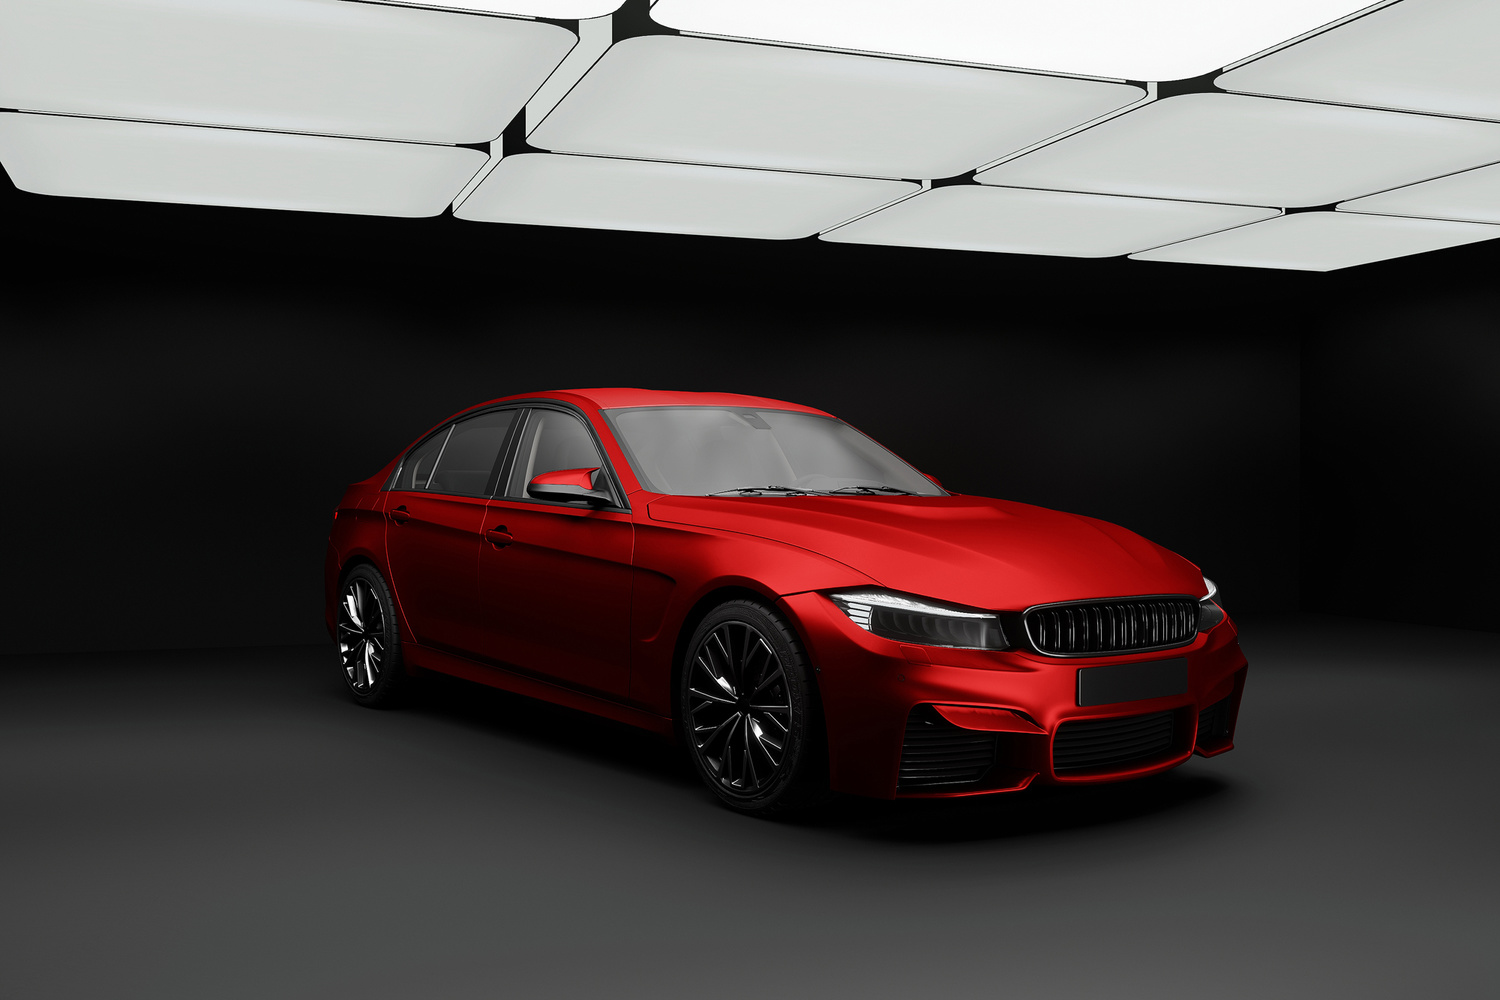
- Automotive photography: lots of uses here, from the glow of the lights to a subtle glow of the paintwork of the car.
- Portraiture scene: background lighting in the scene, long exposure lighting effects, enhancing the glow.
- Architecture: enhancing the exterior/interior lighting, changing the glow color of the lights, or adding a color ambient glow to a room.
The list isn’t exhaustive, and these are only a few of the ideas I can see it being used. You can probably think of plenty more.


What I Liked?
The plugin is really simple to use yet still has a myriad of different results depending on how you adjust the sliders. The non-destructive approach to creating the effects that are completely editable via the edit elements tab allows you to make adjustments even after multiple layers have been added. The time that you save when using the plugin is immeasurable considering the manual method of Photoshop layers.
What Could Be Improved?
Since its inception in the early part of 2020, the plugin has been updated and new features added, which are included in free updates. At $119 for a two-seat single-user lifetime license, you can’t really go wrong with your cash, considering how much time you will save and the rewards you will reap, I honestly can’t see any room for improvement.
Conclusion
Although the plugin is aimed at compositing and digital artists, there are so many other possible image scenarios where it can be used to great effect. It’s actually one of those plugins that I turn to quite a lot just to see how it reads an image and if I can use it to good effect. It’s a creative plugin, and as a digital artist, I’m so happy I purchased it over a year ago, as I’ve found many advantages to using it, with the big ones being time saved and the final effects.
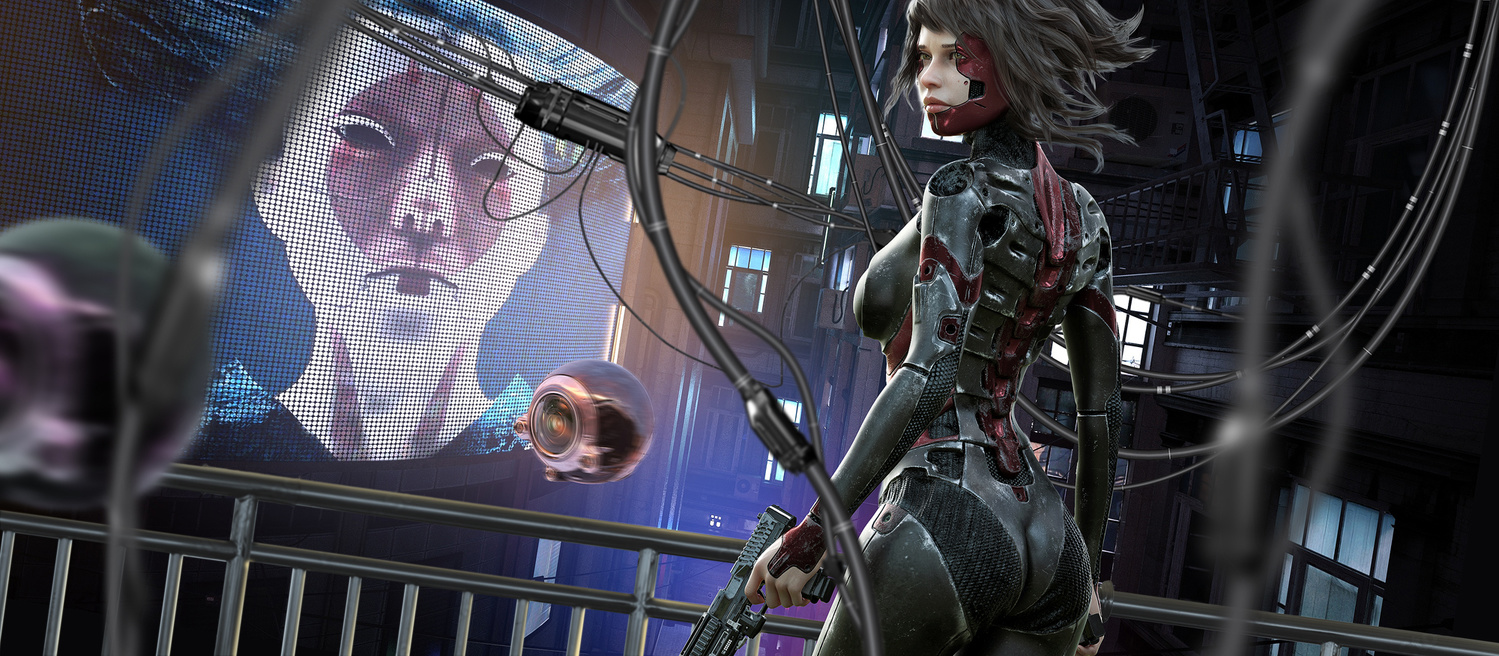
I used the beta of version two, which is due for imminent release in the upcoming days and is free to all users who have purchased the version prior to this. Some images above include smoke and lens flares. These were added at the compositing stage and don’t come with the plugin. They are simply added knowing what Oniric can do with them in the final render.
Is this a plugin for you? Well, if you are a digital artist, the answer is an undeniable yes, and you should check out the Compositenation website. If you are a product, architectural, or commercial photographer looking for that extra lift to your images, I don’t think you would go wrong with this.
[ad_2]
Original Source Link