[ad_1]
Taking photographs of cities at night can be a veritable feast of colors, reflections, and light, but it can also be tricky. Here are my five best tips for taking shots of cities at night.
I’ve always had a thing for cities after dark. I grew up not far north of London, and there was always something alluring to me about visiting it at night. As a child, I’d go down Regent Street in the evening with my parents to see the Christmas lights. I also found driving through cities at night strangely soporific. That sensation has never gone away, and whenever I travel, I love to wander through the streets after the sun has gone down, and I highly doubt I’m alone on that.
Once I’d bought my first camera all those years back, it seemed a natural next step to try to capture whatever it was that I loved about cities at night. I’ve never been much of a landscape photographer or a street photographer, but I find myself drawn to both in these rather specific conditions. Here are the five most important tips I’d offer someone looking to capture these sleeping giants.
1. Use a Tripod for Some Shots
I’ll start with one of the most obvious (and frankly boring) tips for nighttime photography: you’ll often need a tripod. Now, that’s not to say it’s always the case, and tip number two goes in the opposite direction, but for some images, you don’t have a choice. The image above (and a few others in this article) was so delicately lit that to properly capture the mood of the scene, you either needed to crank the ISO up or do a long exposure where a tripod is necessary. I opted for the latter, as I knew many areas were going to be underexposed, and I didn’t want large amounts of noise. Also, another tick in the “pro tripod” column was that the night was so calm and still that there was no movement in the water or even the tree with the Christmas lights. Remember, the use of a tripod doesn’t always mean you’re doing a long exposure; sometimes, it’s just that the shutter speed is a touch slower than you can comfortably shoot handheld.
2. Don’t Be Afraid to Push Your ISO
With modern cameras come flexibility with ISO values we’ve never previously had. As a result, some cameras can push their ISO up to previously unusable levels and see little penalty via noise or softness. Each camera varies with ISO performance, so experiment or research your particular sensor’s capabilities, but you may be surprised. My early cameras yielded reasonably poor images when the scene was underlit and I went north of 800 ISO. The above images, however, were taken with a Fujifilm GFX 50R at ISO 2,000, and even 100% crops show usably low amounts of noise. Find what you consider to be your threshold and then see what that affords you with creative control.
3. Try to Get a High Vantage Point
Getting high up in a city is fun day or night, but at night, you can be rewarded with some brilliant scenes. I was lucky enough to be given temporary access to a rooftop of a very tall building in London for a shoot a few years back. After the shoot was over, we hung around until the sun had completely set just to see the skyline at night. With the London Eye lit up, as well as a deep blue night, the view was spectacular. Some cities benefit from a high vantage point much more than others, but generally, if there are a lot of different lights and points of interest, the higher, the better. Of course, ensure you do this safely and legally!
4. Play With Long Exposures

While on the topic of the London Eye, this was a shot from a different trip into the capital and several years back. Long exposures are often necessary for nighttime photography in cities, but it’s occasionally worth using the technique even when they aren’t. This scene was well lit given the time, but the London Eye was rotating, and so, I wanted to capture that. Many things that would require an ND32 filter to capture movement during the day are now fair game at night. Keep an eye out for any movement you can capture in your scene, from giant wheels to crowds, as they can add real interest to the frame.
5. Step Away From Your Daytime Practices
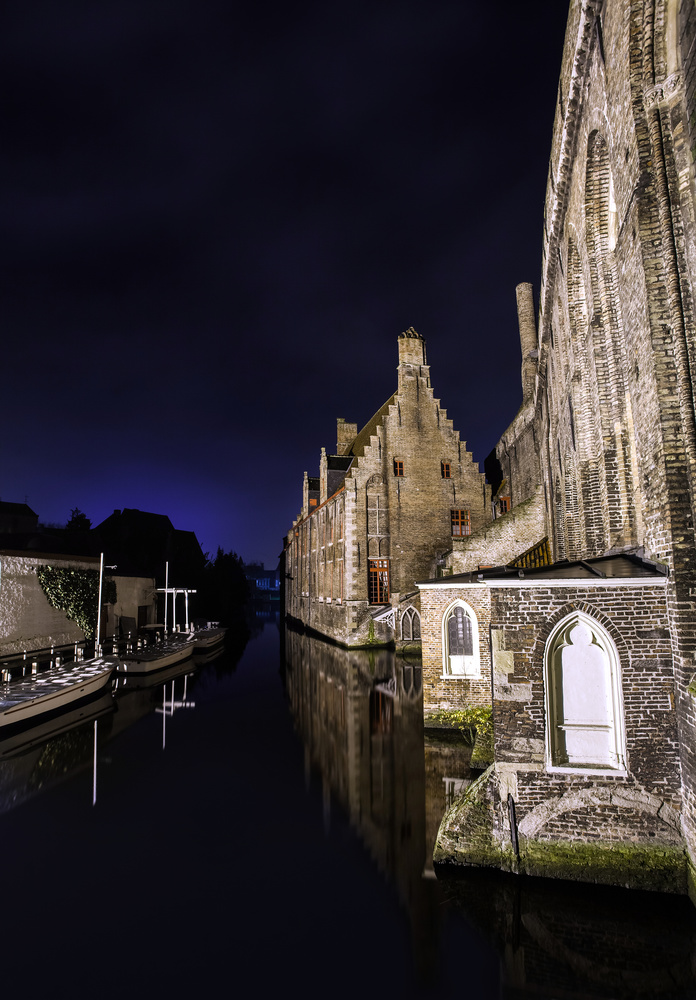
This final tip is one I have to remind myself of often. When I roam around a city during the day, I ignore many shots I think will be boring. As a result, when I’m meandering by the same scene at night, I can automatically discount it, which isn’t necessarily the right move. The above image is a good example. During the day, I took a snap of this scene, and it was dull, so I tried a long exposure to capture the slow-moving water, but it was still dull. So, I moved on. However, late that night, on my way home from a restaurant, I had to stop on that bridge to wait for somebody in my party. I looked at the same view as earlier, but at night, it was eerie, still, and the reflections were far more punchy with the contrast of the artificial lights hitting the white masts of the boats.
This advice can apply in a number of different ways. Take your time to look at the scenes differently, as shots that might be throwaways in the light become something entirely different in the dark.
What Are Your Best Tips for Photographing Cities at Night?
There are a wealth of fantastic landscape, architectural, street, and cityscape photographers here on Fstoppers, so let’s hear from you. What would you suggest to a beginner looking to photograph a city at night for the first time? Share your thoughts and tips in the comment section below.
[ad_2]
Original Source Link