[ad_1]
If you are new to the studio or want to practice your lighting techniques plus save time when in the studio, you should check out this 3D software by Ellixxier.
Studio portraiture can be quite intimidating if you are new to it. Which modifier to use? How much flash power? Where should the model be in relation to the lights? How many lights to achieve this effect? Would a gel work here? Would a gobo work there? Suddenly, your time in the studio becomes more about the lighting than the model instead of the two workings in harmony. This is where set.a.light 3D comes in, and best of all, it’s a cinch to learn.
The desktop-based software, available for both Mac and pc, allows you to set up your own scenarios and try out thousands of different lighting variations from the comfort of your own home, saving you so much studio time and allowing you to focus on the model when actually shooting.
User Interface
The interface can look quite intimidating if you are new to studio portraiture with all the different variations of lighting scenarios you can create. How do you know what light to use and what effect it will have on the model? Well, that’s the great thing about the software: you can try out any modifier, at any light intensity, at any distance from the model, to see how the light will affect your subject.
There is an array of lights of different sizes and makes. You can even program your own to the ones you have available in the studio, ensuring your time spent in the studio is more productive. Each light can then have grids, gels, or gobos added, depending on what you are testing out. Backgrounds can be swapped and recolored, and you can even add a JPEG as your background — very useful if you are planning a composite or environmental shoot.
Viewing Panes
There are three main windows: Top view, 3D studio view, which is entirely movable, and a viewfinder. The Studio view and viewfinder panes can be swapped depending on your working preference. All of the windows can be resized, again depending on your preference. The studio view and top view also work and stay in sync with each other. Select and move the model, light, backdrop, or camera, and it updates in real-time in the other views.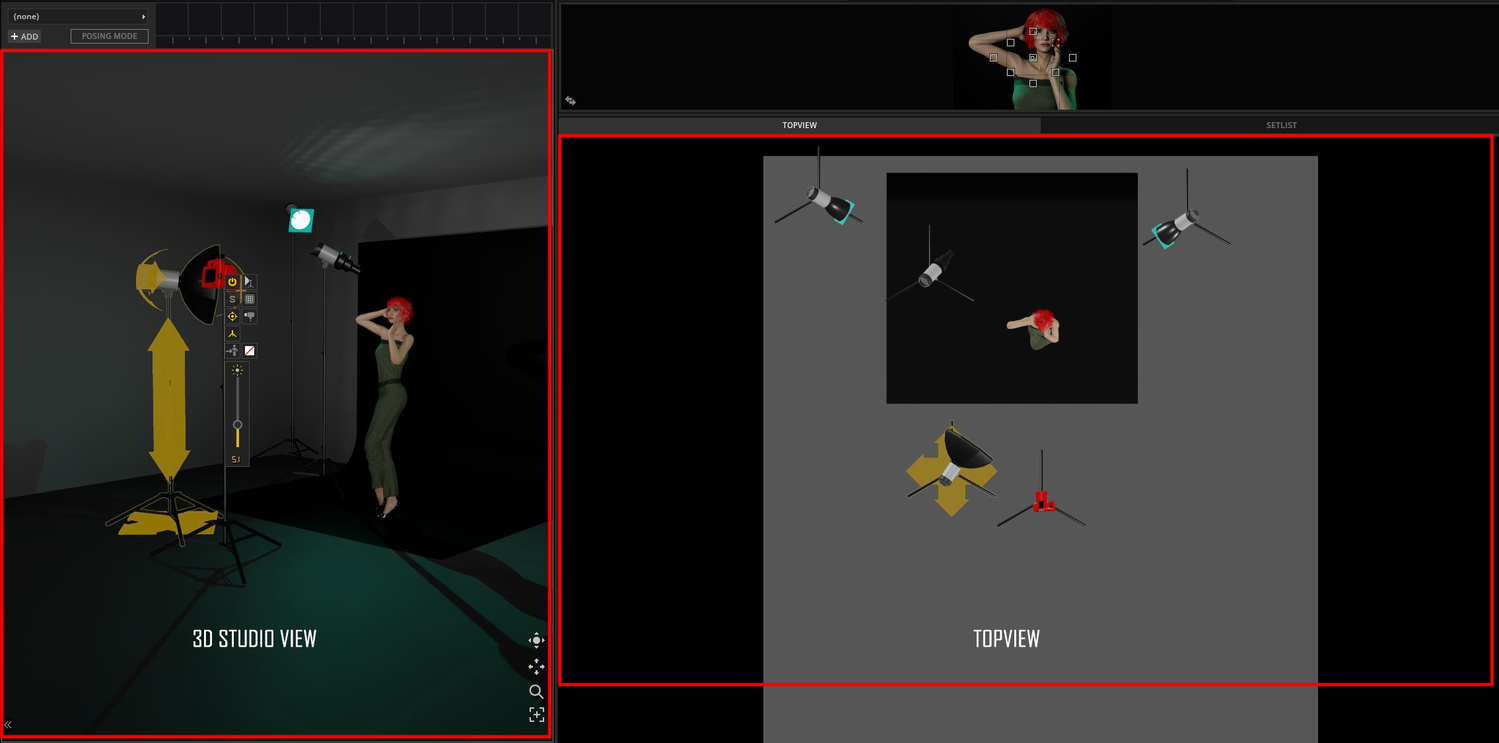
The viewfinder has all the camera settings that you would require for your shooting scenario visualizations, including sensor sizes, aspect ratios, a multitude of focal lenses including primes, shutter speeds from 30 seconds right up to 1/12,800 sec, f-stops, ISO, and color temperature. It also includes focus points, a histogram that can be turned on or off, and camera orientation from landscape to portrait, which updates in the other windows. The camera, when moved, also tracks the model, so no worries about trying to reposition the model in the viewfinder.
Lighting and Modifiers
There is a multitude of lights and modifiers from various manufacturers to choose from, controllable from the panel on the right or from the light itself in the 3D studio view. Lights can be locked so that they point toward the model wherever moved to in the view or unlocked and positioned as bounced lighting, background illumination, or with a gobo added to create an effect anywhere in the scene.
The height, positioning, and rotation of the light can again be controlled by either the Transform window or by clicking on the light itself in the 3D view where the large yellow directional arrows ensure you know what you are moving.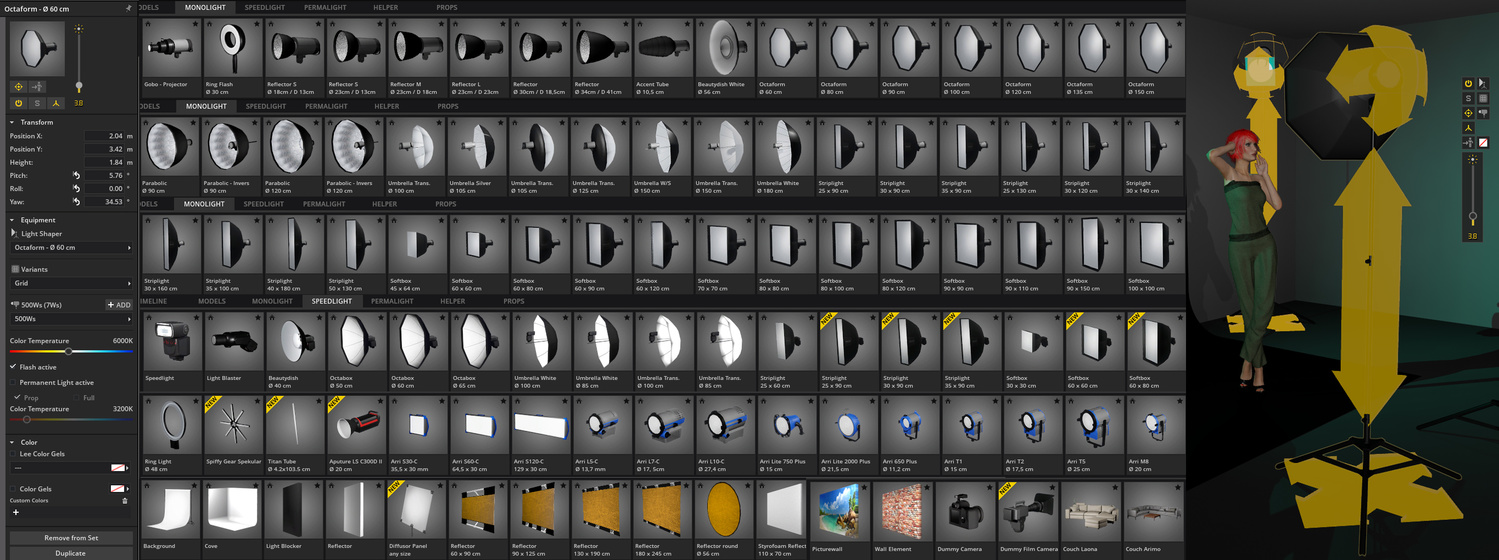
Models
With the new update to version 2.5.6, there are now 10 different models to choose from, three male and seven female. Each of them is totally posable using the posing mode, which includes individual joints. If you are new to 3D software, there is a multitude of different poses that you can choose from, and the model will snap to that pose. You can also add multiple models to your scene, ensuring the lighting effect you are after is practiced before entering the studio. Hair, hair color, eye color, and clothing can also be adapted to whatever you are seeking for your shoot. The skin is textured, sometimes freckled, and reacts to the lights as you think it would, and the software is very intuitive when it comes to that. Cycling through the different variations again is so simple to do, which makes it great for the new user and pro alike.
The details are quite a sight to behold considering they are computer-generated and allow you to near-replicate the shot you are after at any focal length.
Conclusion
Once you have completed your studio setup, you can simply export out all the details, including the final image, and save it to your phone or desktop or print it out, that way, you are not trying to remember positioning and lighting information — another handy feature.  If you weigh up the cost of time in the studio or studio hire costs against the price of the software, which includes free updates, I honestly think you are on to a winner here. If you want to practice new lighting scenarios before you enter the studio or are completely new to studio lighting, this software will definitely improve the quality of your time in the studio. There’s even a community section in the software where you can browse and download other users’ setups and share your own.
There are two versions available, the studio full version or the basic version, and if you want to check out the free trial, it can be found here.
[ad_2]
Original Source Link