https://i.ytimg.com/vi/l5jo9c4ErVQ/hqdefault.jpg
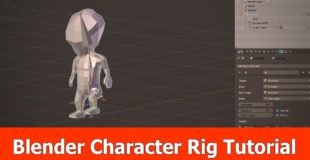
Here is the next part for rigging a character with Blender. I use the IK leg rig from the last part, import a low poly character mesh and add the spine, arm and head bones.
See my social profiles here
G+: https://plus.google.com/+JayAnAm
Twitter: https://twitter.com/jayanamgames
Facebook: https://www.facebook.com/jayanamgames
Patreon: https://www.patreon.com/jayanam
Indiegogo: https://twitter.com/jayanamgames
Production Music courtesy of Epidemic Sound: http://www.epidemicsound.com
source

10 responses to “Blender Character Rig Tutorial”
Question:
In you opinion with new blender, should I stay with fbx export for UE4 using 2014, as with older version (for UE4.19) for best compatibility, or use 2018 export?
Thank you for continuing videos on Blender. I'm still getting used to new features, and your channel helps.
Thanks, you are awesome at explaining complicated features in a really short amount of time.
Hey man thanks for youre awesome videos you make your videos help everyone. So im trying to make a rambo type character but i want to make a ammo belt but i can’t find good explanation for the belt etc can you help me and othet people having problems with this
Thank you 🙂 Looking forward to simple walk and run cycling.
Hey, thanks for making such a series after I asked for it, it overlaps pretty god with your character series and keep posting stuff like this, its always awesome to see those tips and tricks 🙂
Круто 🙂
That's nice and useful. However there are some features that may improve any rig.
Better Spine
The current way of controlling the spine is kind tedious, because the animator has to manage three separate controllers to achieve movement. At least one of the controllers is unnecessary to create natural poses. (It should be invisible for the animator and its rotation can be copied by the top body bone with half influence) Also the hip incorrectly rotates from the crotch. It can be fixed by flipping the bone (but clear its parenting first) and making the middle bone copy its location.
Isolate Rotation
The head and the forearm controllers inherit the rotation of their parents. Sometimes, this may be what we want, but in most cases it'd be better if we had separate control over their rotation. We can achieve this by simply disabling 'Inherit Rotation', but that's the worst way we could possible do, because it makes it impossible to change the bone's orientation, using another bone. Riggers like to use 'socket rigging', which does the same thing, but makes it possible to add parents, that can change its rotation. Also 'socket switches' can be toggled On and Off, using a float prop, not a bool, which gives the animator the ability to mix between inheriting and not inheriting.
Root Bone
Can be done by adding a new bone, making it bigger than the others and aligning its local Z axis with the world's Z axis and parenting all controllers with yet no parents to it, so the follow it.
Bone Shapes
Last, but not least, adding good custom bone shapes to the controllers makes it easier to select them with X-Ray off and they take less screen space.
—
Don't get me wrong, I'm not sending any hate whatsoever, in fact, for an indie game character, the rig shown in the video is more than enough. But since this is a rigging tutorial, I'm simply suggesting features that may speed-up the animator's workflow. Also I'd recommend the "Humane Rigging" course by Nathan Vegdahl, a professional rigger and animator for older Blender Open Movies, like Sintel and Big Buck Bunny. The training is kinda old, yet I learned a lot from it. The lessons are under the CC-0 license, so they have been shared on video platforms like YouTube.
Anyway, have a great day!
Next will be skinning? 😀
good thx