https://i.ytimg.com/vi/DSnjmaHZSpc/hqdefault.jpg
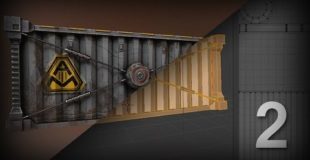
Welcome to another tutorial series. I’m working on an indie game and I wanted to share my progress and explain the tools and techniques I use at the same time. This week, I’ll go over how to use Blender to do low resolution hard surface game asset modeling and UV unwrapping.
source

17 responses to “Blender Game Asset Modeling Tutorial (Part 2)”
Something like this. https://i.imgur.com/RIV3Xad.gifv
You could just right click after you have made the edge loop to autocenter them.
BTW, for those interested, the protruding boxes with the holes are for attaching linking pins when they stack these on top of each other on rail cars and ships.
Hey bro thanks for this but how do you create the plane without it mirroring? Every time I try and include one it mirrors another plane like the corrugated walls.
When trying to Shrink-fatten corners,all bars connected get fatten as well.You say hit Alt and E to extrude,thats not what happens.Even at the bottom of your Blender,its says Shrink-Fatten.Apparently,either you forgot to mentionned a command or version 2.79 have some subtle differences.But the fatten command is exactly the same so what is missing?
Hey! Around 0.45 seconds I had trouble following. I need to not just hit E to extrude, but hit Alt+E to get to the extrude menu and select Region (vertex normal). Otherwise the results I was getting with just E looked more like it was extruding along the middle vertex's normal, not what I want!
the alt S correction can be corrected by going in the alt S options after doing it
Why deleting the bottom part? That will limit the level designer. If this asset will be for a 3d shooter the level designer can't stack the containers with different rotations 🙁
Anyway very good tutorial 🙂
I have tried every fix in these comment for the corners not extruding properly. Im in blender 2.78. Nothing is working.
I am really enjoying this series, even if it takes me a while and many do overs to get it right. 🙂 I am having trouble with the corners, when I hit E to extrude, it only wants to extrude in one direction, if I hit E and then S to scale, well it definitely starts looking weird. I even did what someone below suggested, E, and alt S, but I still do not get the same effect you do. Any ideas where I am going wrong? I am using 2.78 if that matters.
thanks
Okay, I am having some trouble here. At the beginning of the video, you say you extrude the corners you have selected. However, the bottom of your screen gives the parameters for the "Shrink/Fatten" tool, and when I try to use the extrude tool, I do not get near the same results. Are you sure you extruded the corners? If so, how did you get them to all extrude their separate ways cohesively?
Just a question, why don't you use Screencast keys? 🙂
Cool video, thanks for sharing your work process!
Just btw: manually doing the same tasks for every side of the object is a clear sign that you applied the mirror modifier too early!(: Especially because there was no need for it in the first place.
6:30 you can also select the object and scale it on the x
skipped a good few steps. last vid you were touching up the corner pieces, next thign we know its a full container.
1:07 no estrude. "E" only inset face "i" and "ctrl" = depth