https://i.ytimg.com/vi/0-L3nndEuVA/hqdefault.jpg
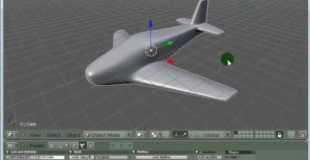
Modeling of a Simple Airplane Model, using Extrude, Mirror Modifier & SubSurf-modifier
source
https://i.ytimg.com/vi/0-L3nndEuVA/hqdefault.jpg
Modeling of a Simple Airplane Model, using Extrude, Mirror Modifier & SubSurf-modifier
source
36 responses to “Blender Simple Airplane Modeling Tutorial Part 2of2”
Ctrl+3 3:04
I have just started to play around with Blender and your tutorials gave me a real head start. Thanks a lot!
@pooky2483 You might want to check out my other video on image reference set up. Or watch my newer airplane Timelapse video to get a better idea. Thanks for watching!
I have been trying to model a car using a blueprint, a bit like what you show in the last part of the vdeo but in ortho view and using 'front', 'back', 'top', 'left', 'right' and placing the 'blueprint of each corresponding part over each view but its not properly corresponding to the view and I dont know where I'm going wrong. BTW, your video is the best one I've seen so far in showing how its done.
@killyouin1punch You can apply the Modifier so that it comes a single object, then you can edit both sides independently. You usually want to do this once the symmetrical modeling is done.
Hi, Thanks for that TUT and I wanted to know if you knew any car Modeling 2.5 Version Thanks
@AustinSteveir You might want to take a look at this video /watch?v=eKkJ1pHZBBc
Hi. I am new to this program and I just saw your video and I wanted to know how to make a background??
@elaji88 I pressed the key combination Ctrl + 3 (top number row) to add a Sub Surf modifier.
I'm sorry, What's the shortcut for this effects? 2:54 3:04
@Dan593cool As always, its a great pleasure to know my videos helped! Thanks for watching! Do check out my other videos!
@goihe You can watch my UV mapping video on a jetplane video. Just go through my channel. Thanks for watching!
@IxianMace Ah yes, before you apply the Subsurf Modifier, the interaction will be very smooth and fast. If you set a high subdivision and after applying, there will be a noticeable slow down in interaction especially in EDIT mode. I did apply the mirror and subdivision at level 3 and I can still edit my model albeit slower in Edit mode. You will need a fairly fast Graphics card and CPU if you want to work at high Polygon levels. I'm running a Quad Core Q9550@2.83Ghz with a 1G ATI 4890.
@weeliano I did apply the mirror and subsurf modifiers after I'd finished modeling the entire aircraft. I was just wondering how your final Mirage mesh turned out after you applied the modifiers and whether you also got a large number of vertices/faces as a result? I had so many my computer was slowing down just moving the view around studying the mesh, which left me thinking that maybe there was something I wasn't doing right.
@IxianMace You usually apply the subsurf or mirror modifier towards the end of your modeling. For some modelers, they will apply a low level subsurf so they can add more details. Another way would be to break your model into different parts and model them separately before joining them back for UV purposes. Sometimes modeling in separate components is easier to manage instead of trying to keep the model in one piece. Grouping is another way to manage the different parts.
Thank you for this clear and easy to follow tutorial.
About the Mirage jet model at the end… Maybe there's something I'm not understanding here but it looks like you haven't applied the mirror modifier or the subsurf modifier to get the final mesh.
I've tried making a few aircraft now and whenever I apply the subsurf modifier I end up with a huge number of vertices and faces that looks like an elaborate framework of the entire model.
Love the jet at the end. Very nice work! Your tutorials have been very helpful. Thanks.
@AlonsodragonOficial Hi, its not a Kfir model, though it looks like it. Its a Mirage 4000 twin engine version of the Mirage 2000. You can leave me a personal message if you want to know more.
Awesome tutorial, thanks so much!!
@dvnobles Thanks! Glad you find it helpful, do check out my other videos and subscribe!
Thanks! very helpful and nice modelling.
thx mate really helpful with all the shortcut keys
Man thank you very much, this is a sweet newbie tutorial on how to think when working with blender.
@amad23456 Glad you liked it! Thanks for watching!
thx man really helpfull video
@joepfilm11 you are most welcome! and Thanks for watching!
You can watch my Biship Chess piece tutorial, I explain how to do that there. I prefer using textured maps as reference as I can see the reference in Perspective views. However, you must enable wireframe view for the object if you want to see through to view the image plane.
I'm glad it helped! Thanks for watching.
Thanks m8 great tutorial. Can't wait to show my son. He will be all over it.
He Smoothes the Object by pressing Ctrl+3
what do you do, if you can't spawn any more shapes for your model ?
nvm i finished the airplane thank you so much!
really ^^
3:01
what did you say there
ctrl + what?
You are most welcome! I'm glad the video help, I will try to come out with more videos in the future and don't stop playing with Blender! I believe this 3D software is going to be the most popular 3D software in the world!
Glad you liked it! This aircraft is a little simple, check out my other video on aircraft modeling.
Thankyou my friend. This video is a big help. I am a student pilot and I am looking into building my own home built plane. Excellent aircraft at the end.