https://i.ytimg.com/vi/UKxxXzSr5vM/hqdefault.jpg
http://www.LittleWebHut.com
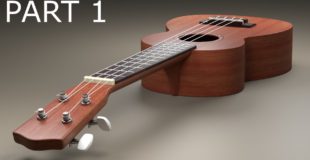
This is the first in a 4 part video series that demonstrates how to use Blender to make a ukulele. This ukulele has a lot of different parts so a lot of modeling is demonstrated. Blender version 2.77a was used for this tutorial. This video shows techniques that may be helpful to beginners and intermediate users.
Link to wood image
http://www.littlewebhut.com/images/ukulelewood.jpg
Blender website
35 responses to “Blender Tutorial: Ukulele Part 1 of 4”
I would like to know: before you came to values like 1.1 or 0.1 etc… How did you start? What thought processes were first. Did you see a picture of a ukulele and then you said, let's try a ukulele? Then, I guess, you went through some kind of consideration what the most economic way of making the ukulele would be? Are there many trial and error phases? Did you first make the ukulele in a complicated way and then made it in an economic way? These are the things I am thinking of. I know I can follow your instructions and than have the same ukulele. There are good skills learned along the way. But… I want to know how to come up with my own decisions and end up in economic, or elegant solutions… can this ever be taught? Or is it a long way being on my own?
Hey, this is plagiat from Russian channel "Blender 3D – Уроки"
I hope this playlist would be one of my favorite playlist 😆
THANK YOU for using the imperial system!!!
Thank you so much! You are so kind!
please can you make a 3d modelling tutorial of ipad please
you are too good ,your tutorial has been helpful ,will love to learn more from you. @tutor4u
allready subscribed this chanel, nice tutor, very easy to follow the instruction step by step
By mistake I deleted uv editing
Now what to do
Great tutorials!!
Awesome man! you rock. So smart, this tut was so helpful…
The first true model I have ever made! Thank you for your very clear and precise instruction, and understandable explaination. As a total beginner, I needed something like this! Thx so much! Liked and Subbed 🙂 going to watch the next part now
Can you please create a tutorial of an electric guitar most especially an ibanez jem?
Excellent tutorial
greatest tutorial i've seen. I even paid for a udemy course and i've seen nothing this good!! great job! you're really helping people like me
So beautiful.
you know I think ill come back in a year or two and then start this xD im quite new to blender finished the bear and pool balls and they look nice so thank you but ill go watch some modelling texturing tutorials etc
You've done it again. Great. Thank U.
looking like camera is moving
I feel that you should provide actual courses to people all around the world. I mean you are the only reason I am good at blender. You are a model for all teachers alike! Thank you for making these videos for our community!
Some seriously clever techniques shown here. Very well done.
thanks to your wise ttrls we waiting more modelng and how to emport to aftereffects also how to model world map
Could you make harder animations?
Please!!!
Dude you are freaking amazing.
I just did your dog animation thing in less than an hour.
Wish I could like this twice…
great tutorial! thanx!
Pretty cool modeling techniques! Shows off Blender in spades! Renders great with my dual 1080Ti's. Note one thing above all … SAVE OFTEN … using different file names because in Part 2 I lost 3.5 hrs worth of work and had to come back here to start over again due to one file increment NOT SAVED that had the one and only error in the modeling!
A brilliant modelling tutorial/walkthrough. Every time I watch your vids I learn a ton of new tricks and approaches. Thank you very much. On to modelling the ukulele neck!
The Best Instructor of the Net for Blender 3D, Inkscape and Gimp!!!
Thousand thanks :)))
You are best instructor thank you very much. Much better than the others 👍
The first blender tutorial I followed quickly all the way through with no surprises lol Thank you!
13:40 My project is dark please help!
I can't possibly imagine why anyone would give this a thumbs down…
fuck
Hello Sir
First of all, a great tutorial!
BTW i am stuck at one point. At 14:53. to select all the center faces around the side, i pressed alt+right mouse button. But nothing happened!
Please see if you can help me figure this out!
Thanks!