https://i.ytimg.com/vi/EPo2LroCU9A/hqdefault.jpg
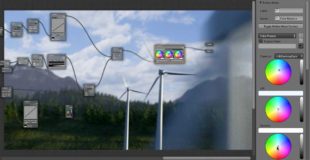
Learn to create mist in Blender with Cycles for environments
http://cgcookie.com/blender/2013/03/11/creating-mist-blender-cycles-z-depth/
When you’re creating expanse environments that are believable, one of the things you need take into account is the saturation of far away objects. As things get farther and farther away, they appear less saturated, almost like they’re covered in a slight mist. In order to create believable CG this is a very important detail to consider, particularly when creating your environments, as it greatly adds to the realism of your scene.
In this tutorial I’ll show you how to create an accurate, anti-aliased Z-pass with Cycles that can then be used to create this mist-like effect. This is done by creating a custom shader that makes use of the View Distance option of the Camera Data node for Cycles shaders.
source
25 responses to “Creating Mist in Blender and Cycles with Z Depth”
The bummer with this is that it has a habit of "blinking" whenever the camera moves or things get too complicated you get hr same problem where your blacks and whites (Z-deapth) moves all over the place. any way you can make this constant/clean it up?
what?
dude, thank you!!
great video, but unbelievable how they totally fucked up on this with cycles…
wow great tutorial! really helpful. :DD
This video is not for beginners is it?
A quick and simple summery of the differences:
PNG is a single layer image format with a maximum bit depth of 8 bits per channel, and a maximum of 4 channels.
EXR is a high dynamic range image format that has no layer limit and supports up to 16 bits per channel.
Will you quit writing in capitals like some brain-dead idiot. Moron.
Thanks for the great tips!
Do you need to shout? The fact you are in a minatory of 1 should tell you something. If the sound was better the videos would be more enjoyable to me and others it seems.
YES!
WAIT, YOUR USING A SOUND EFFECTS MIXER WITH YOU MIC INPUT….
SOUND OKAY, BUT I'D DROP IT.
HE'S PERFECT HERE. I USE A 32" LCD w SPEAKERS
I REALLY DON'T UNDERSTAND YOU AND OTHER'S COMPLAINTS.
LOOK WHO'S TALKING "LAUGHING MY ARSE OFF"
DID YOU THINK BEFORE YOU ASKED THIS QUESTION?..
FROM HERE YOU SOUND PERFECT!
DOES ANYONE REALLY UNDERSTAND YOU. MR. BLENDERSPOCK :0)
YOU ARE A BLENDER GEEK FOR SURE.
THANKS FOR THE MIND MELD.
I really don't like that composition. The motion blur on the closest windmill is terrible.
Because PNG does not support layers.
Awesome video's, but please buy a decent USB headset with noise cancellation!
Why do use openexr multilayer instead of just png?
Doesn't the new cycles engine support any atmospheric scattering computations to simulate this phenomenon more realistically? Is anything in this direction planned?
Also, very useful. This is great for adding that little bit extra to make any out-door scenes that little bit more believable.
Love your accent, not poking fun, I legitimately love listening to this.
Very good, nice and informative. Set some of information in right places in my head. Also, nice use of simple standard tools! Great! Good job, bart!!! 🙂
bartek is genius