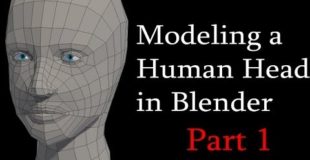
https://i.ytimg.com/vi/ZO77Lgpv57U/hqdefault.jpg
Enjoy!
links to download the images:
front: http://i.imgur.com/3yDixoe.jpg
side: http://i.imgur.com/5kiCkuV.jpg
Like this tutorial? You can “tip” here! paypal.me/benmorgan28
Check out my T-Shirts! http://www.redbubble.com/people/benjmorgan
source

42 responses to “How to Model a Low Poly Human Head in Blender: Part 1”
Nice video bro
Im sorry but you explained things very poorly sir. At minute 9 you just started rotating things without cause. Very frustrating…
WHAT THE FUCK ARE YOU DOING ur makeing no sense and you messed up half the tutorial
I need some help, for some reason I can't see the the mirrored half, it worked for the first part, but the mirrored half. As soon as I tried to do it on the nose it didn't work.
Are the images in the description aligned?
Hey guys, I have good news. Even though it's four years later..
So I aligned the images manually and they actually align, here's the download image
Link: https://drive.google.com/open?id=0B0XW9LKAfeTQQkJxaTZ3b1VLRmM
The tutorials are pretty good, but to anyone imitating them, please, do yourself a favor and find some better reference images if you don't want your model to look like the T1000 when it's morphing.
There are so many people producing so many GOOD videos
How is it possible that so many of them don't know that:
VERTEX us SINGULAR
and
VERTICES is PLURAL?
It's like you barely know what you're doing. So many wrong turns. Not a very succinct tutorial.
Good evening! Excellent material, congratulations! Where can I download a model of the head that appears in the video from the beginning until the instant 0:50 for reference? Thank you!
Is it okay for animation?
I followed the tutorial with different reference images and add a little bit of sculpting at the end. Thank you Benjamin Morgan for this tutorial, here is my results: http://imgur.com/a/2X1TI
Thanks for the info! I kept looking at all these 3d faces like "how did they model these??" and now I'm starting to get it.
Wait how did he put those images o the screen?
why are those rectangles curved? what?
Nice tutorial, this is what I've been looking for.
i found out how to solve the mirror problem in edit mode- in the modifier options u will find a box called "adjust edit cage to modifier result" a thing that is also useful for mirror modifier is to add an empty and locate it at 0,0,0- then u can use that empty as an mirror object in the modifier panel 🙂 hope i could help someone
a bit unplanned- but very helpful, thanks 🙂
when i delete the vertices on the circle to mirror it. i cannot see the other side no matter what i do. I have also tried to use ctrl A to reset the rotation values and nothing. Also have checked xyz and no help. please help i dont understand I also tried to add a face to the circle and it still does nothing..
i created phantom raven and the strangers help me become better at blender
why my cycle can not be mirrored?
How did you add a mirror modifier in Edit mode? It works only in Object mode for me.
suggestions? yesh how do you get a good line up on the images.. that is a big problem for me.. using gimp so yeah it can be done but what proccess do you use? … a short vid on that would be good, basics ya know?!?!?!?
My mirror its checked on all X Y Z (even tried unchecking some) and in object mode the mirror works but the mirror like goes away in edit mode
May I ask you how long did it take you to first be able to model a face? and a human body? Thank you
This is a great tutorial! And thank you for it 🙂
where can I download the pictures?
why do you skip aligning?
my ctrl R not working when I create a nose part… what's wrong?
way too fast
You go too fast and your instructions aren't very clear.
When I circle the eyes and nose on the front view, they end up in the middle of the head on the side view instead of in front of the side view face
When I try to apply the mirror modifier, I wind up with the whole octagon in Object Mode, but when I switch to Edit Mode, it's still half an octagon.
I have a problem using the grease pencil.
i cant get how you mirrored the circle . whenever i do it i get the other half not touching the mirrored one
how do u make the ref pic to come on the screen
the nose is the worst part to do haha
how do i download the image? it will not show up when i try to add it
once I get the first loop around the mouth and try to expand it the mirrors overlap and it looks funky. Am i doing something wrong?
Im trying to use this tutorial to model a chimpanzee, however i must say, Do not use this tutorial to make a chimpanzee
no offense but you rush a lot
I tried it too: http://imgur.com/JADk2Le spent about a hour to do it. Even then it's still wrong. 🙂
Your model doesn't look anything like the original. The geometry&topology on the face area is entirely wrong.