StructureSynth to Luxrender
It’s finally here!!! A useable Exporter for Structure Synth to LuxRender
[wpdm_file id=1]
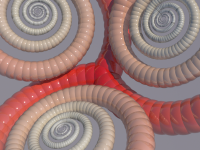
LuxRender Scene
We are going to take a look at the entire exporter and go over the functions of each section. I hope this will serve you to understand how it is arranged and how you can modify it to make it suit your needs.
The Camera
First thing we see en the exporter is the transform of the camera (its position). The curly brackets denote what SS should insert in this position of the scene file. The LookAt transformation takes 3 vectors as parameters. The first, CamPosXYZ, gives us the position of the cam. The second, CamTargetXYZ, is the position of the target of the camera or where the camera is looking at. The last, CamUpXYZ, is the up vector which tells Lux which way the cam is oriented up. In the case of SS, it will orient the cam up in +Y. Lux however uses +Z up, so we will need to take care of that in coming versions.
This is quite a simple transformation, which allows you to specify 2 points, one where the camera is located and another point of ‘interest’.
LookAt {CamPosX} {CamPosY} {CamPosZ}
        {CamTargetX} {CamTargetY} {CamTargetZ}
        {CamUpX} {CamUpY} {CamUpZ}
Next up are the camera settings. This where we are going to set all the params for the camera. Again, these are completely customizable to your needs. We can see that we are getting the FOV from SS directly with the {FOV} tag. We are also getting the Focal distance with the {CamPosZ} tag. I am still testing to see how effective this is and if it the right tag to be using in the first place. Time will tell.
Camera "perspective"
	"float fov" [{fov}]
	"float lensradius" [0.00625]
	"float blades" [6]
	"string distribution" ["uniform"]
	"float power" [1]
	"float focaldistance" [{CamPosZ}]
	"bool autofocus" ["false"]
	"float shutteropen" [0.000000000000000]
	"float shutterclose" [0.041666666666667]
The Flex Image Film
LuxRender uses the concept of a ‘film’ as the buffer that stores the final image being generated by the ray-tracing.
Most of Luxrender’s features are a result of the FlexImage film. It stores samples generated by rays independently according to the defined Light groups. This enables you to re-light the scene without re-rendering. It also has extensive support for tone-mapping, noise reduction, multi-threading and serialization built in. All of this is connected to the GUI and allows you to make changes on the fly while the scene is rendering.
In this section, you can see the settings that will be exported for the “Film”, they are pretty basic and should be customized to your hearts content.
Film "fleximage"
     	"integer xresolution" [{width}] "integer yresolution" [{height}]
	 	"string filename" ["Structure_Synth_LDR"]
		"float gamma" [2.200000000000000]
		"float colorspace_white" [0.314275000000000 0.329411000000000]
		"float colorspace_red" [0.630000000000000 0.340000000000000]
		"float colorspace_green" [0.310000000000000 0.595000000000000]
		"float colorspace_blue" [0.155000000000000 0.070000000000000]
		"bool write_resume_flm" ["true"]
		"bool restart_resume_flm" ["true"]
		"bool write_flm_direct" ["false"]
		"bool write_exr_halftype" ["false"]
		"bool write_exr_applyimaging" ["true"]
		"bool write_exr_ZBuf" ["true"]
		"string write_exr_compressiontype" ["PIZ (lossless)"]
		"string write_exr_zbuf_normalizationtype" ["None"]
		"bool write_exr" ["false"]
		"string write_exr_channels" ["RGB"]
		"bool write_png" ["true"]
		"string write_png_channels" ["RGB"]
		"bool write_png_16bit" ["false"]
		"bool write_tga" ["false"]
		"string write_tga_channels" ["RGB"]
		"string ldr_clamp_method" ["cut"]
		"integer displayinterval" [10]
		"integer writeinterval" [180]
		"integer flmwriteinterval" [900]
		"integer outlierrejection_k" [5]
		"integer tilecount" [0]
		"string tonemapkernel" ["autolinear"]
You can change the resolution to fit your needs under “xresolution and yresolution” and the filename should be changed to something relevant to your file. Otheriwse, this can be used as-is. Most of these settings will be controlable from the GUI so you shouldn’t worry about tweaking them.
Samplers
Lux splits the Sampler class into a normal Sampler (for sampling integrals) and a PixelSampler for pixels. Again these are standard settings that give good results but can be modified to suit, maybe for previewing etc.
PixelFilter "mitchell"
			"bool supersample" ["true"]
			"float B" [0.333333343267441]
			"float C" [0.333333343267441]
			"float xwidth" [2.000000000000000]
			"float ywidth" [2.000000000000000]

Sampler "metropolis"
			#"string pixelsampler" ["vegas"] //use for lowdiscrepancy
			#"integer pixelsamples" [4] //use for lowdiscrepancy
			"integer maxconsecrejects" [512.000000]
			"float largemutationprob" [0.50000]
			"bool noiseaware" ["true"]
			"bool usecooldown" ["true"]

SurfaceIntegrator "bidirectional"
			"integer eyedepth" [48]
			"integer lightdepth" [48]
			"float eyerrthreshold" [0.000000000000000]
			"float lightrrthreshold" [0.000000000000000]
			"string lightpathstrategy" ["auto"]
			"string lightstrategy" ["auto"]

VolumeIntegrator "multi"
			"float stepsize" [1.000000000000000]

Accelerator "qbvh"
			"integer maxprimsperleaf" [4]
			"integer fullsweepthreshold" [16]
			"integer skipfactor" [1]
The two types of samplers can be different. Just make sure that the first one inherits from ‘Sampler’ and the second, from ‘PixelSampler’.
Material details
Settings for matte material:
MakeNamedMaterial  "shader{uid}"
	"color Kd" [{r} {g} {b}]
	"string type" ["matte"]
	Shape "sphere"
	NamedMaterial "shader{uid}"
Settings for glossy material:
MakeNamedMaterial "shader{uid}"
	"color Kd" [{r} {g} {b}]
	"color Ks" [0.03000000 0.03000000 0.03000000]
	"bool multibounce" ["false"]
	"bool separable" ["true"]
	"float index" [0.000000000000000]
	"float uroughness" [0.046200405806303]
	"float vroughness" [0.046200405806303]
	"float sigma" [0.050000000745058]
	"string type" ["glossy"]
	NamedMaterial "shader{uid}
Keep in mind materials will need to be modified BEFORE exporting out of SS.
Although all the rest can be change to suit your tastes even after it has been exported.
This could be useful to test out different parameters to suit.
Let me know what you guys think and stay tuned for v .02 with materials!!
If you do use the exporter I would love to see that outcome so please up load some pics in the forums. Thanks